
Overview
Setting up the General Ledger (GL) is a foundational activity in Oracle Fusion Financials. A properly configured GL ensures accurate accounting, reporting, and compliance. This guide walks through GL — Setting Up General Ledger step by step, from initial setup to posting the first journal.
For a comprehensive, hands-on walkthrough of General Ledger setup and the full Oracle Fusion Financials suite — including Accounts Payable, Fixed Assets, Cash Management, and more — check out our Oracle Fusion Financials Training. The course covers each of these topics in depth with live Oracle Cloud demonstrations.
For official Oracle documentation on General Ledger setup, accounting calendars, and Chart of Accounts configuration, refer to the Oracle Financials Cloud Documentation. You can also access the General Ledger specific documentation and the detailed General Ledger setup guide for comprehensive reference materials.
GL - General Ledger
A General Ledger (GL) is the central accounting record used to store and summarize all financial transactions of an organization. It captures transactions across assets, liabilities, revenues, expenses, and equity and serves as the foundation for preparing key financial reports such as the balance sheet, income statement, and cash flow statement.
In Oracle Fusion General Ledger, the General Ledger functions as the core of the financial system, where data from subledgers is posted, validated, and consolidated. A properly configured GL ensures accurate accounting, compliant financial reporting, and effective financial control, making it a critical part of setting up a general ledger in Oracle Fusion.
Step 1: Create an Implementation Project
The first step in GL Setting Up General Ledger is creating an implementation project.
This helps group and manage all financial setup tasks. A separate video explains this in detail — please refer to the link provided below: Creating Implementation Project
Blog Link: Creating Implementation Project Blog
Step 2: Create Chart of Accounts (CoA)
Next, define the Chart of Accounts, which structures how financial data is recorded and reported.
Calendars. This step is also covered in a separate video. Refer to the link below for a detailed walkthrough: GL Create Chart of Accounts
Blog Link: Oracle Fusion Chart of Accounts Blog
Step 3: Create Accounting Calendar
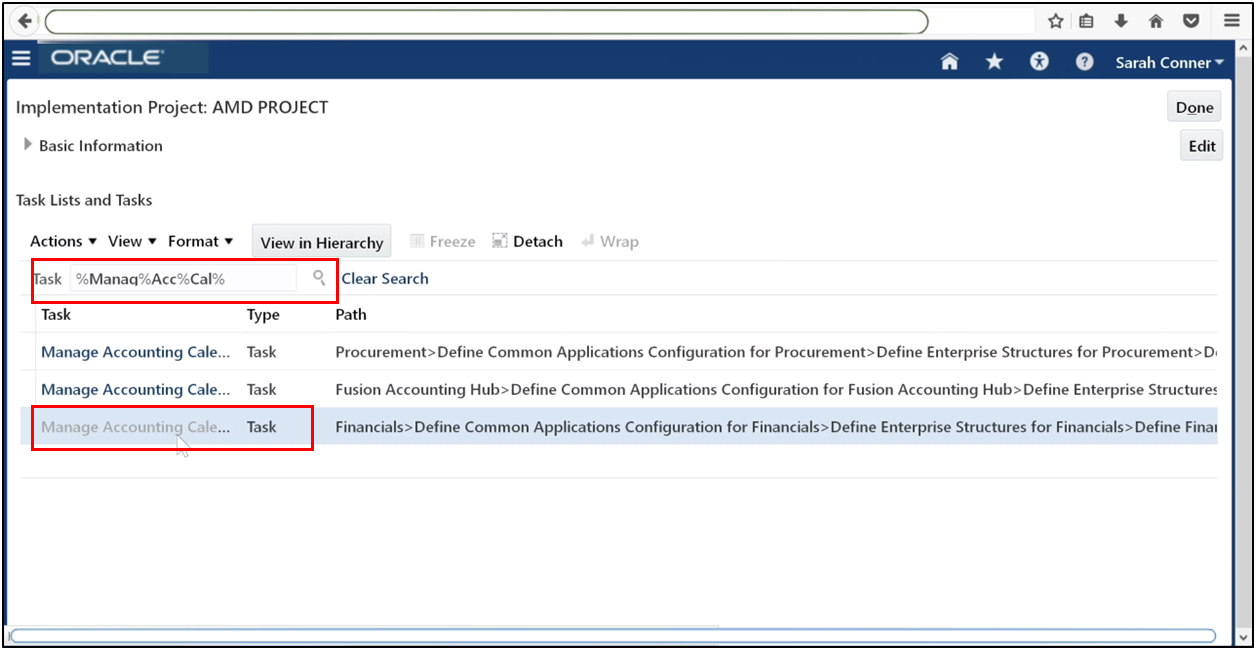
Go to the Tasks menu and search for Manage Accounting Calendars. Click on the Search icon, then select Manage Accounting Calendars from the results to open the setup page.
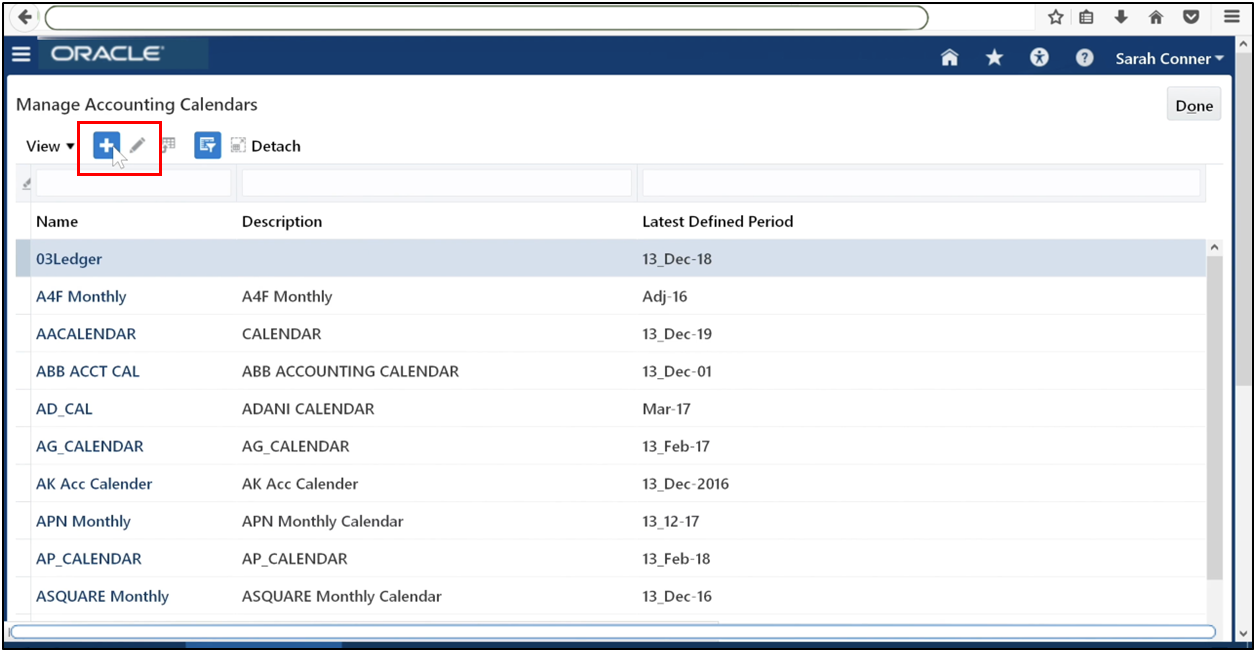
Click Go to Task, then click Plus (+) to define a new calendar.
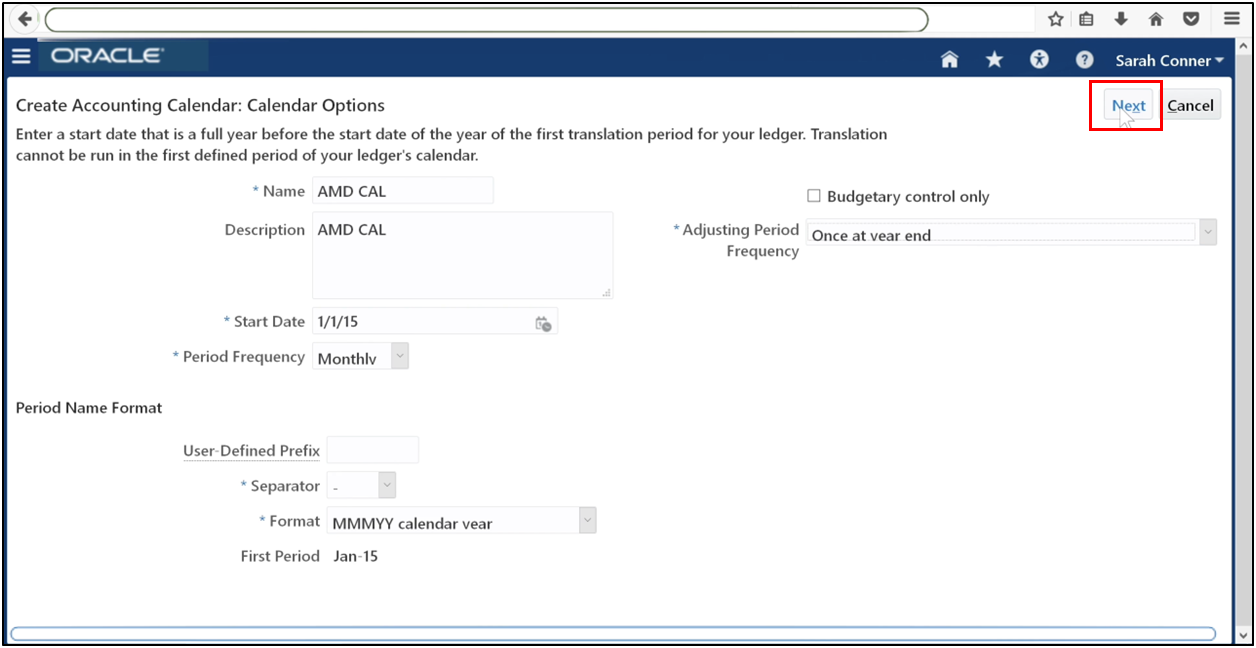
Enter the calendar details. The start date determines the first accounting period. Choose an existing adjusting period frequency.
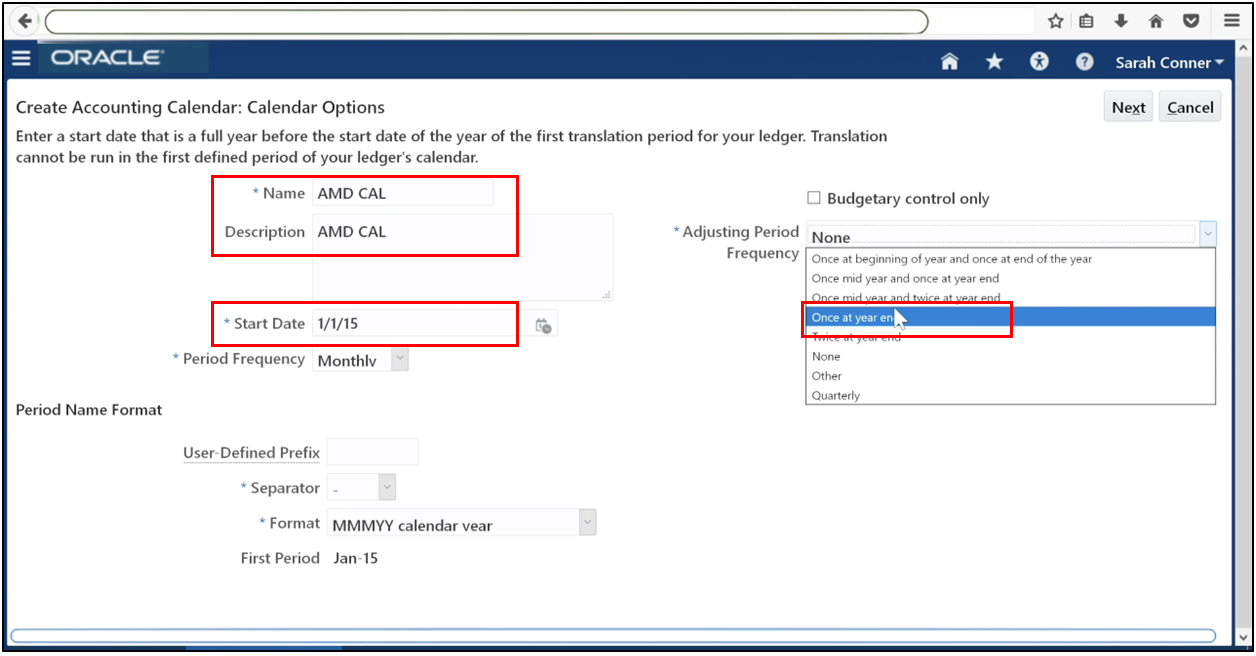
Click Next.
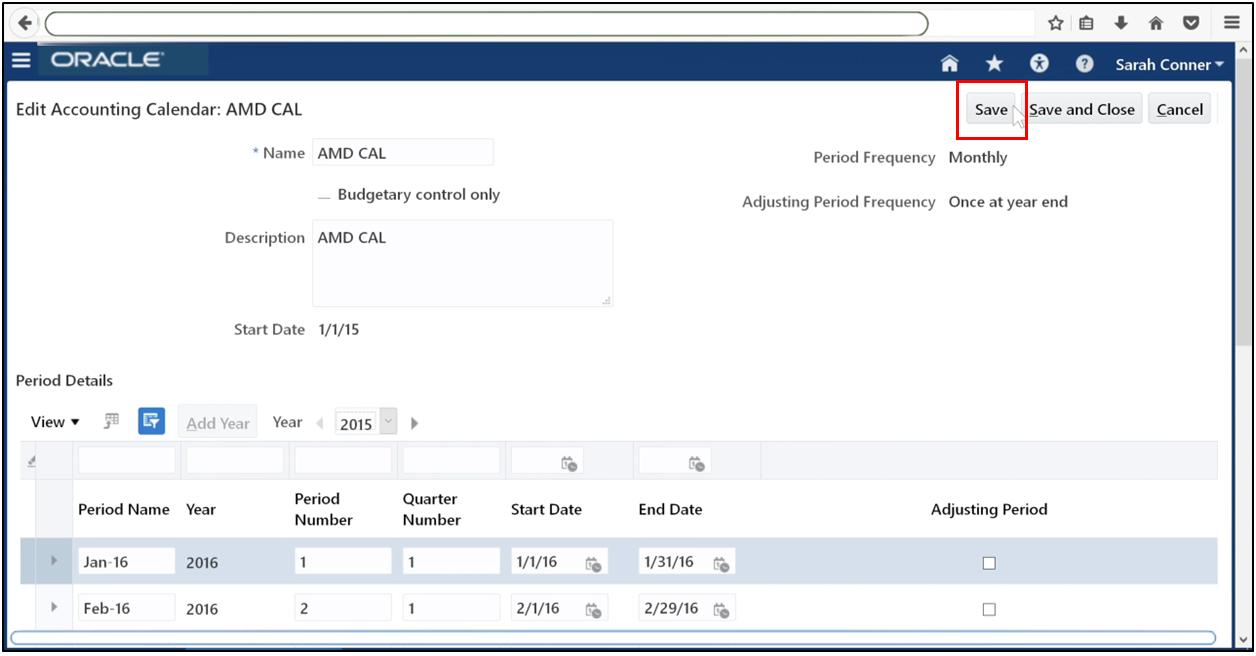
Oracle automatically generates the calendar. Review the generated calendar. Click Add Year to add future years (for example, 2016).
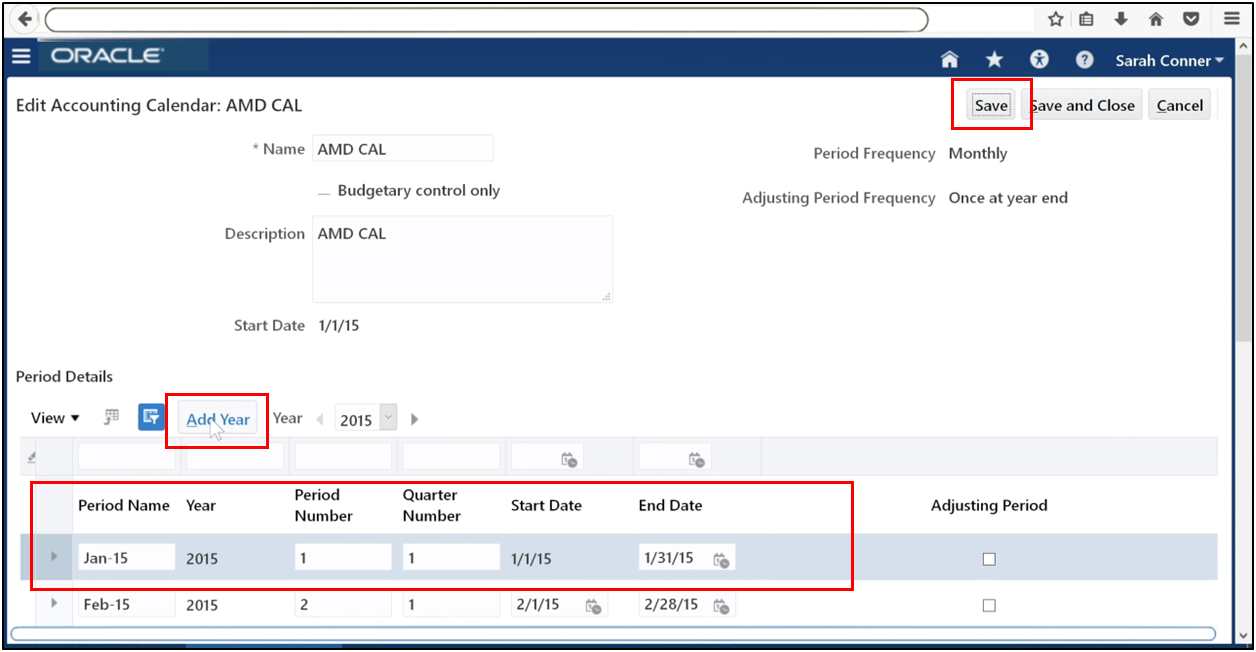
Save the calendar.
Once all required years are added, save and close, then click Done.
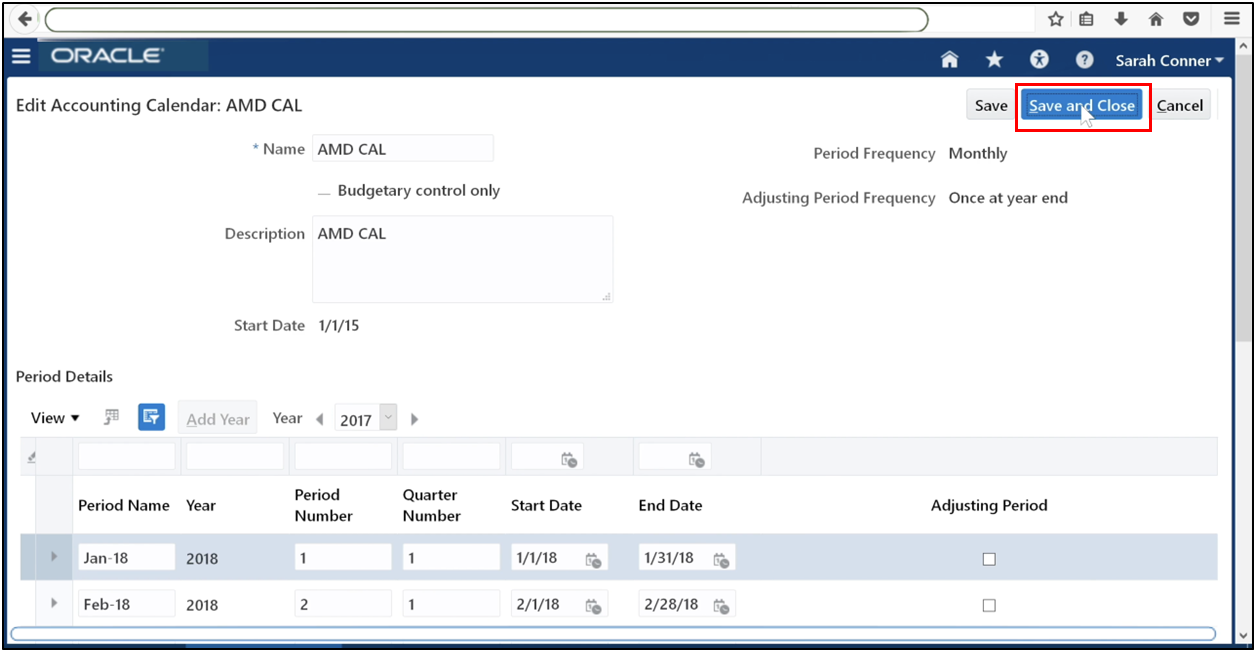
Click Done.

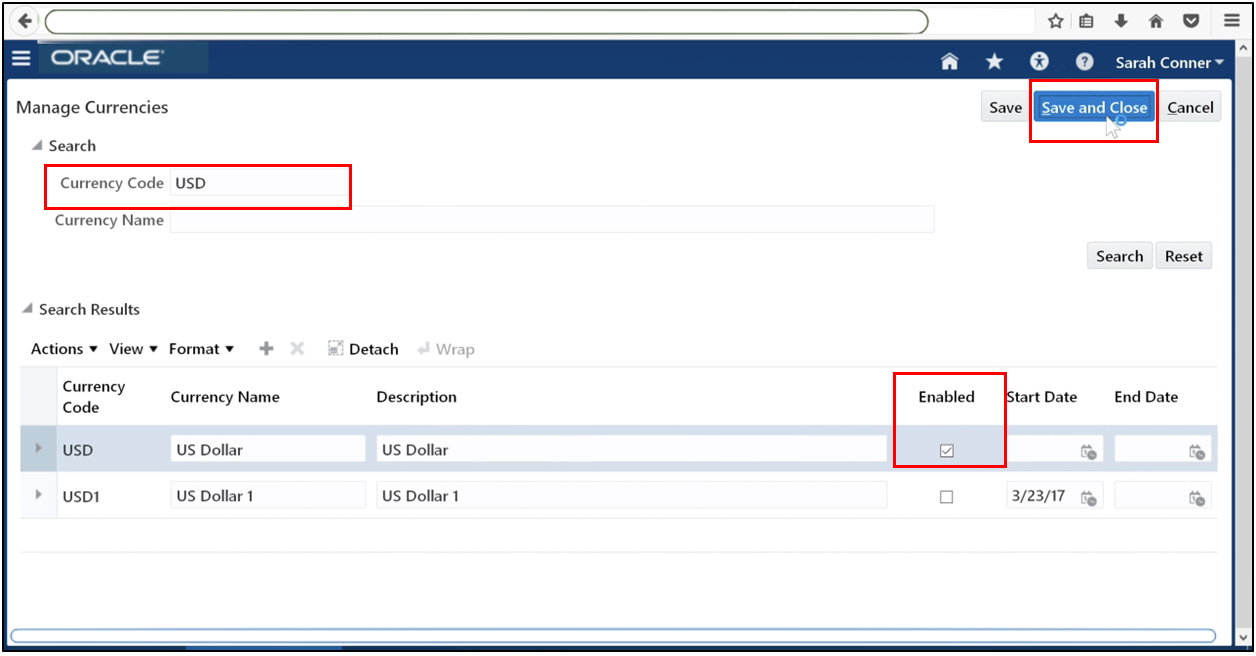
Step 4: Enable Currency
Navigate to Manage Currencies.
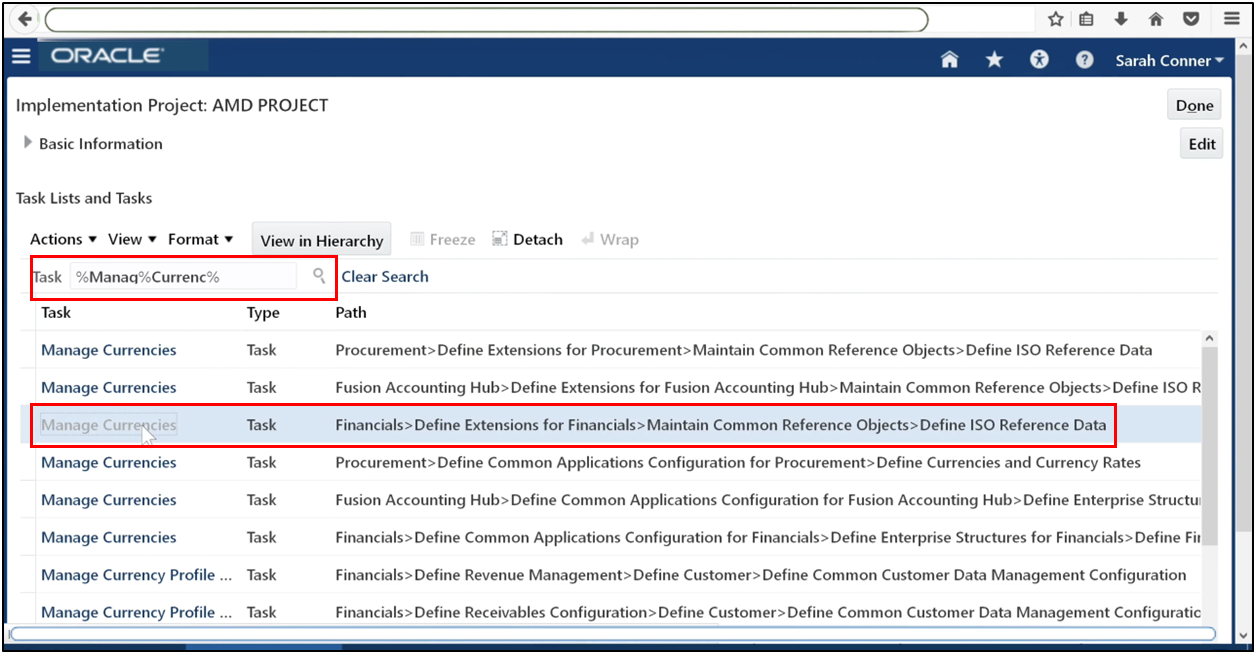
Search for the currency you intend to use.
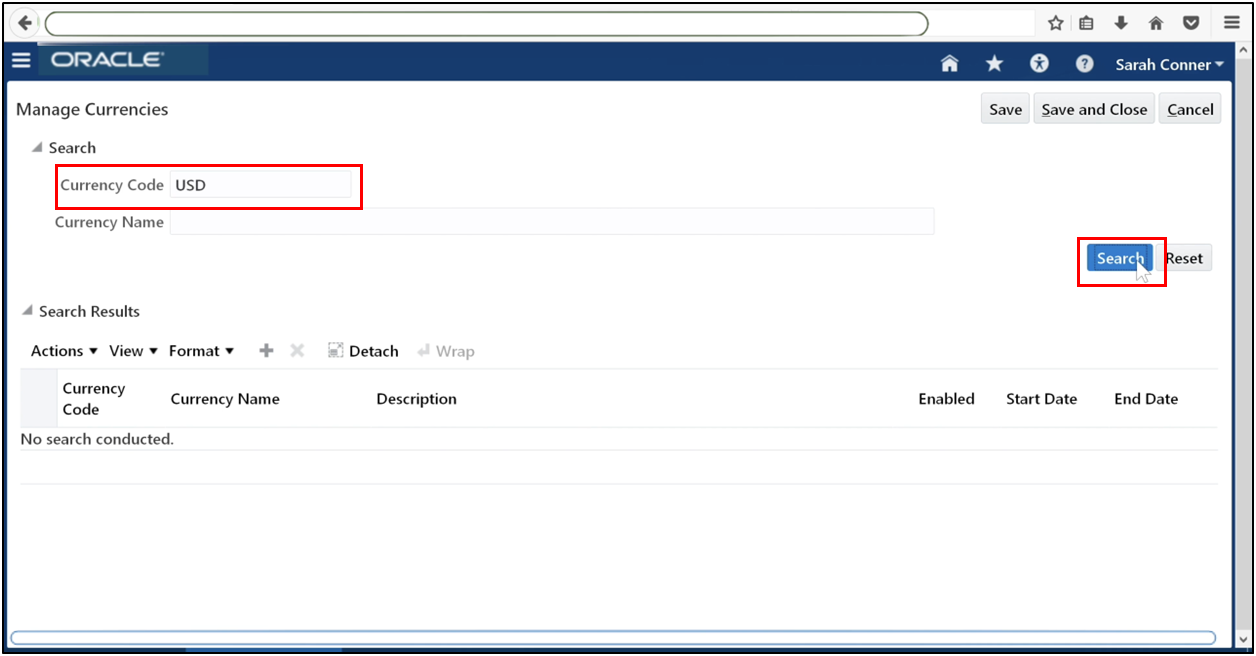
If it is not enabled, select the Enabled checkbox. Save your changes.
Step 5: Select Accounting Method
Accounting methods are seeded by Oracle. For standard implementations, use the Standard Accounting Method. You only need to create a new accounting method if you plan to customize accounting rules.
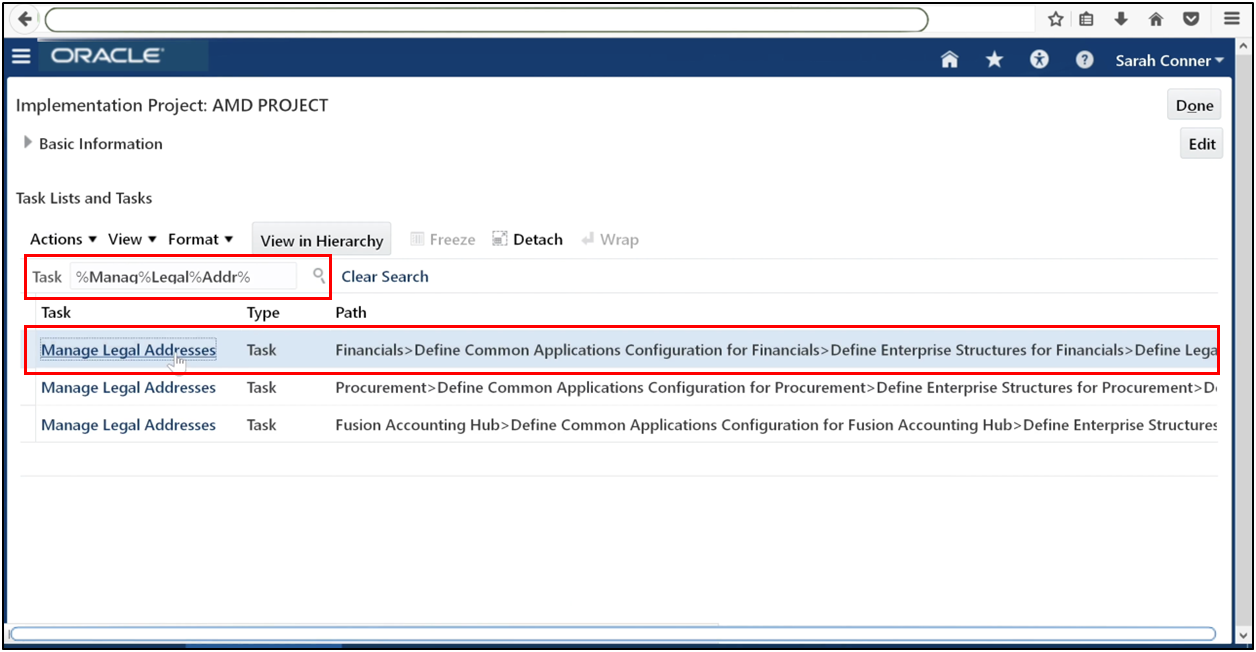
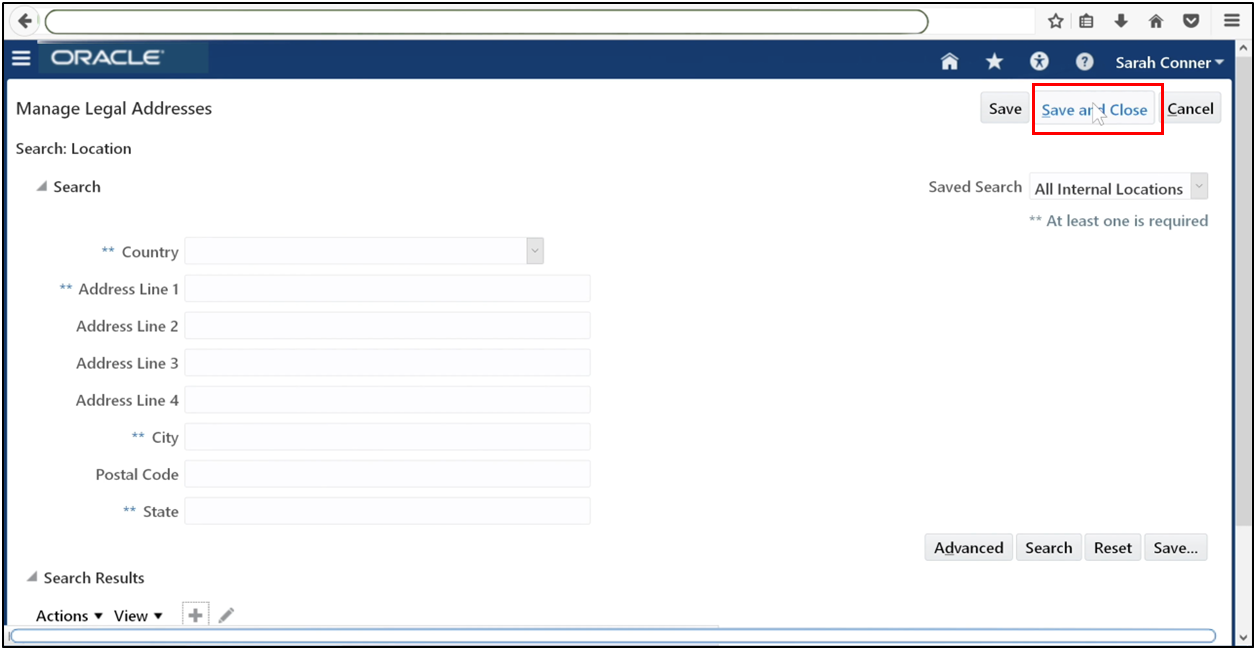
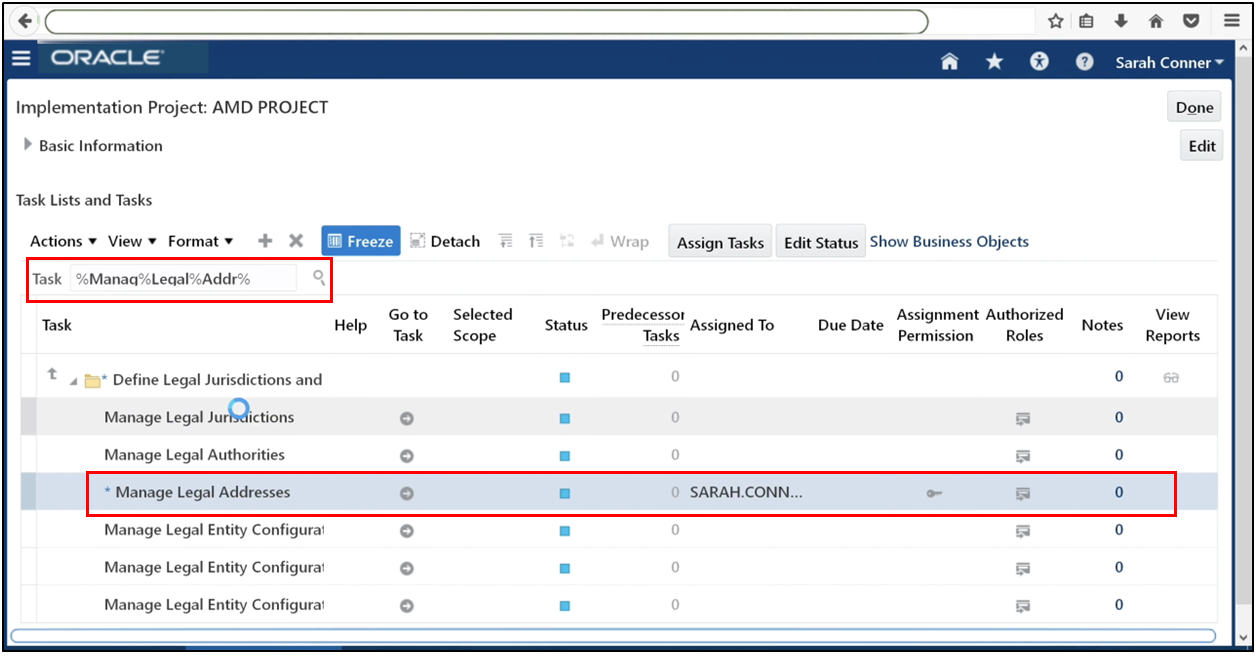
Step 6: Define Legal Address
Go to Manage Legal Addresses.
Click Plus (+) to create a new address.

Enter the legal address details. Click OK, then Save.
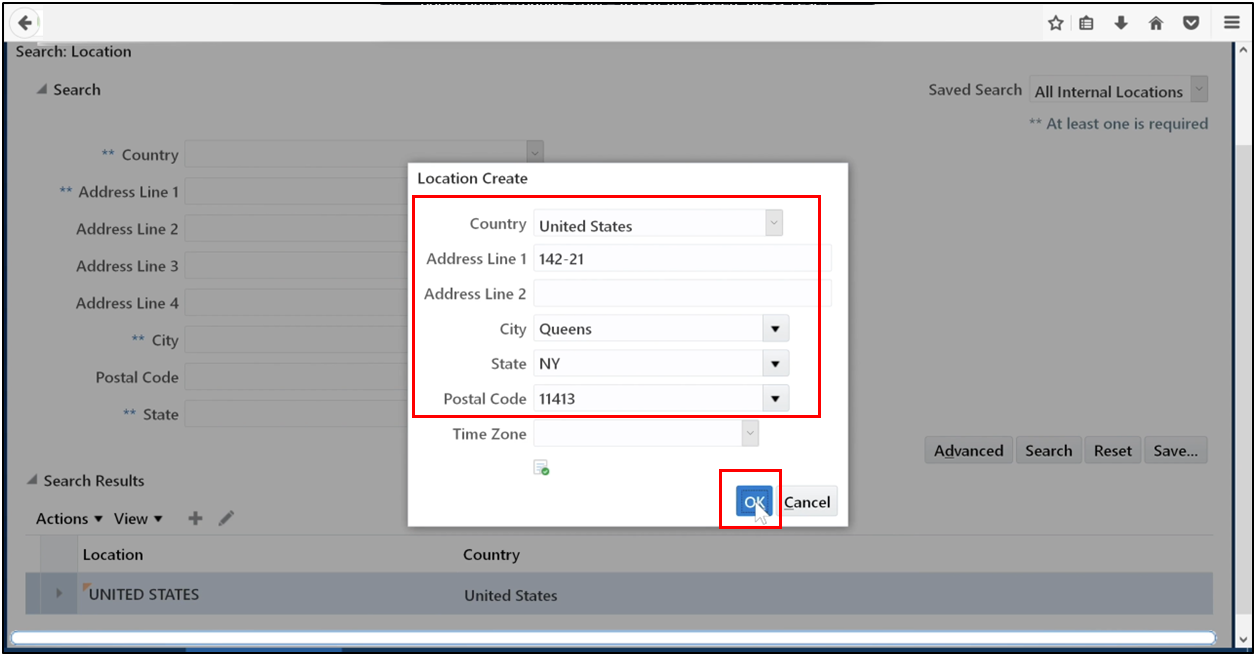
Save the address.
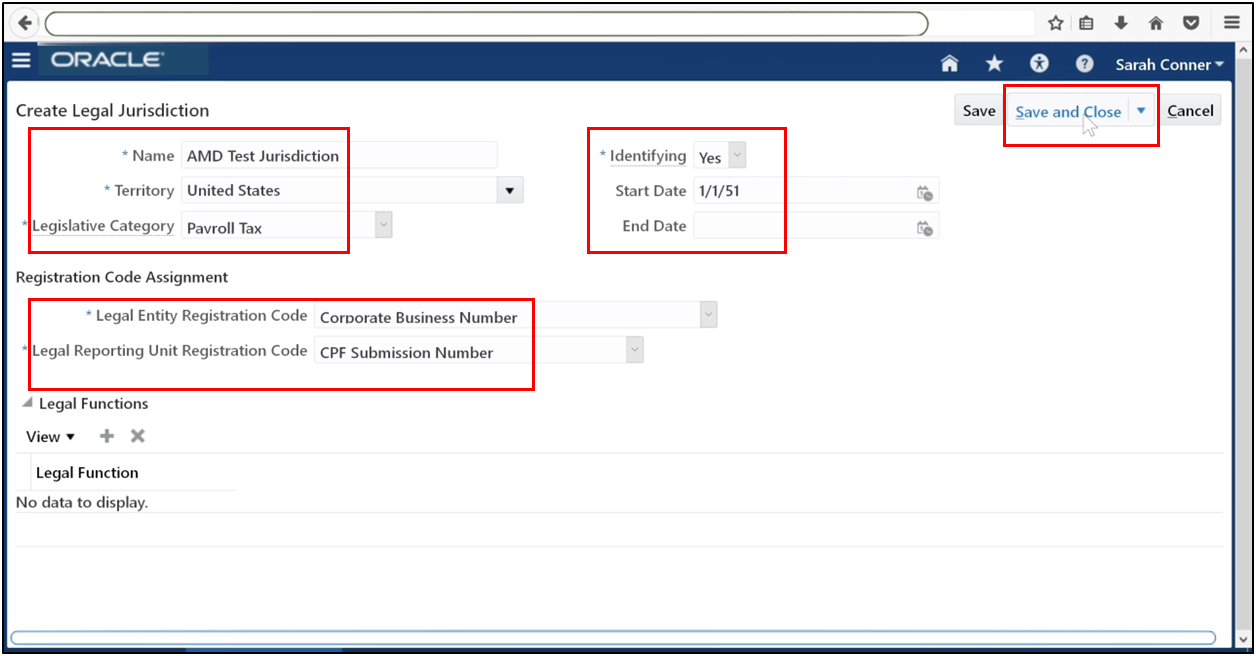
Step 7: Define Legal Jurisdiction
Navigate to Manage Legal Jurisdictions.
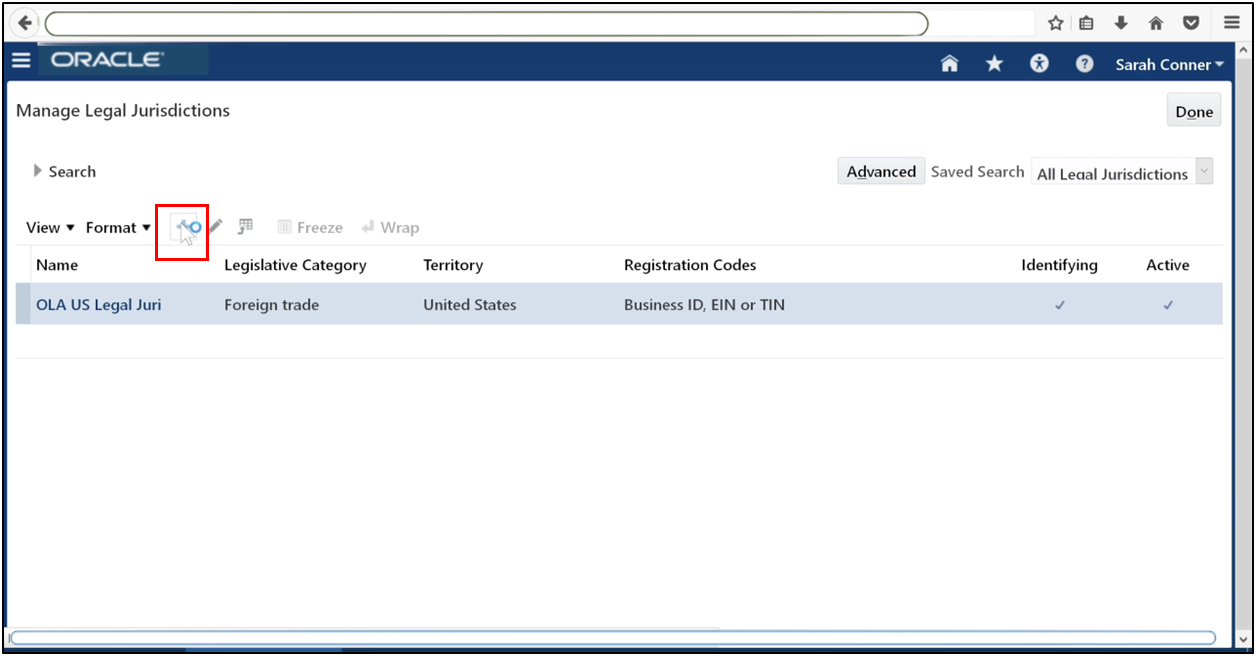
Search for an existing jurisdiction for your country.
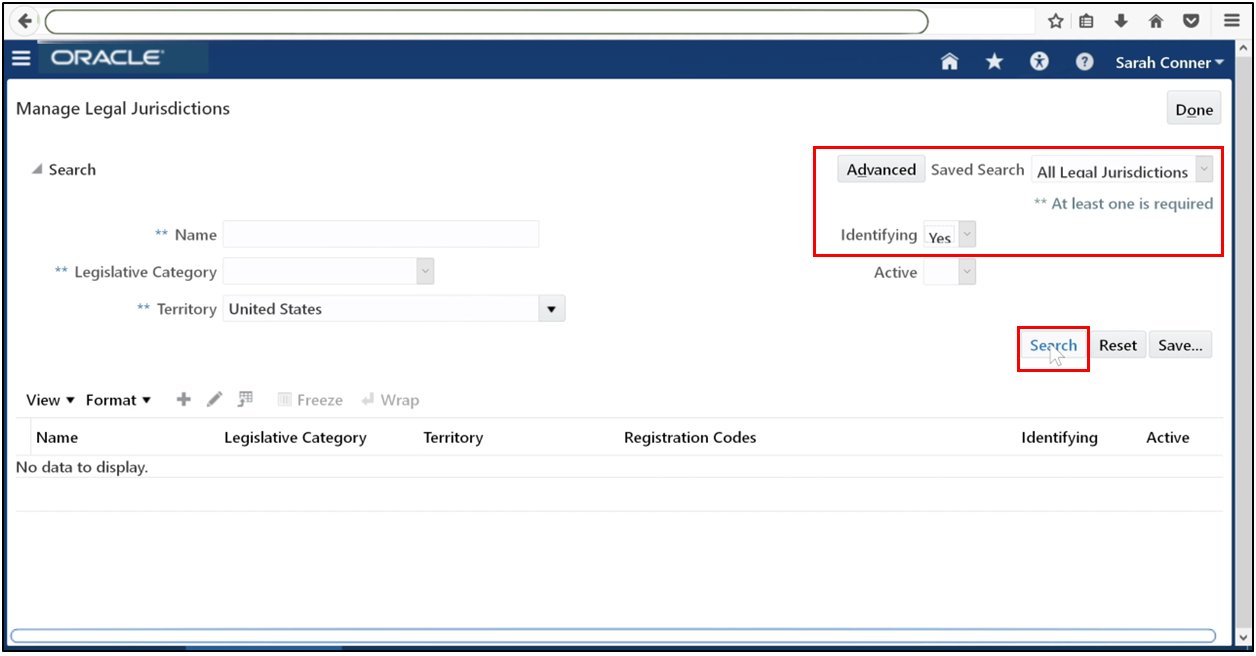
If an identifying jurisdiction already exists, no action is needed. If not, click Plus (+) to create one.
Enter details and set Identifying = Yes. Save the jurisdiction.
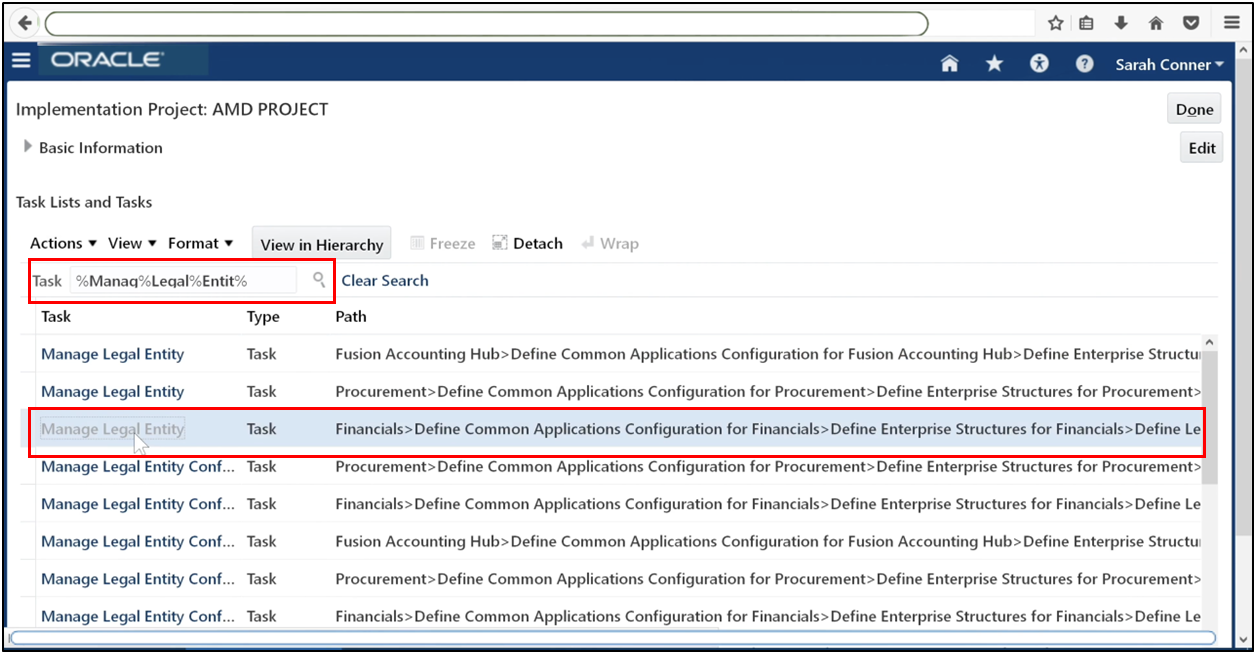
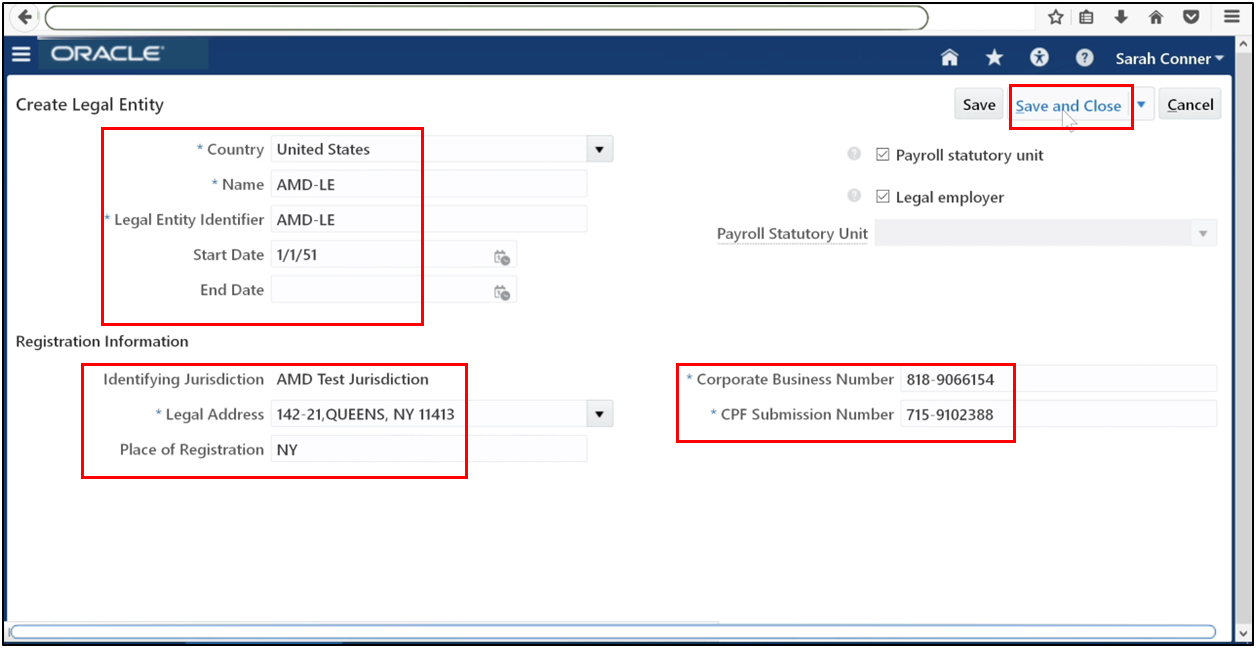
Step 8: Define Legal Entity
Go to Manage Legal Entities.
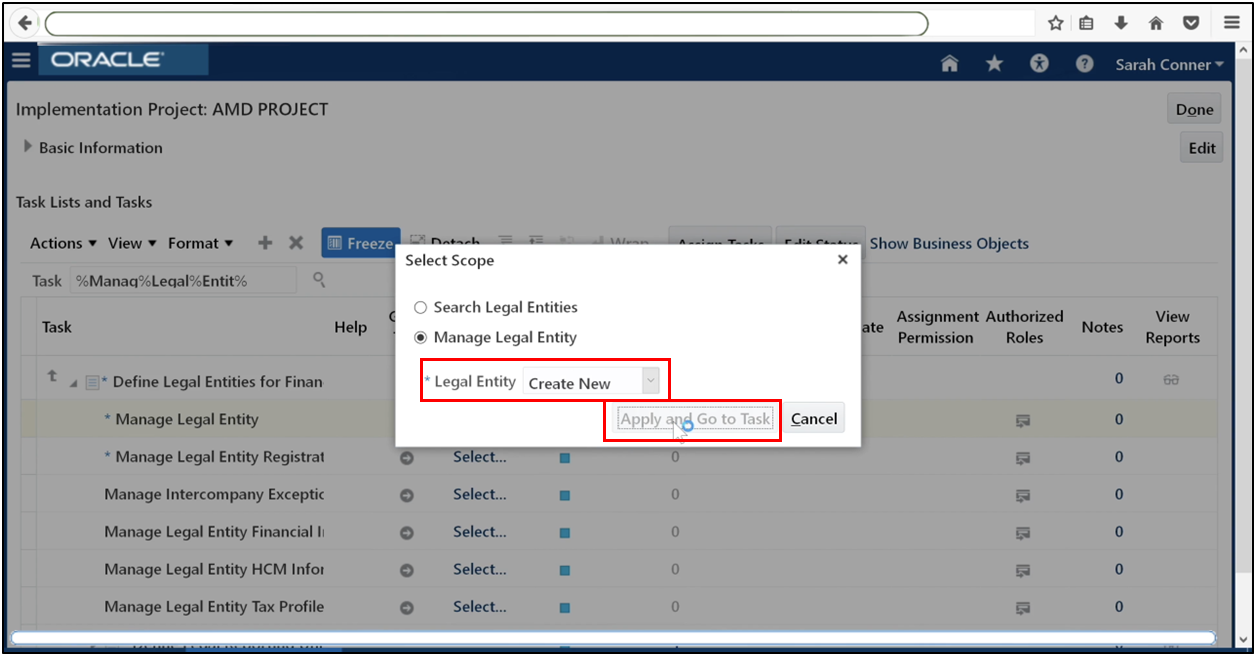
Select Create New and click Apply and Go to Task.
Click Plus (+) to create a legal entity.
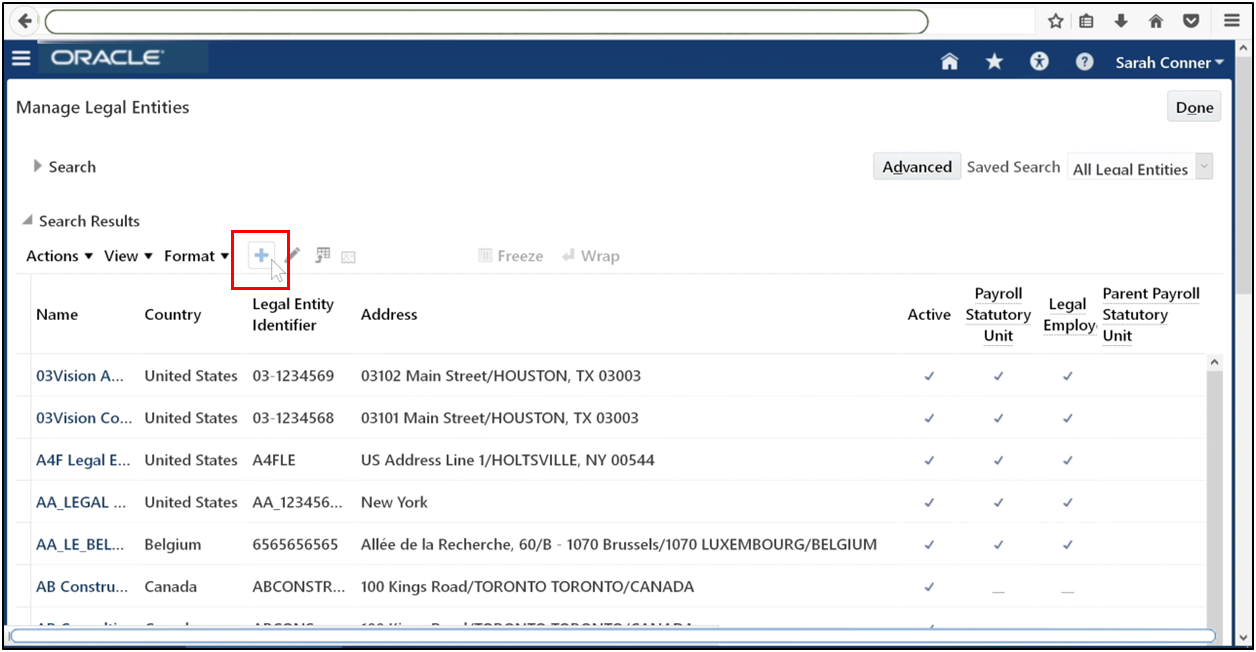
Enter entity details. Select the legal address created earlier. Save the legal entity.
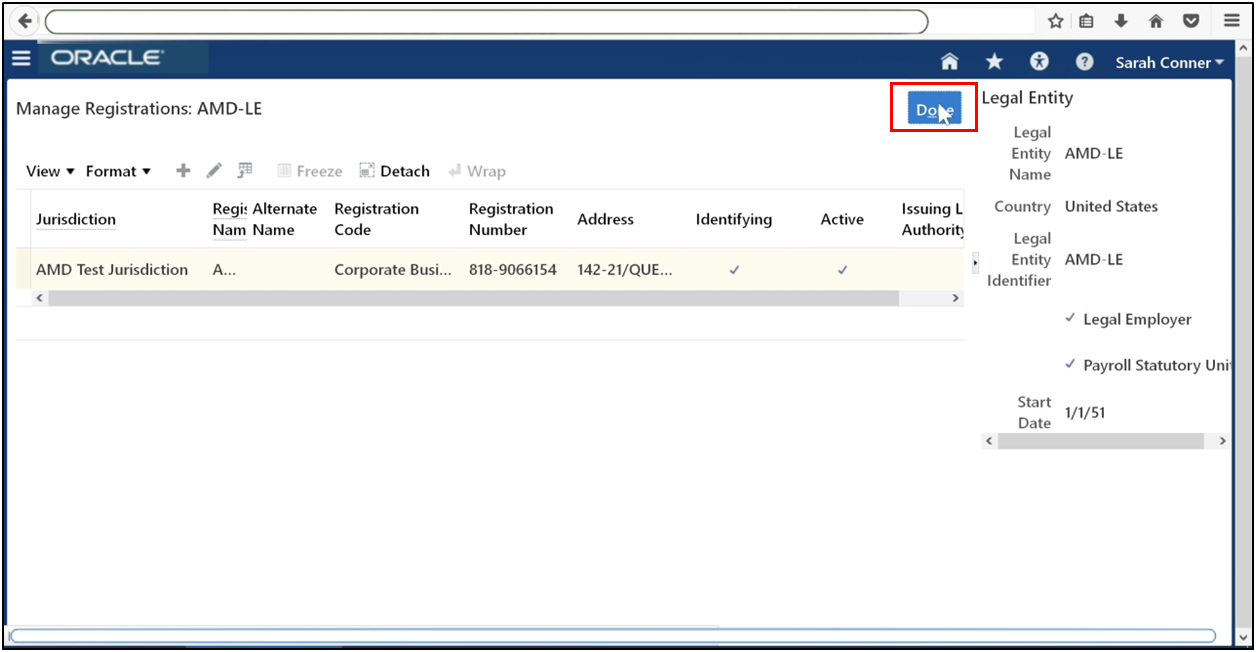
Step 9: Register Legal Entity
Go to Manage Legal Entity Registrations.
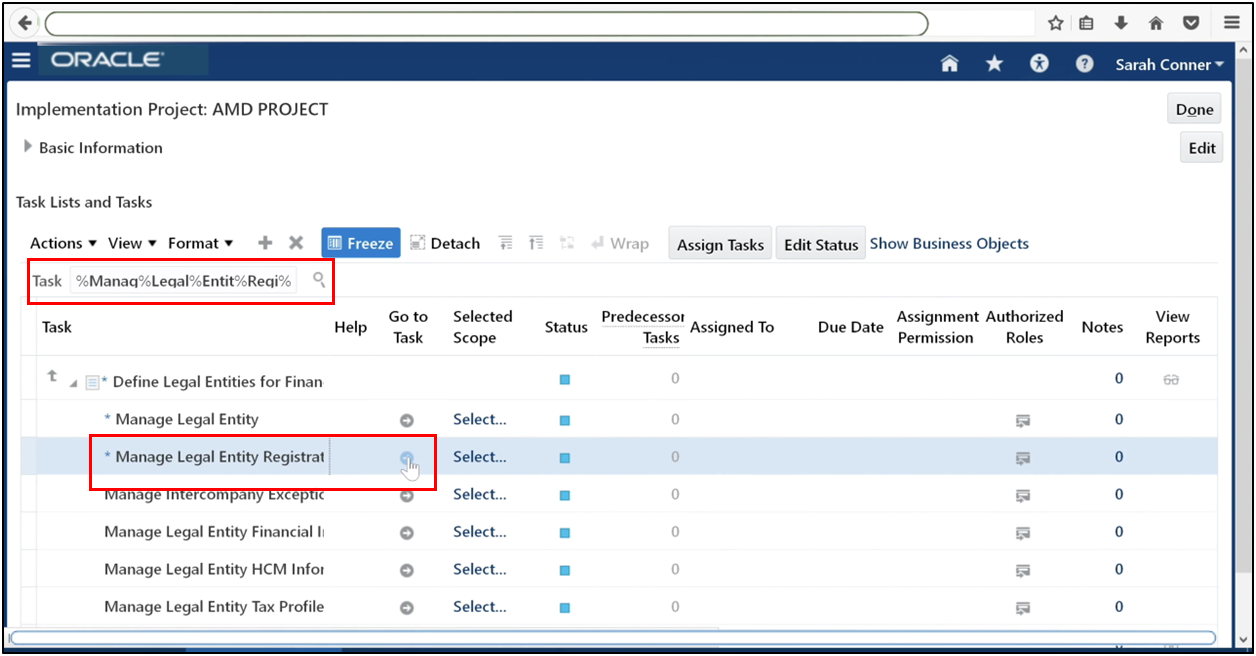
Choose Select an Option and click Apply.

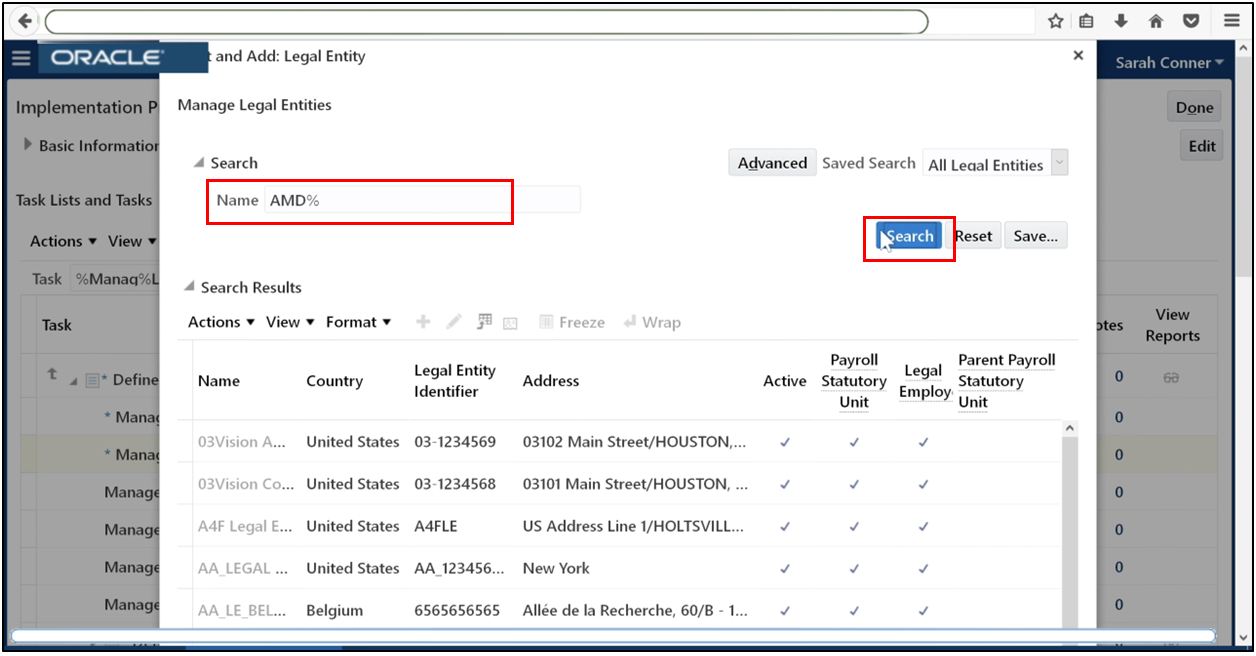
Search for your legal entity.
Click Save and Close, then Done.
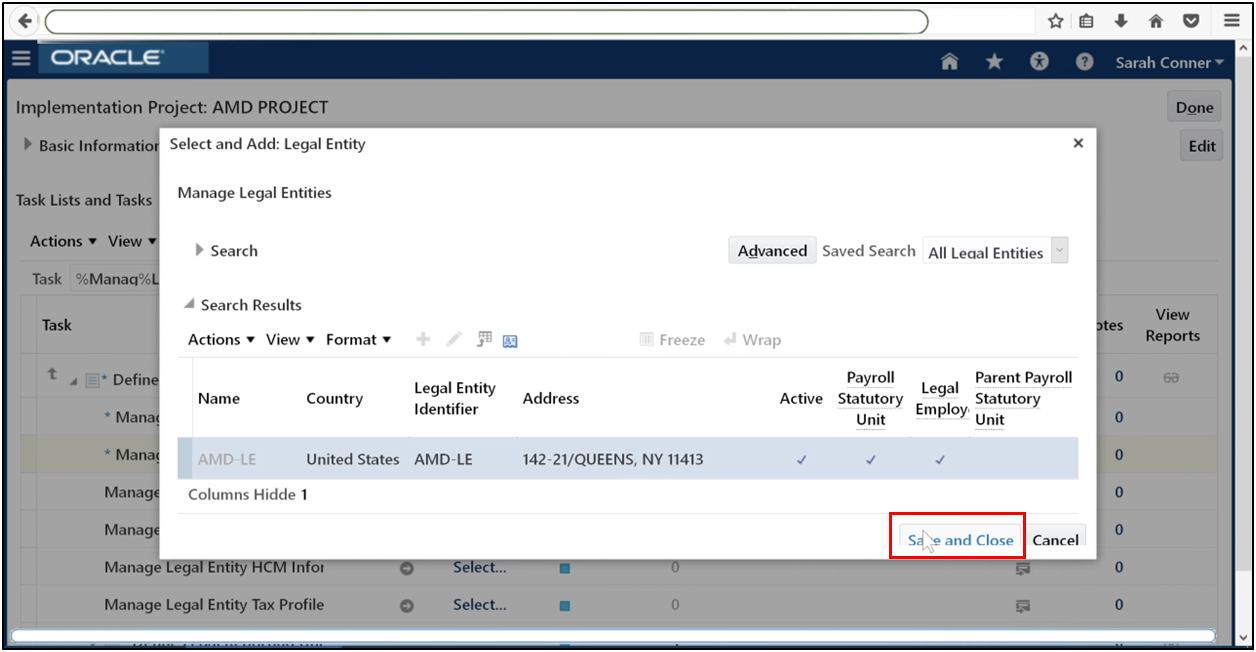
Click Done.
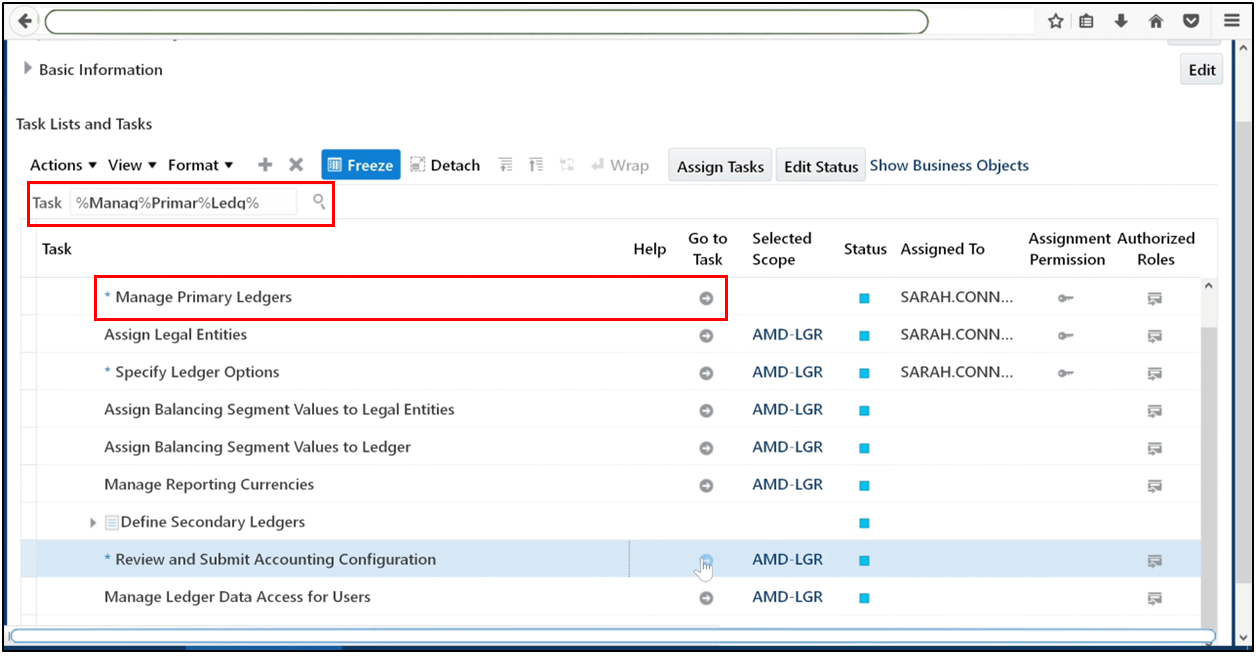
Step 10: Define Primary Ledger
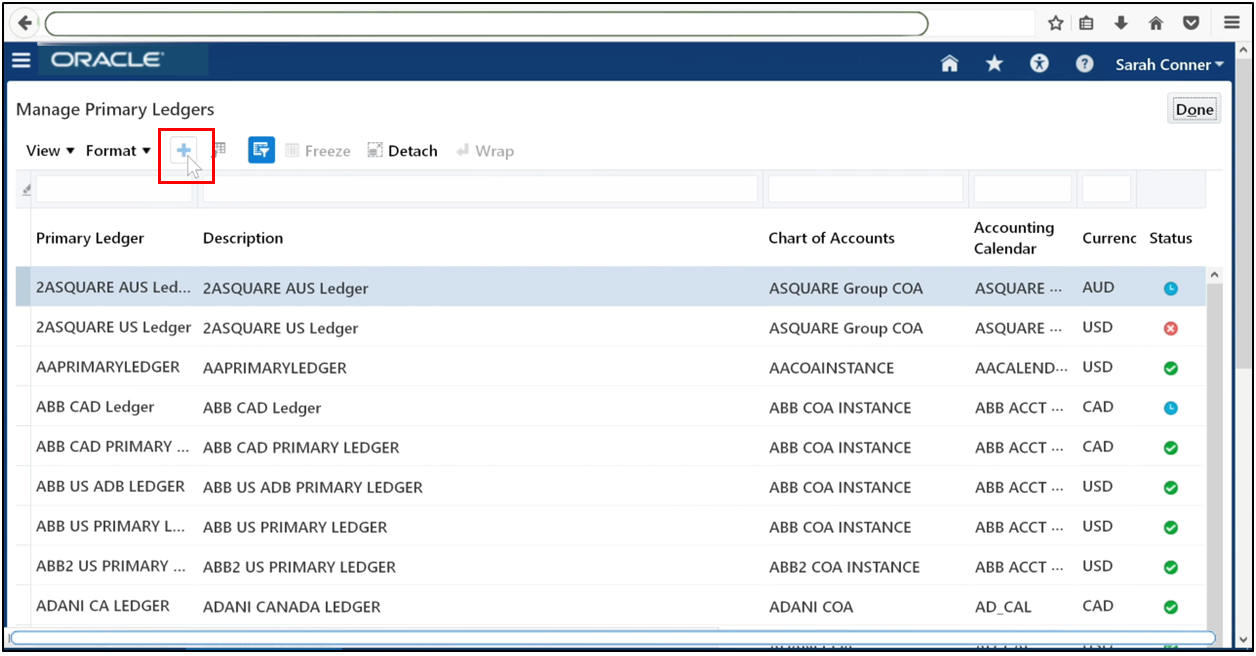
Navigate to Manage Primary Ledger.
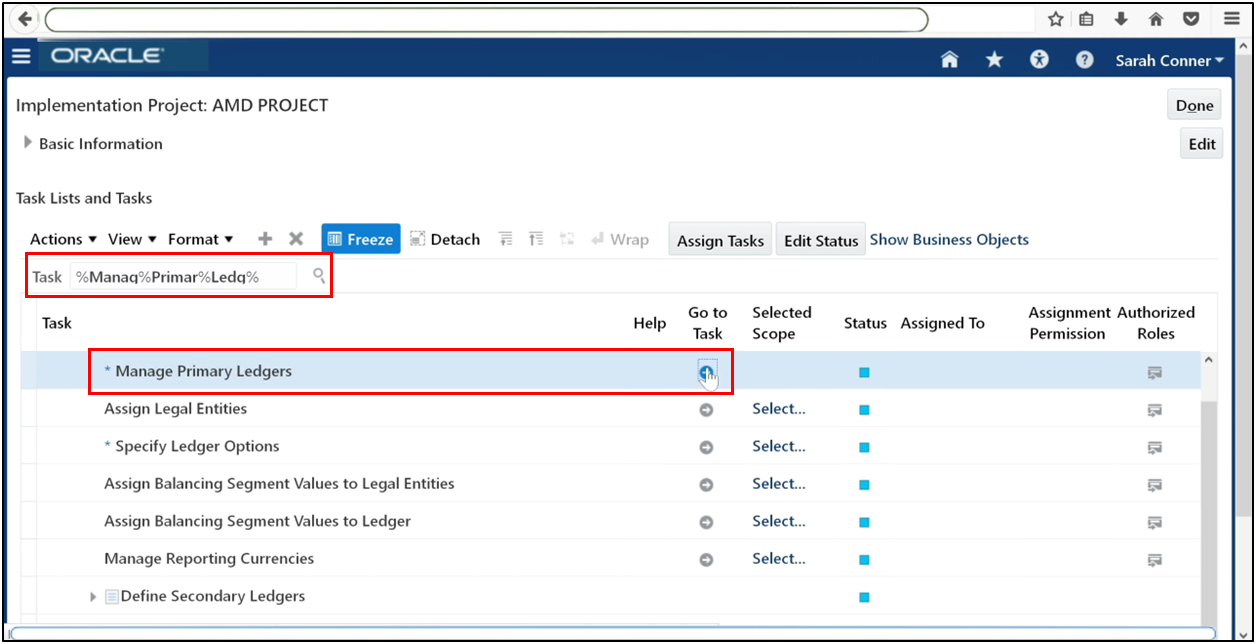
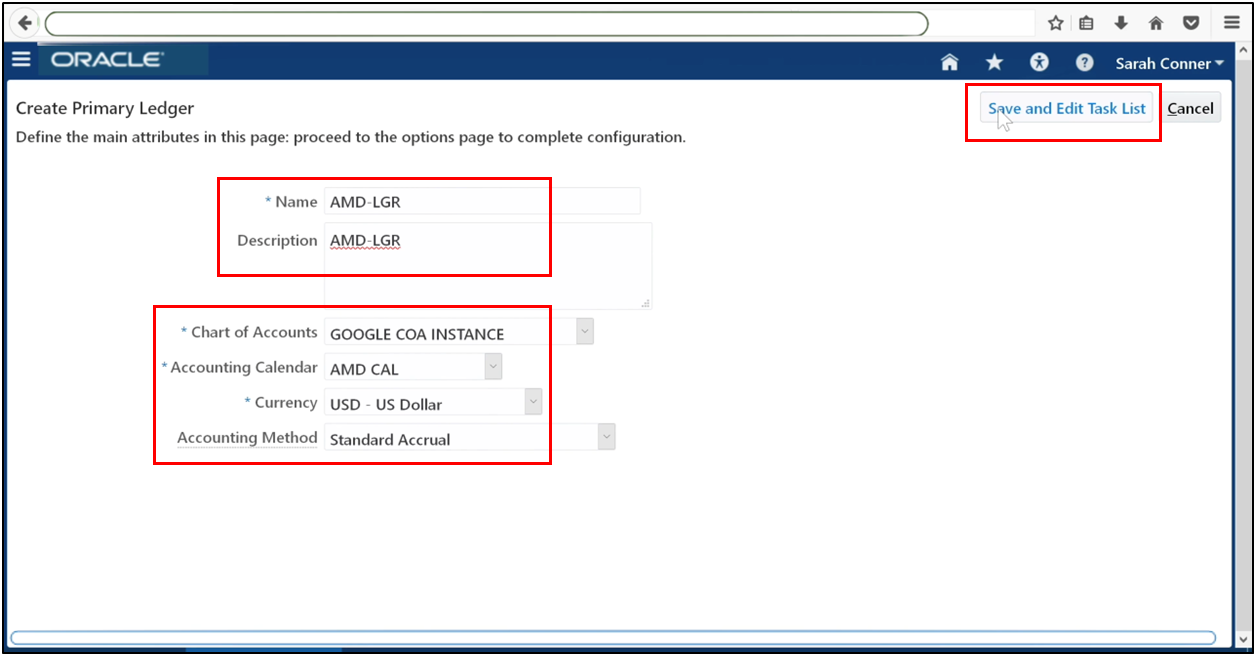
Click Plus (+) to create a new ledger.
Enter the ledger name. Select the four Cs: Chart of Accounts, Accounting Calendar, Currency, and Accounting Method. Save the ledger.
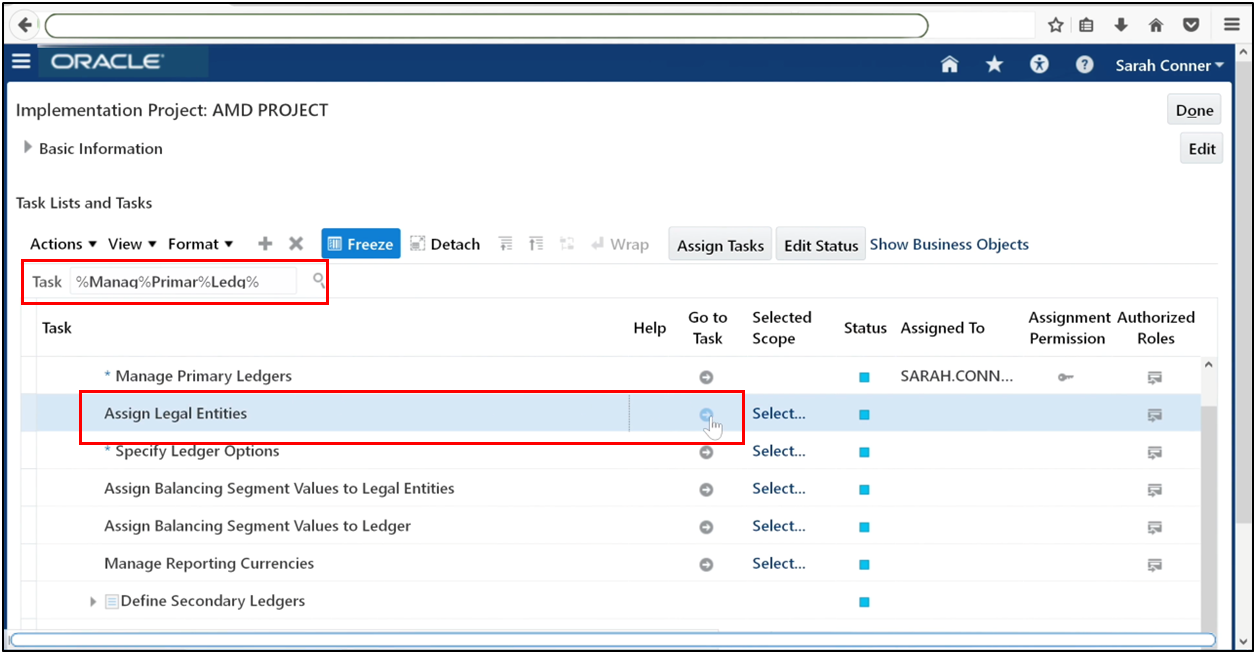
Step 11: Assign Legal Entities to Ledger
Go to Assign Legal Entities.
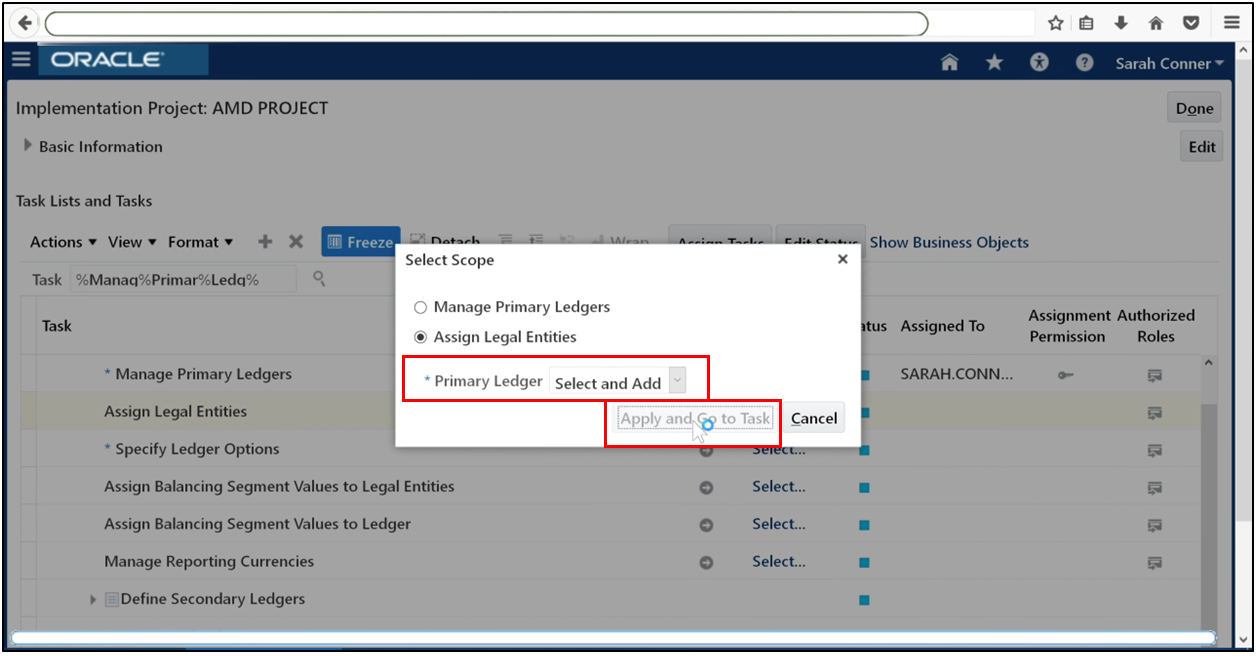
Choose Select and Add, then click Apply.
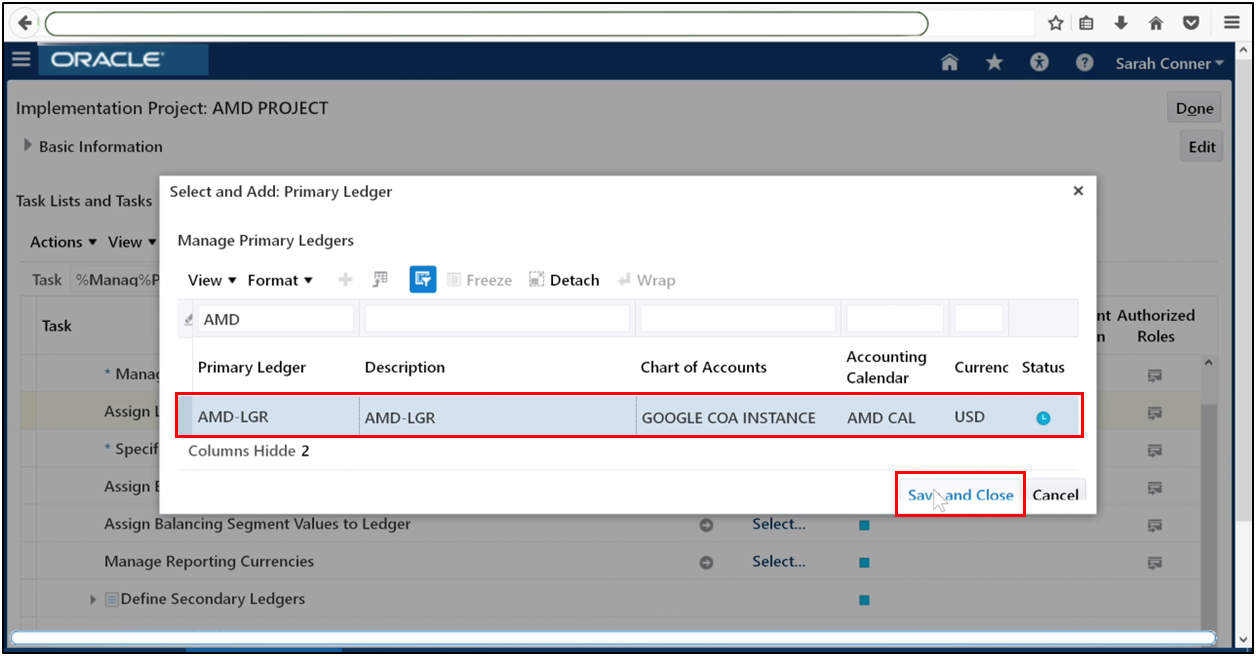
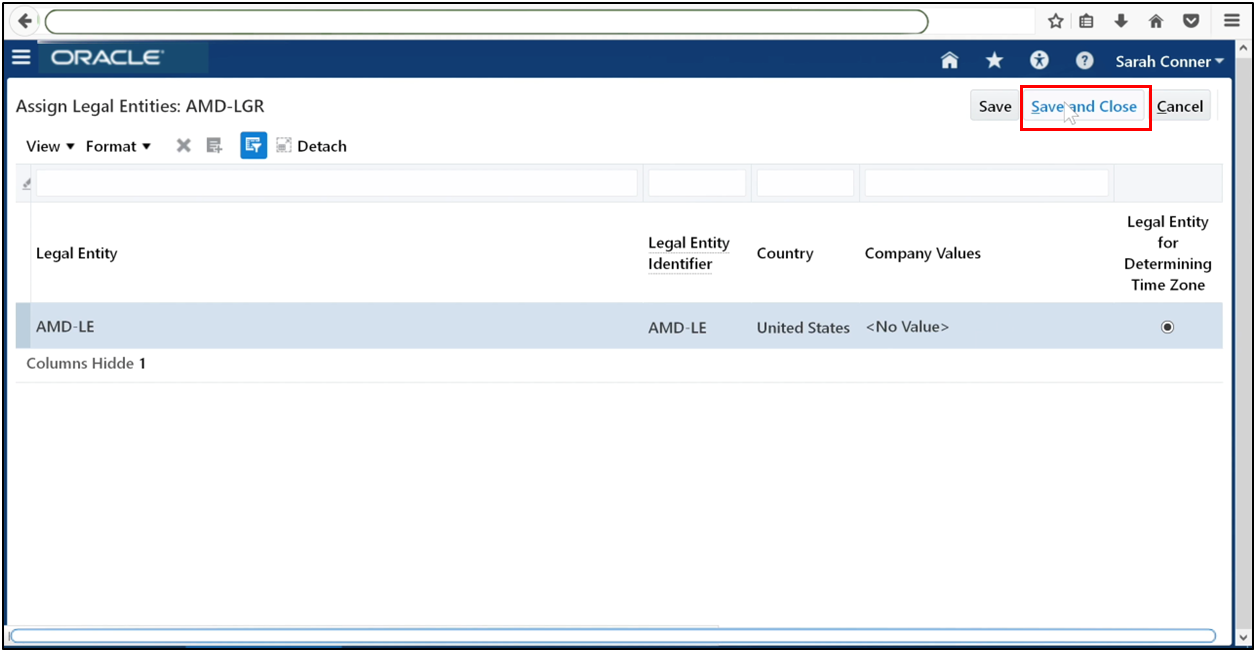
Select your ledger and click Save and Close.
Click Plus (+) to add a legal entity.
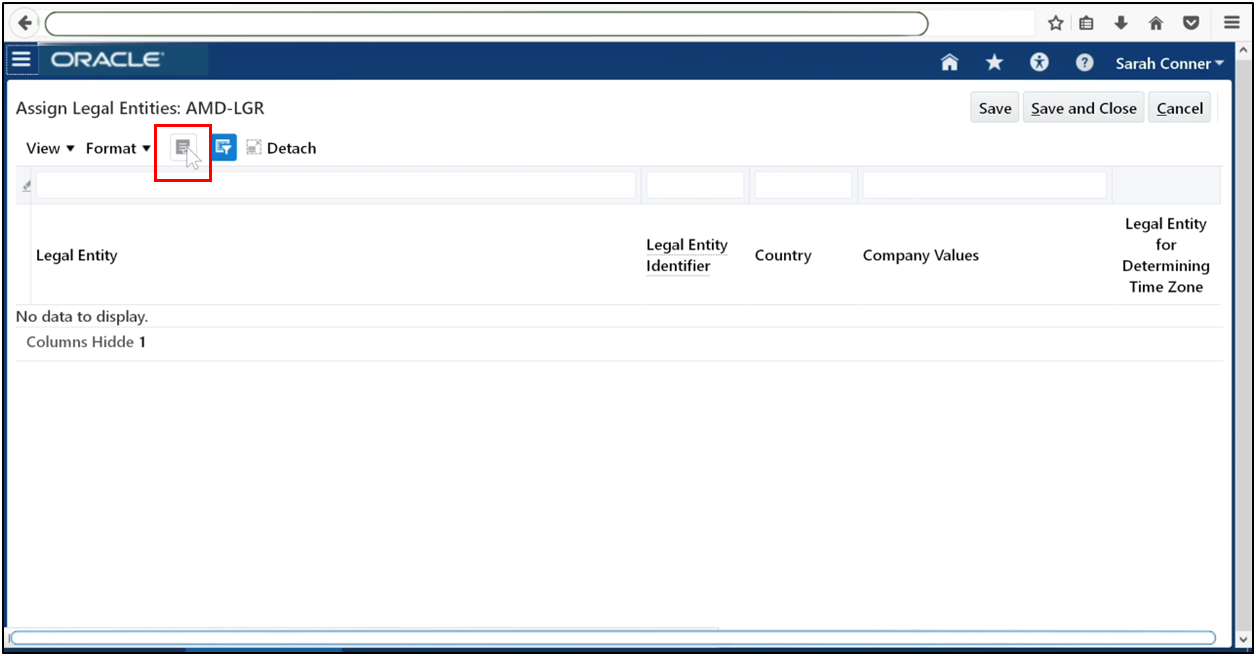
Search and assign the legal entity to the ledger.
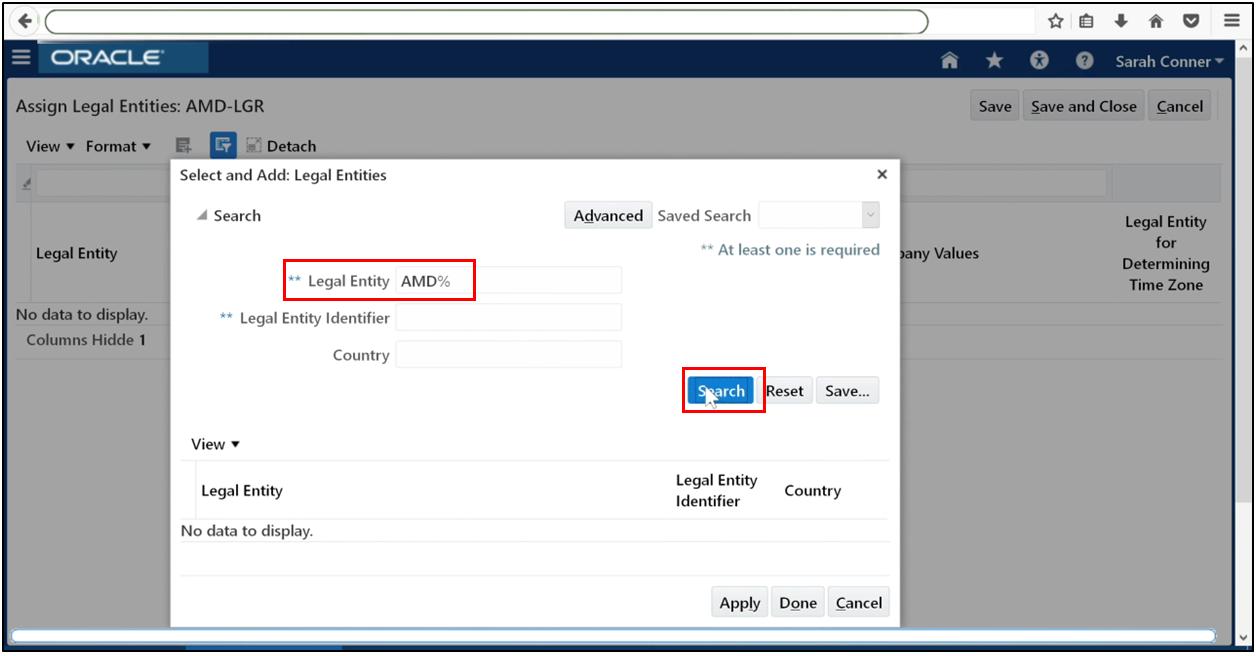
Search the legal entity and assign it to the ledger. Click Apply.
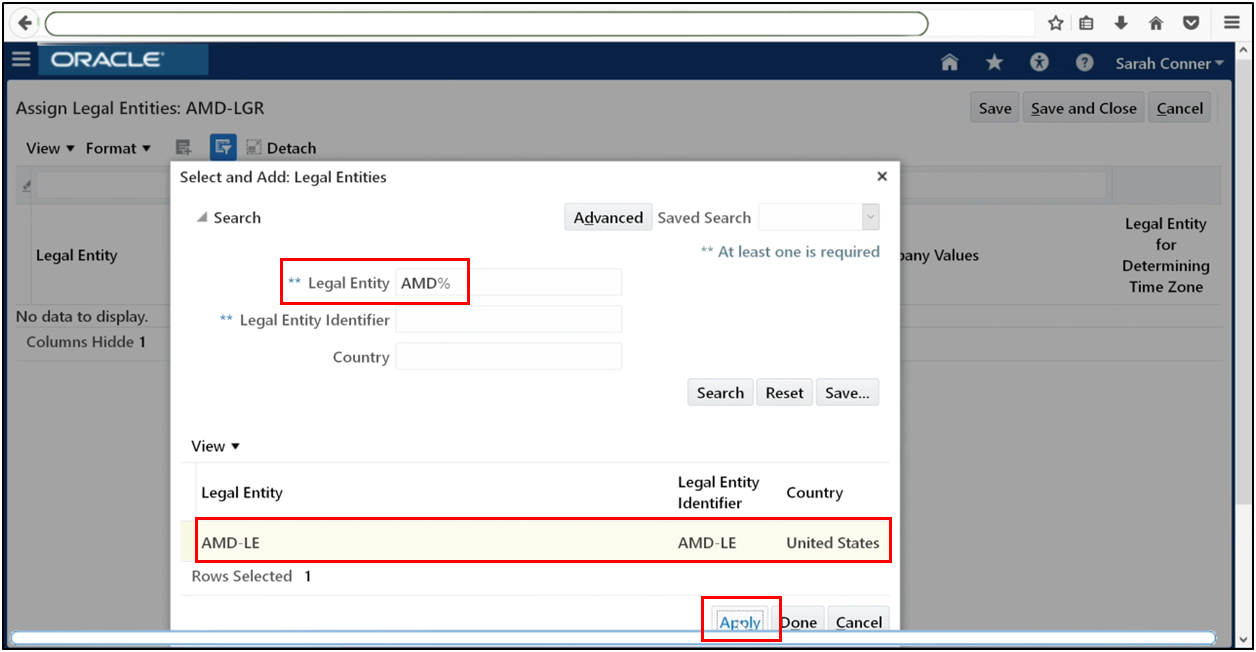
Save and close.
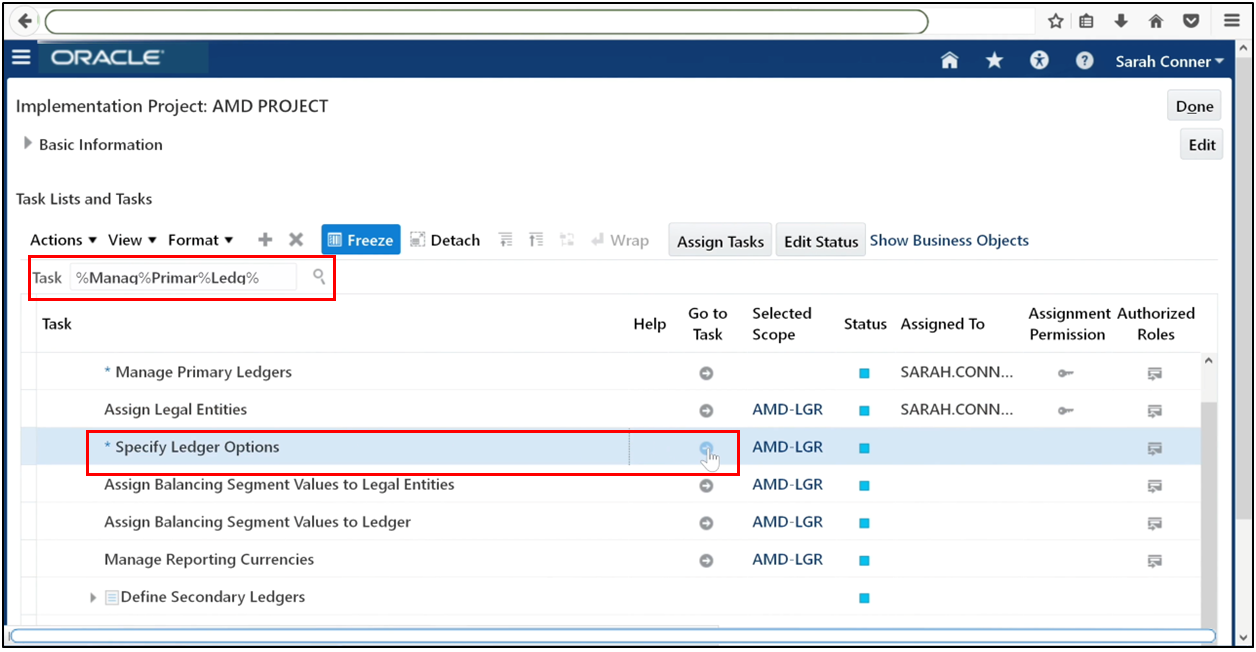
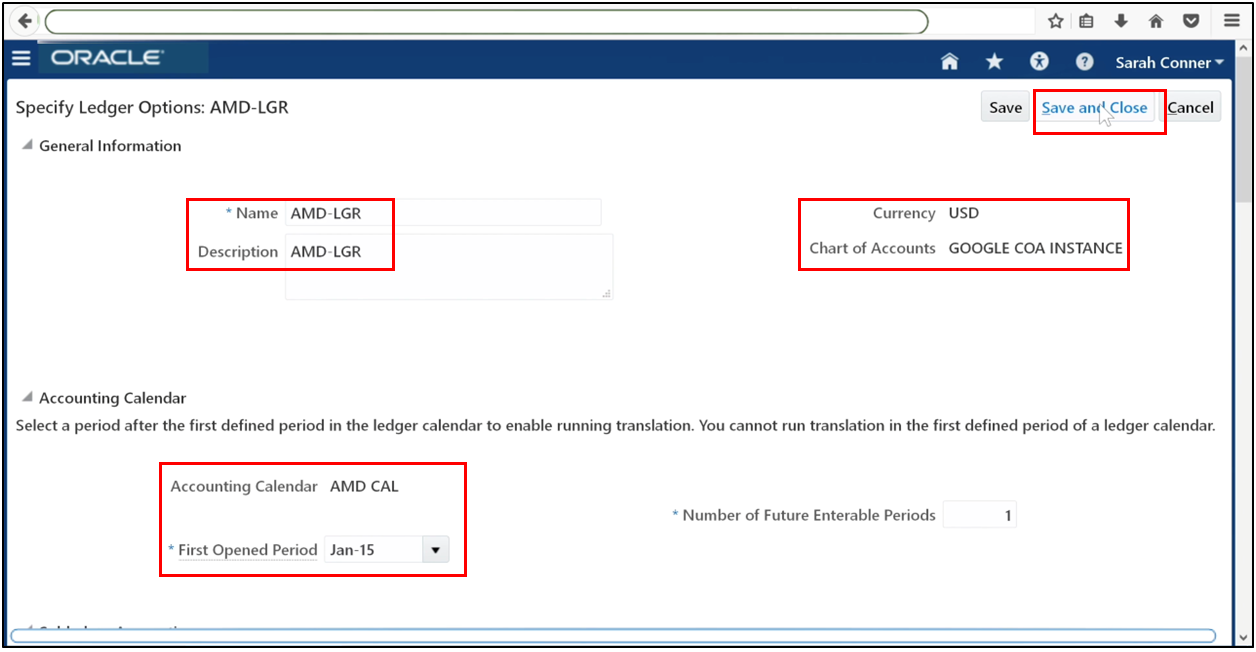
Step 12: Specify Ledger Options
Go to Specify Ledger Options.
Set the first accounting period to be opened. Select the reporting language. Enter:
- Retained earnings account
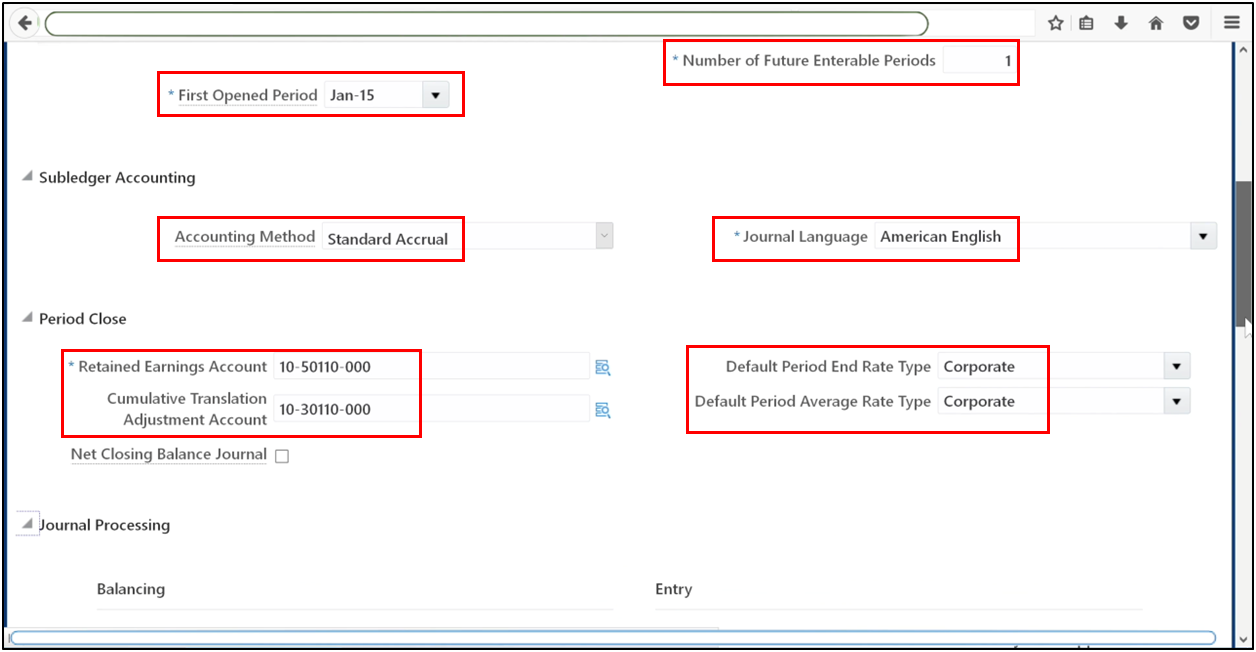
- Cumulative translation adjustment account
Select the corporate conversion rate. Specify other accounts such as suspense and rounding.
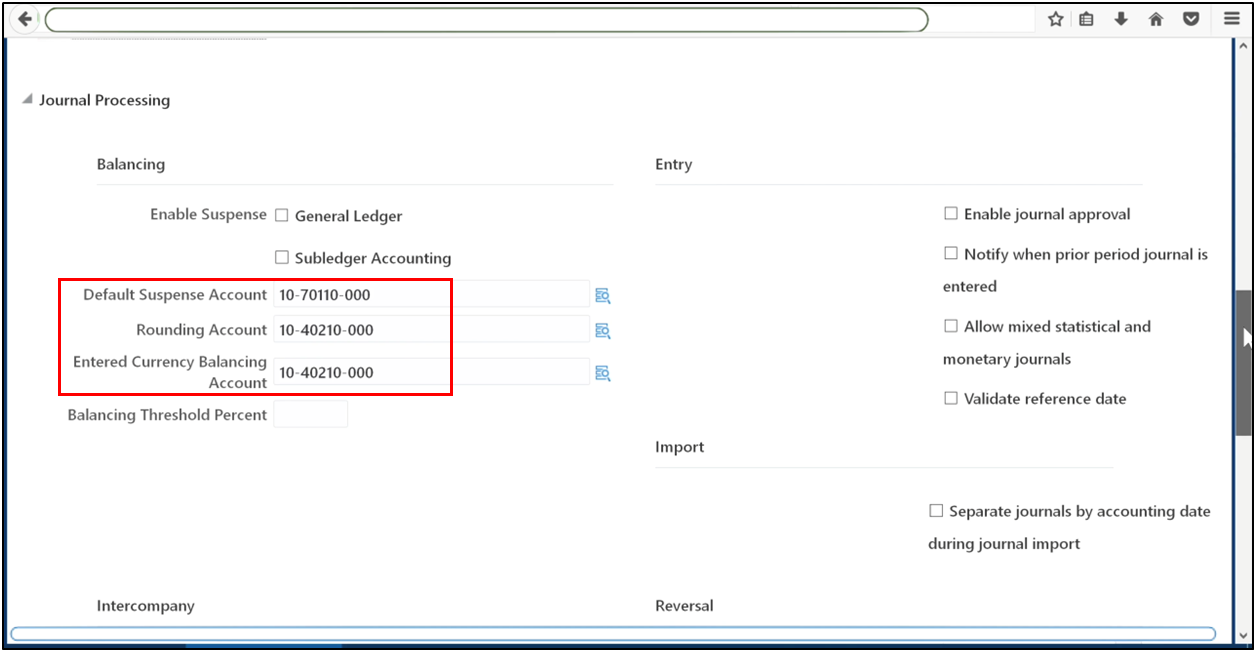
Enable suspense for:
- General Ledger
- Subledger Accounting
Save ledger options.
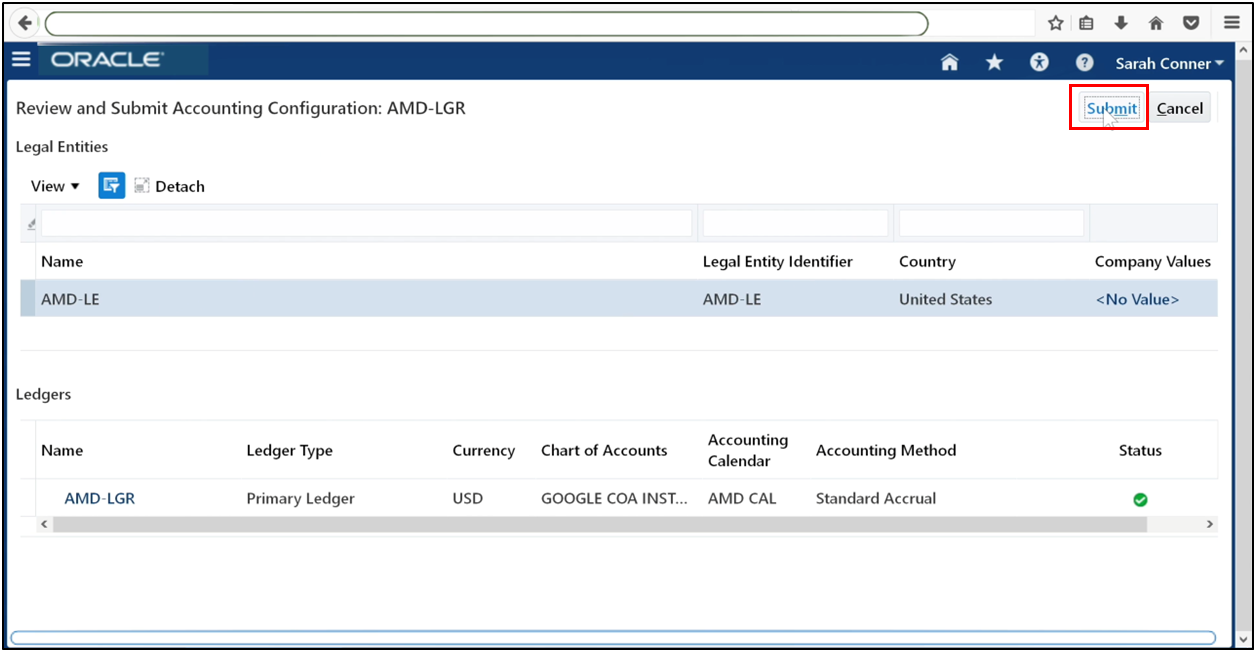
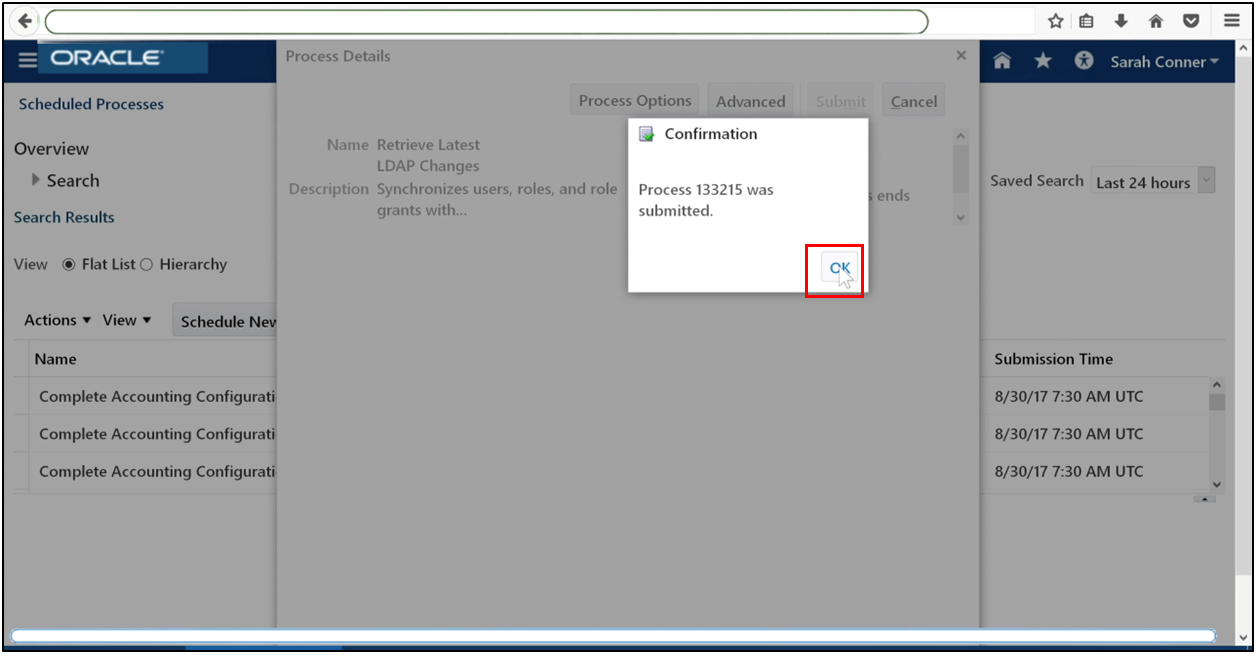
Step 13: Review and Submit Accounting Configuration
Go to Review and Submit Accounting Configuration.
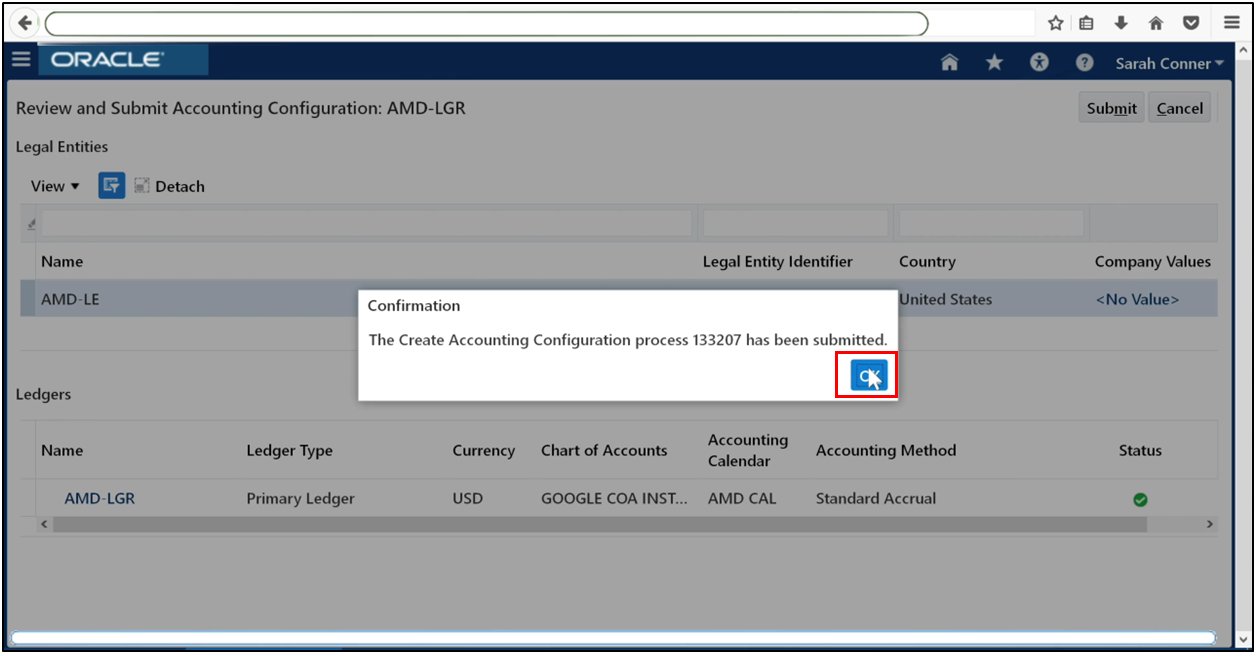
Confirm that your ledger and legal entity are displayed. Click Submit.
Click OK.
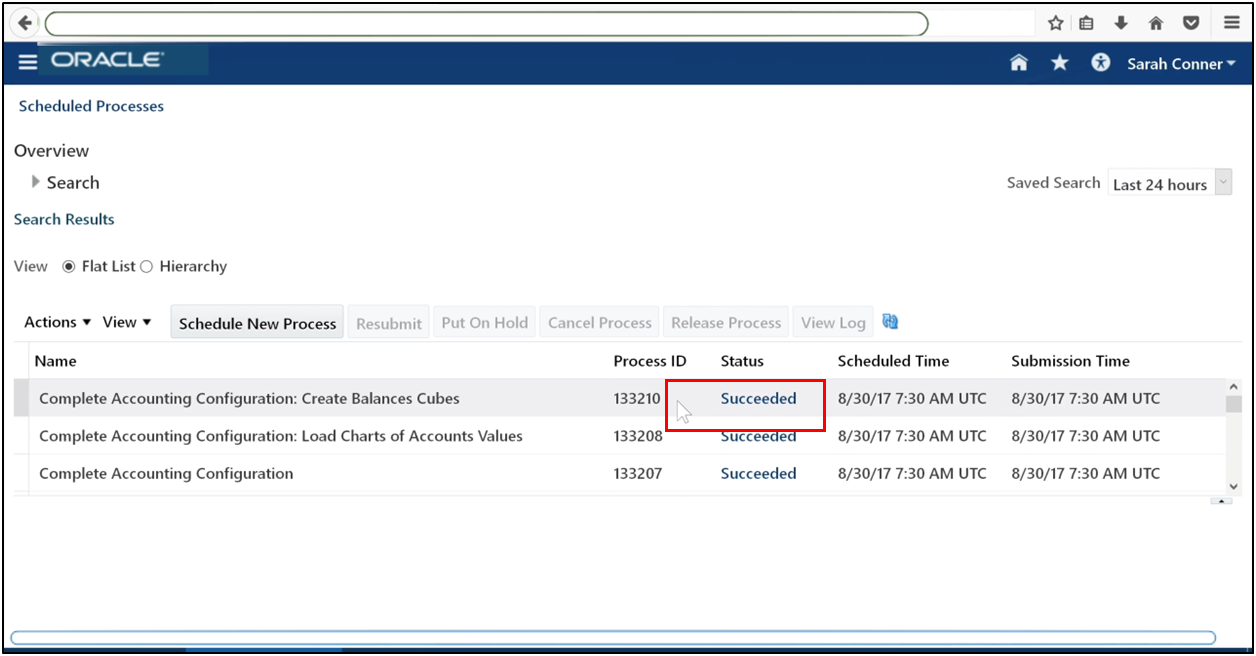
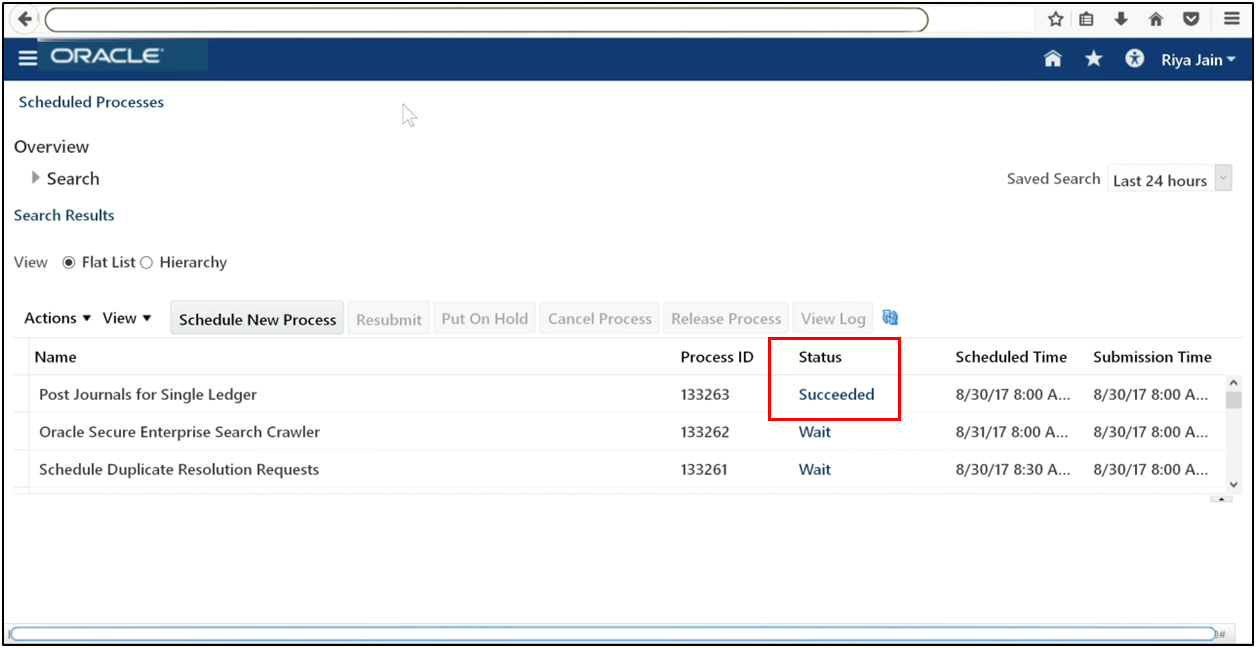
Navigate to Scheduled Processes.
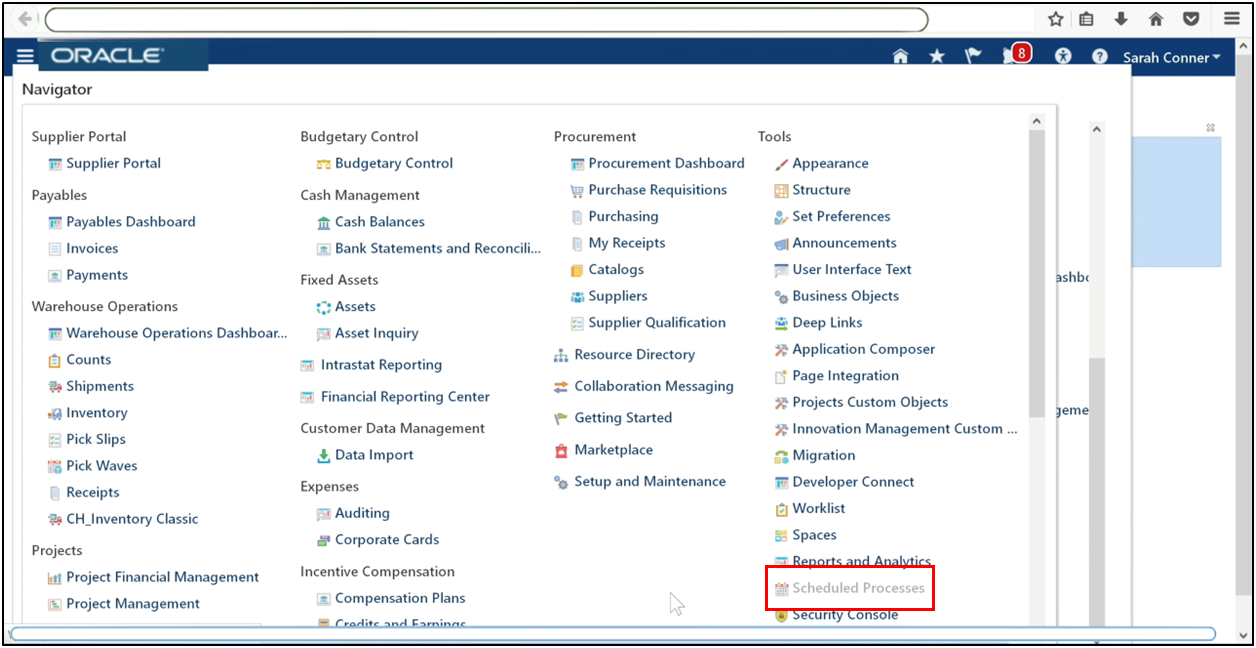
Ensure that the process is completed successfully.
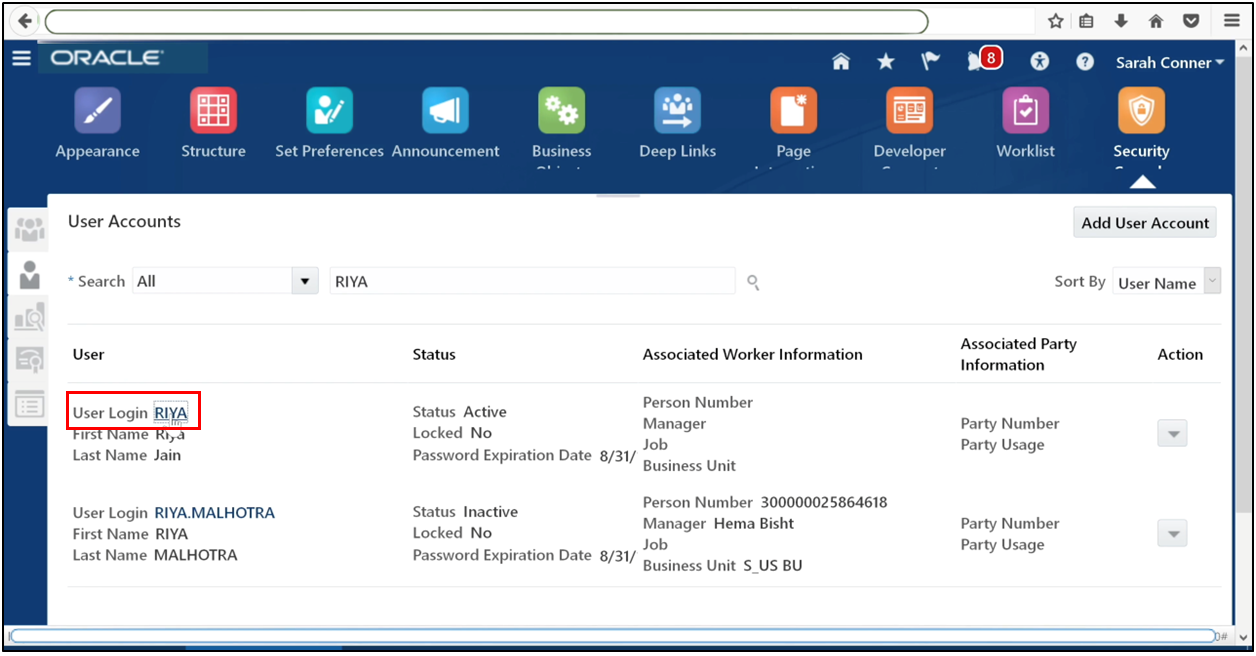
Step 14: Assign Roles to Users
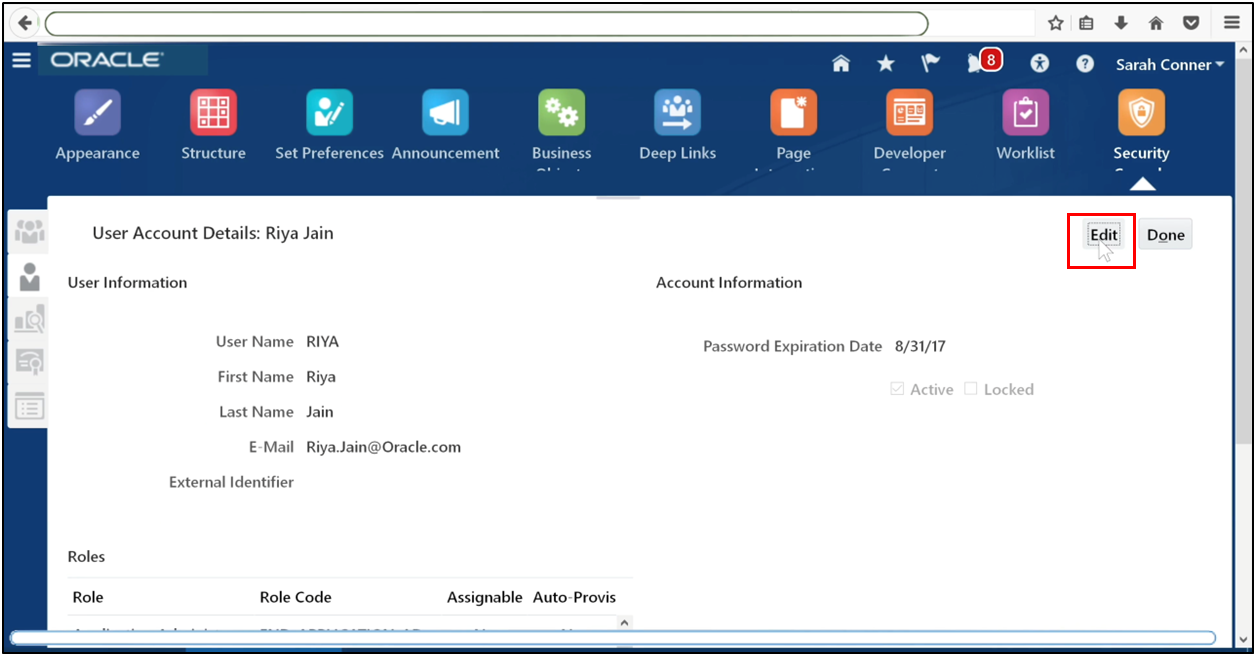
Open Security Console. Go to the User Accounts tab. Search for the required user. Click the username.
Edit.
Add roles.
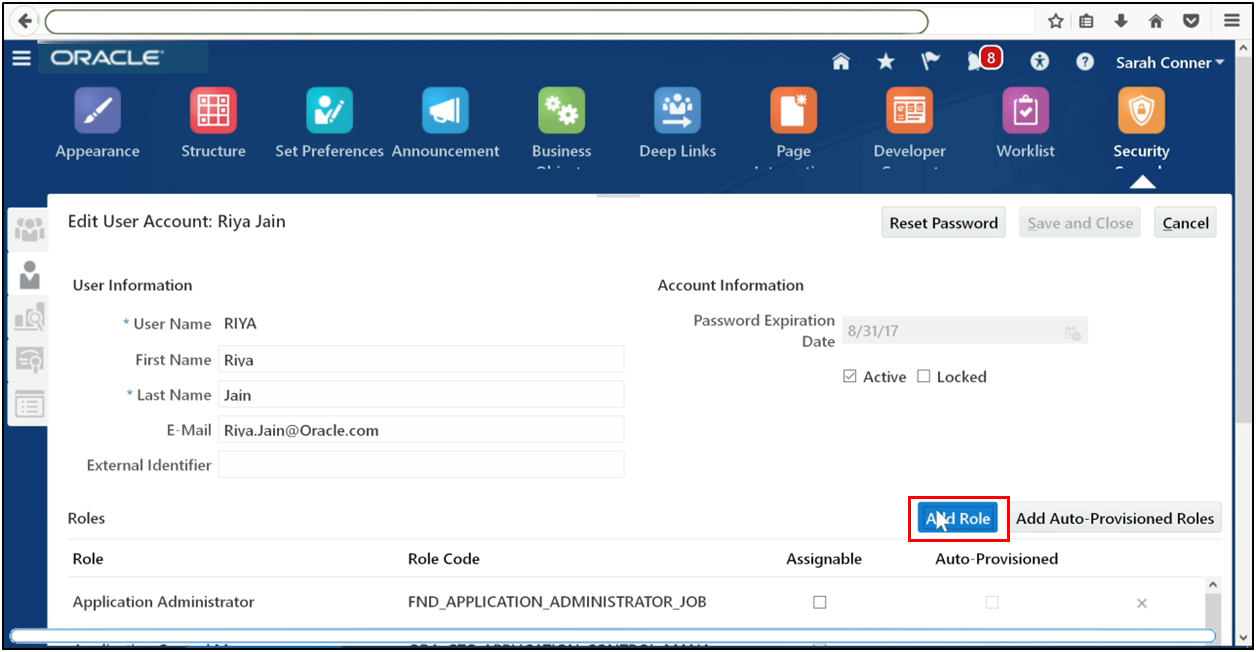
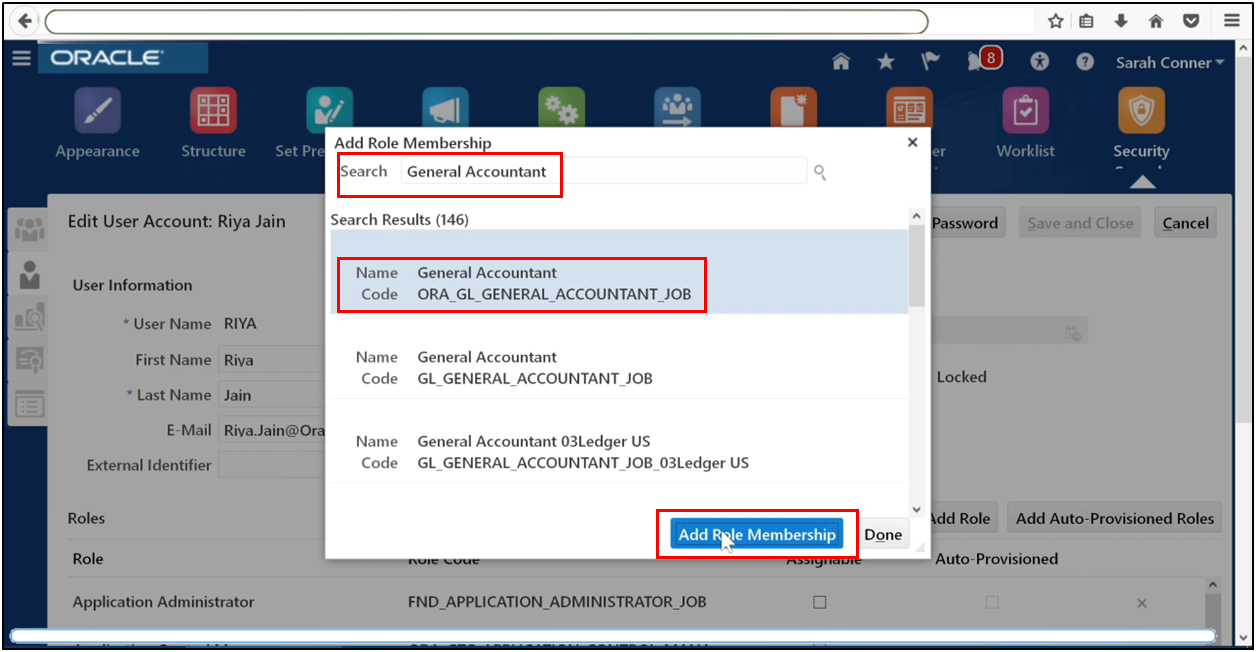
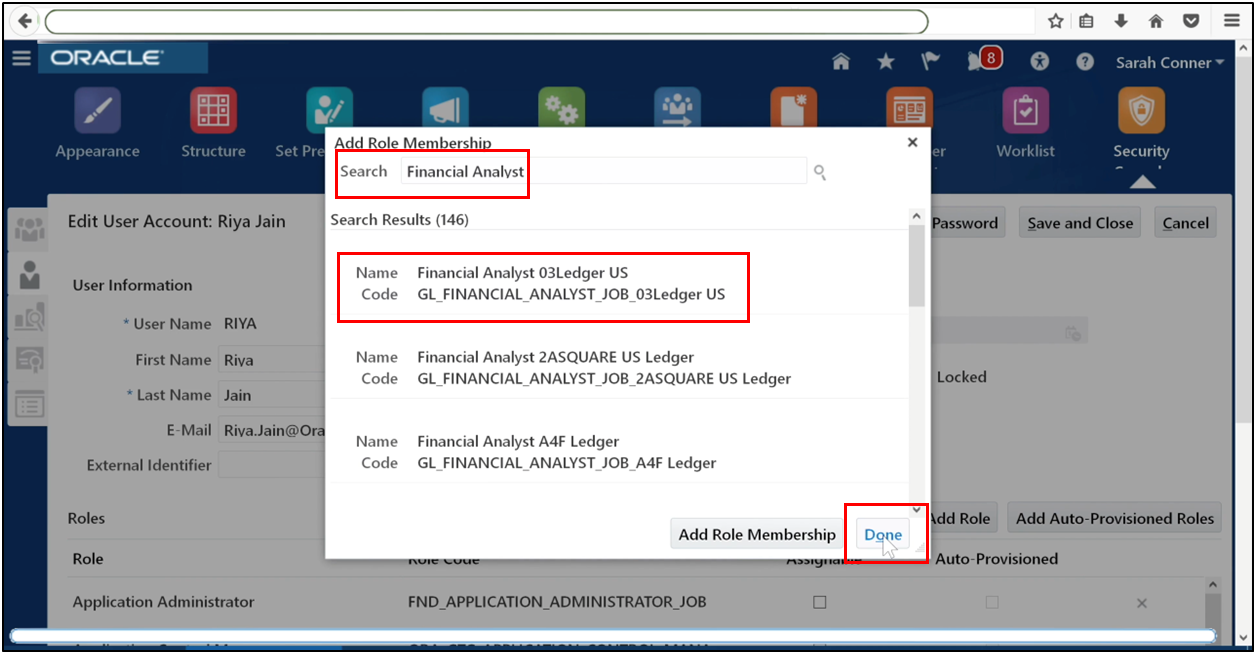
Assign the following roles:
General Accountant
Job
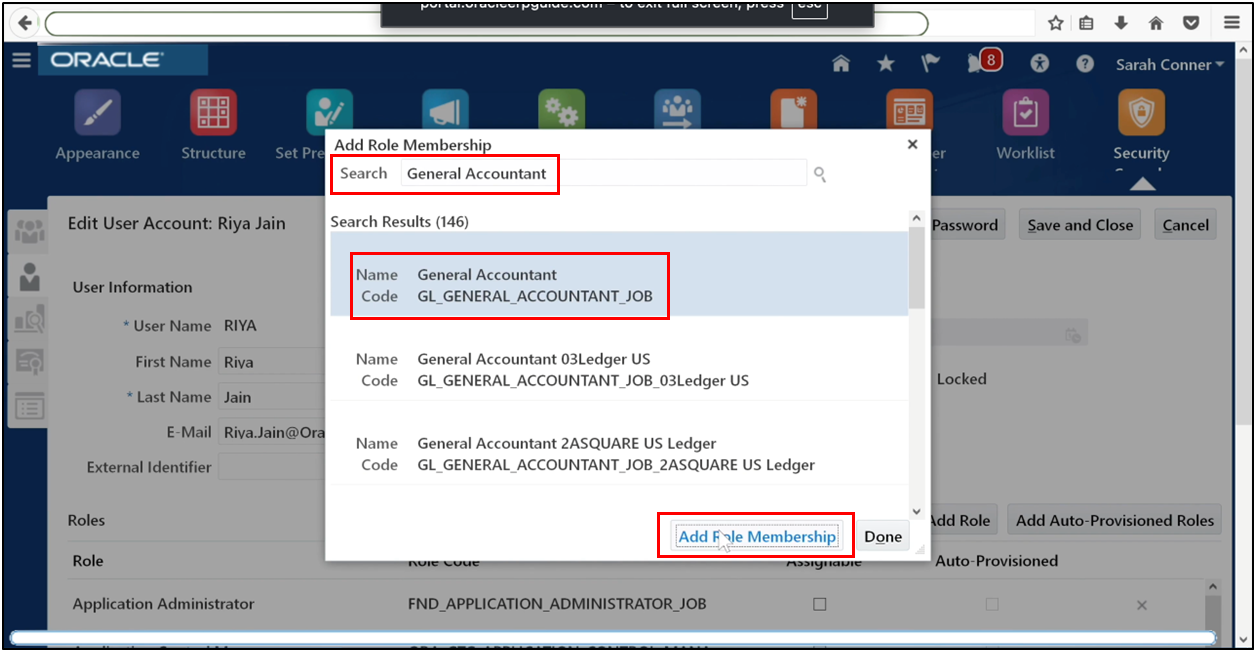
Controller
Financial Analyst
Chief Financial Officer
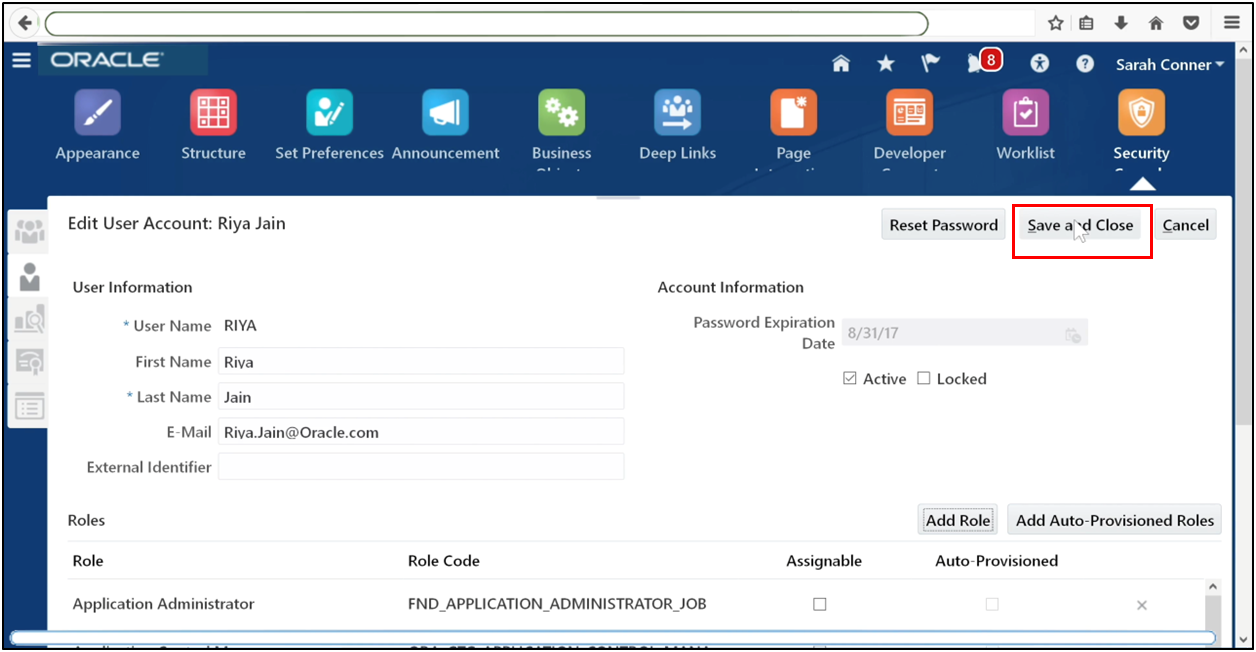
Click Done. Save and close.
Step 15: Assign Data Access
Go to Manage Data Access for Users.
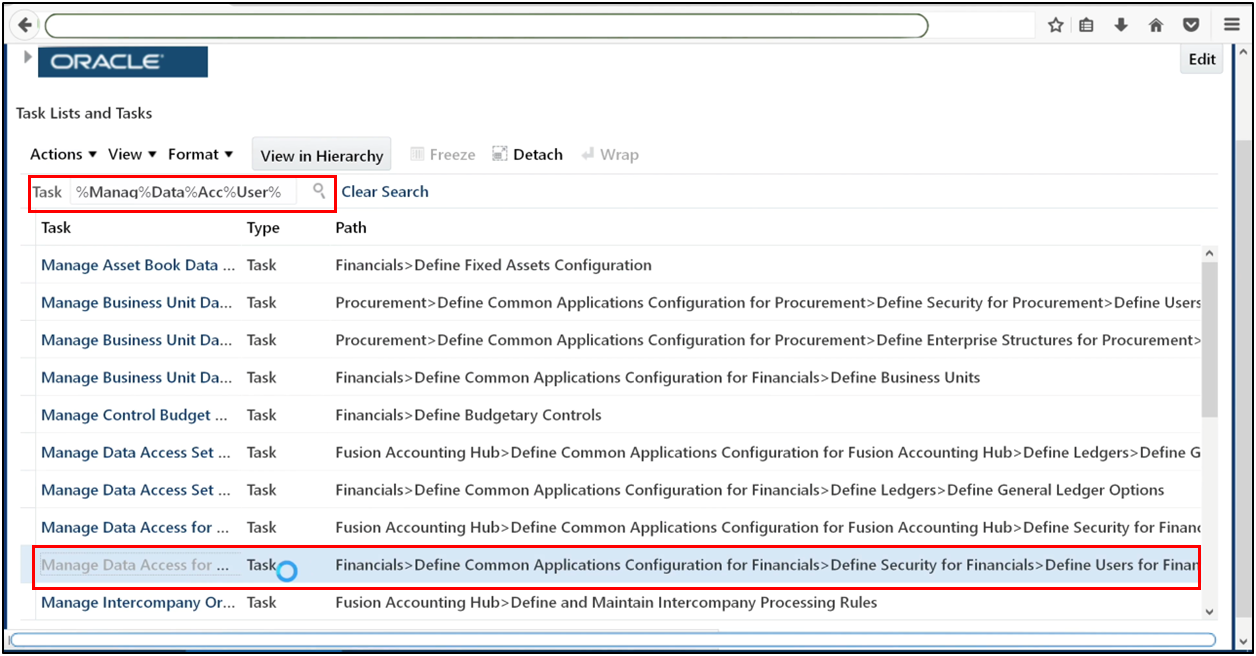
Click Plus (+).
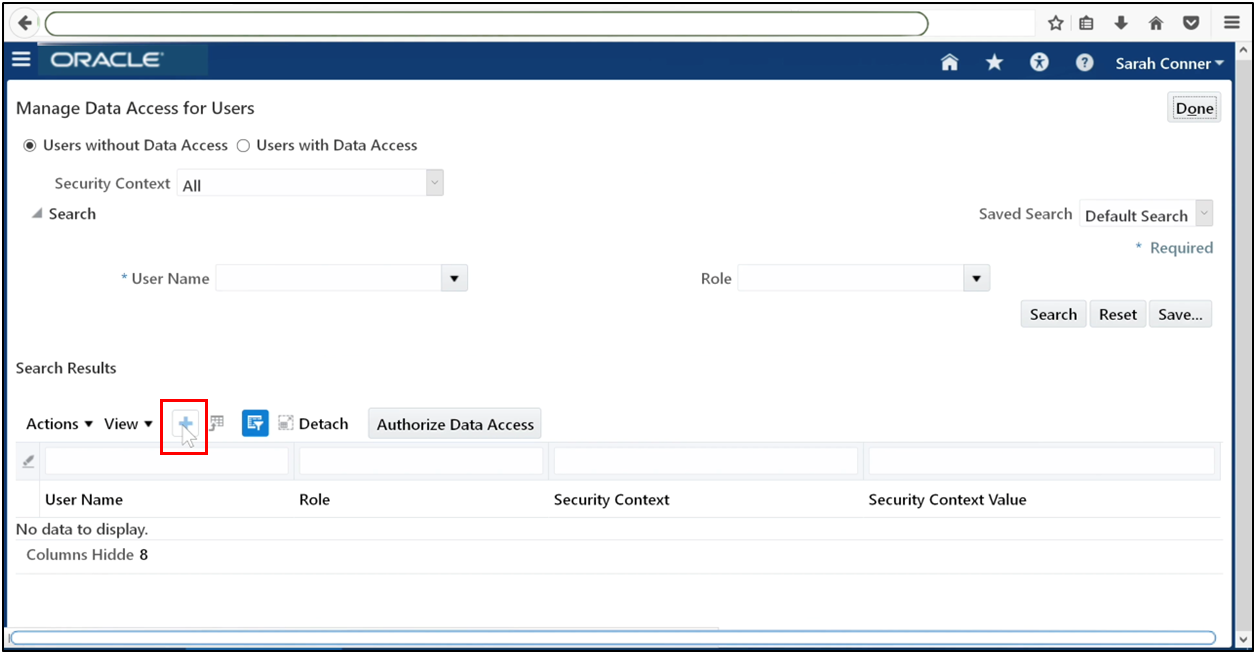
Enter the username.
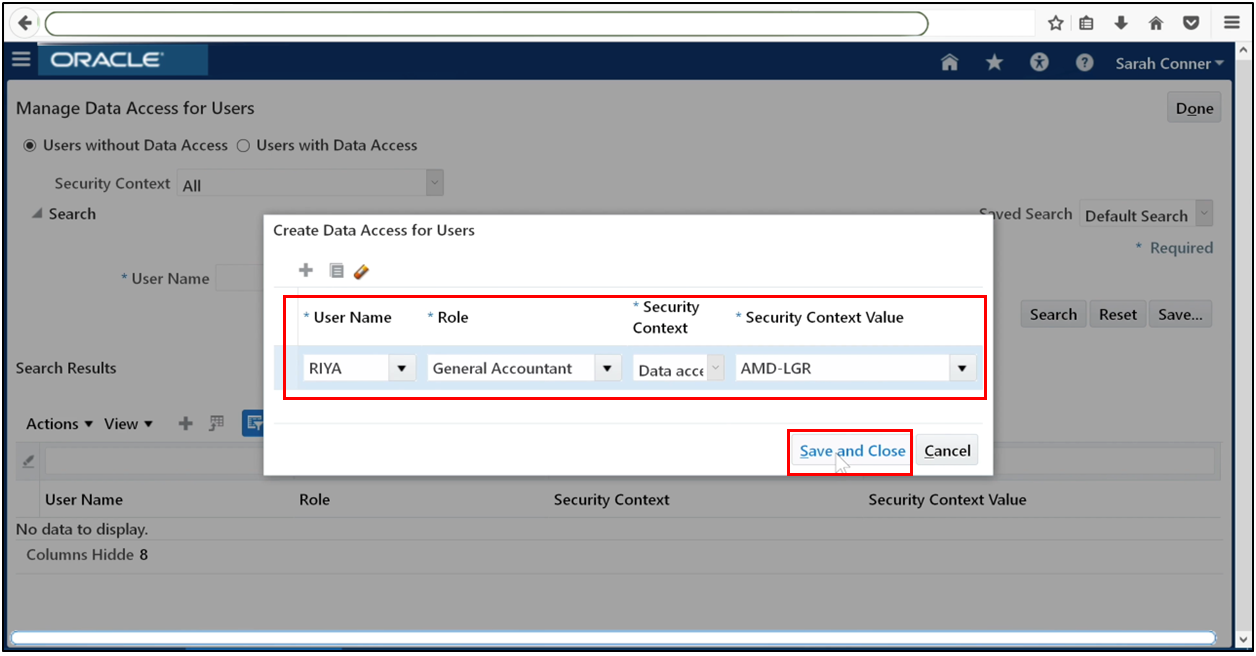
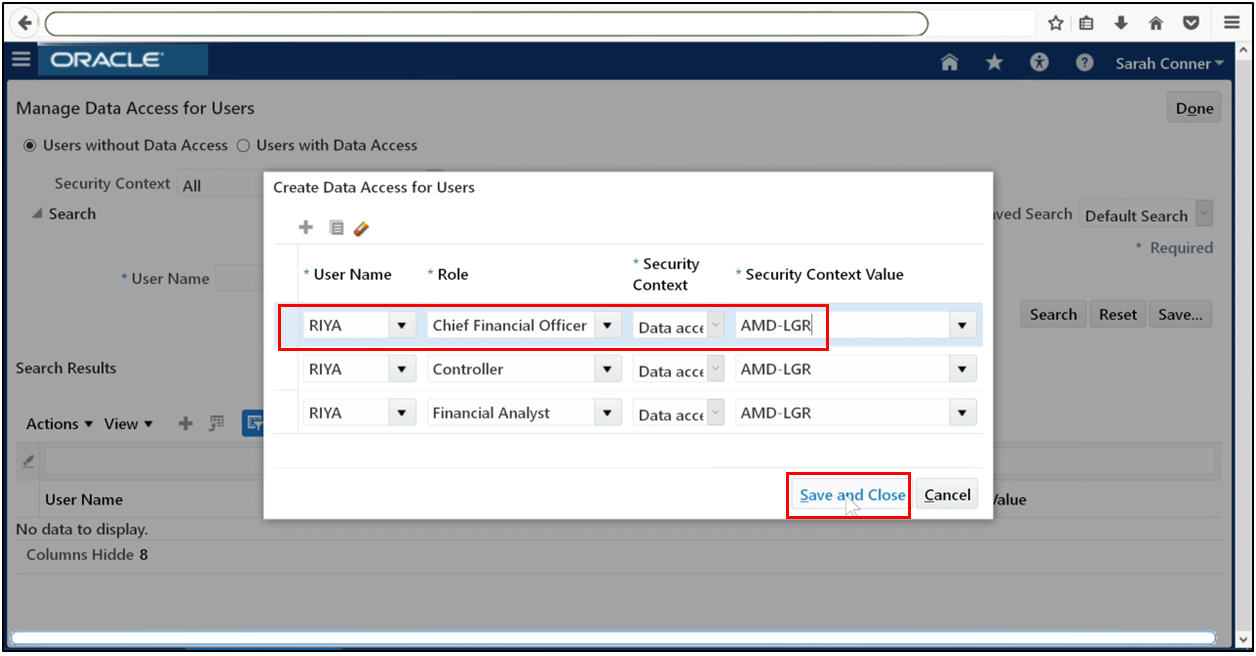
Select the appropriate Data Access Set. Save the assignment. Repeat for other roles such as Controller, Financial Analyst, and CFO.
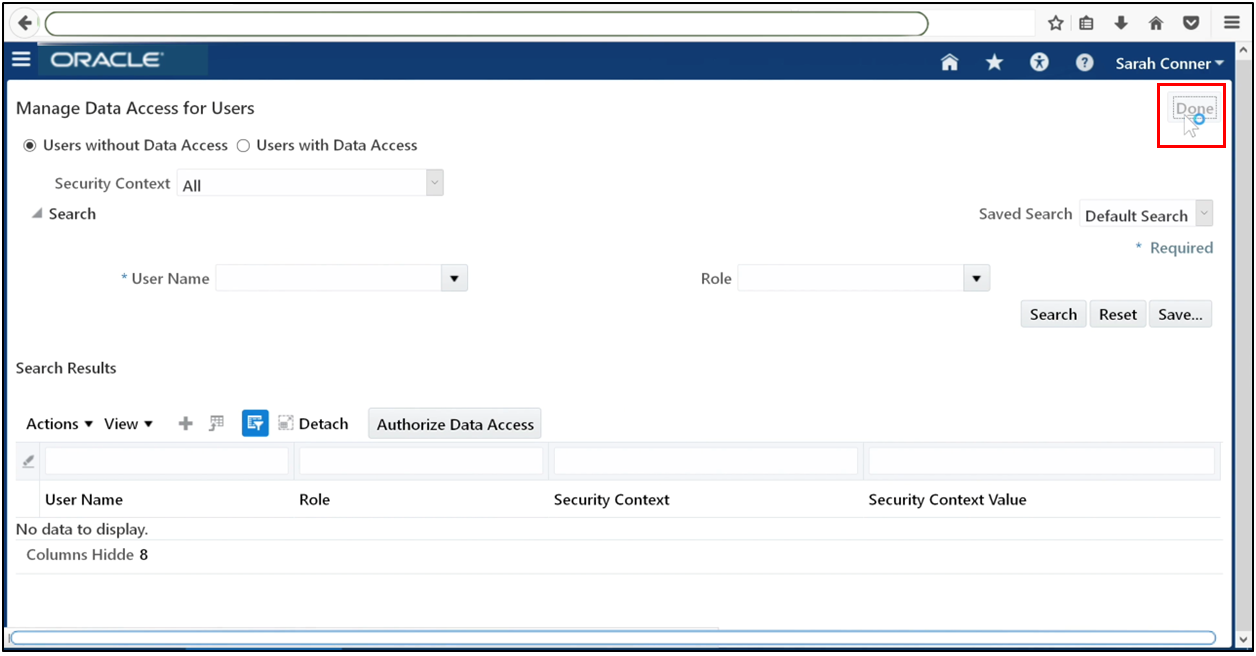
Click Done.
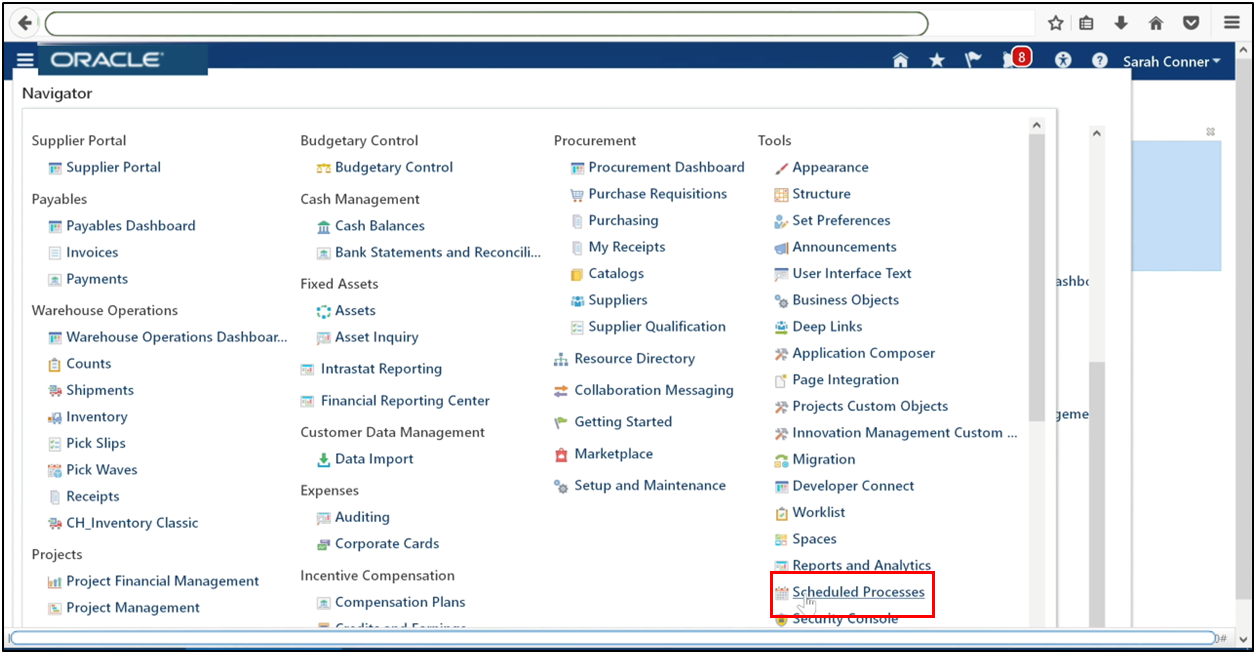
Step 16: Run Retrieve Latest LDAP Changes
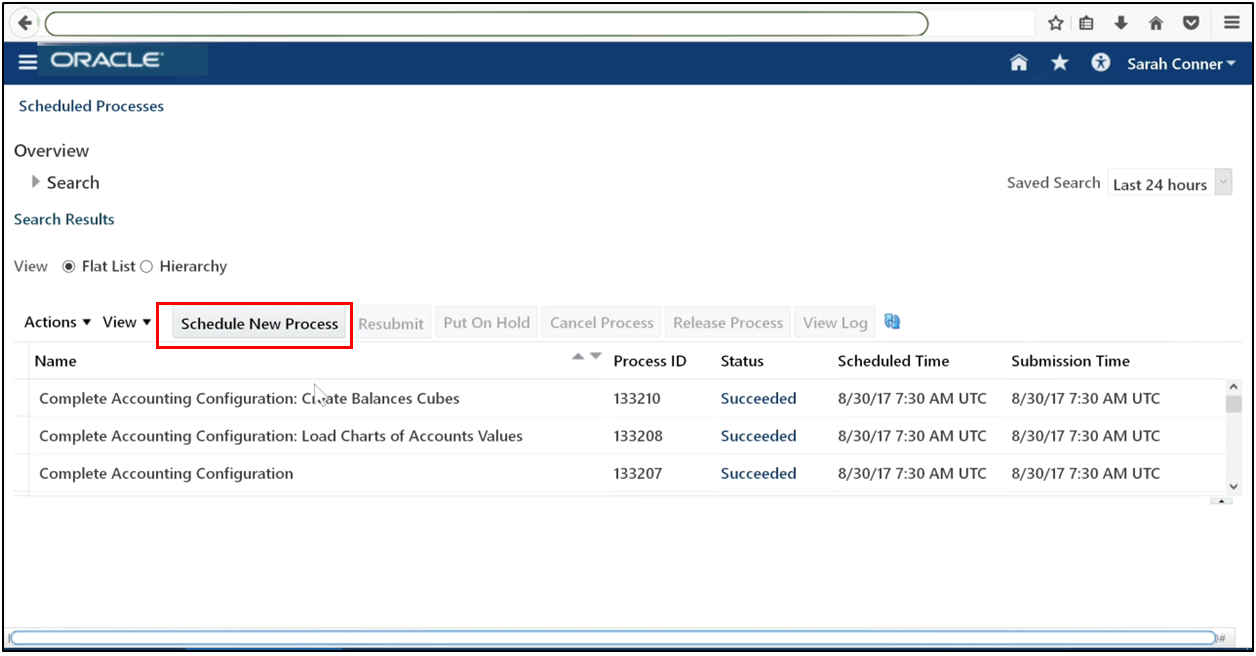
Go to Scheduled Processes.
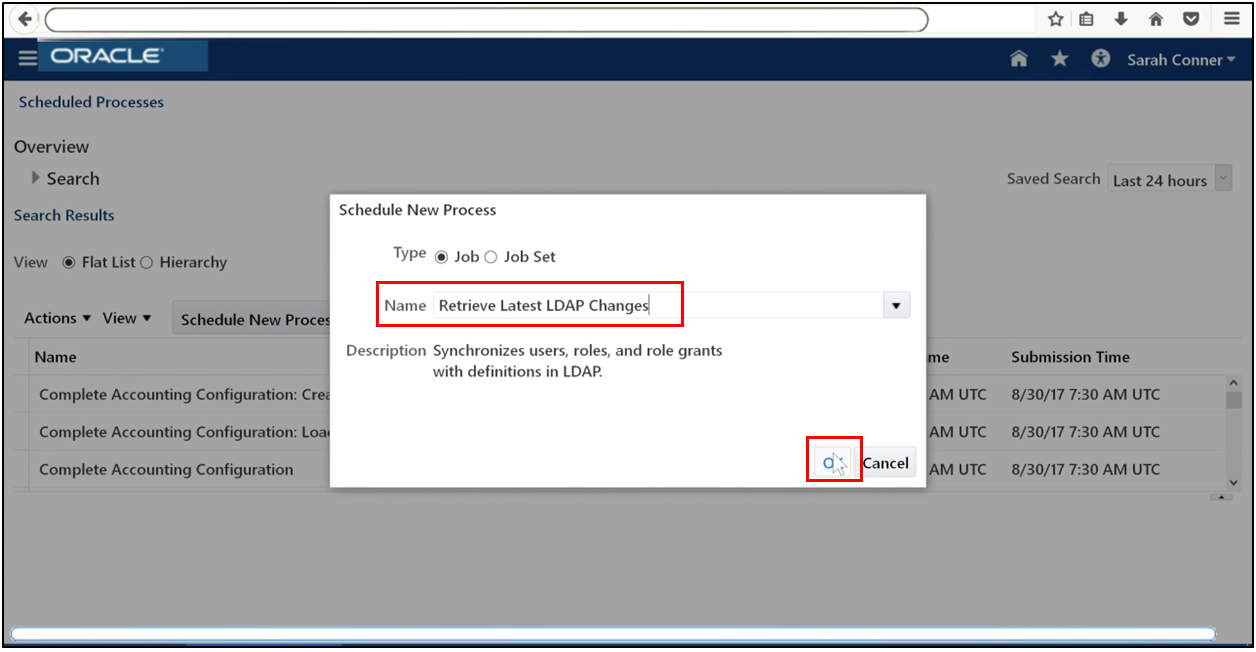
Schedule a new process.
Retrieve Latest LDAP Changes.
Click Submit.
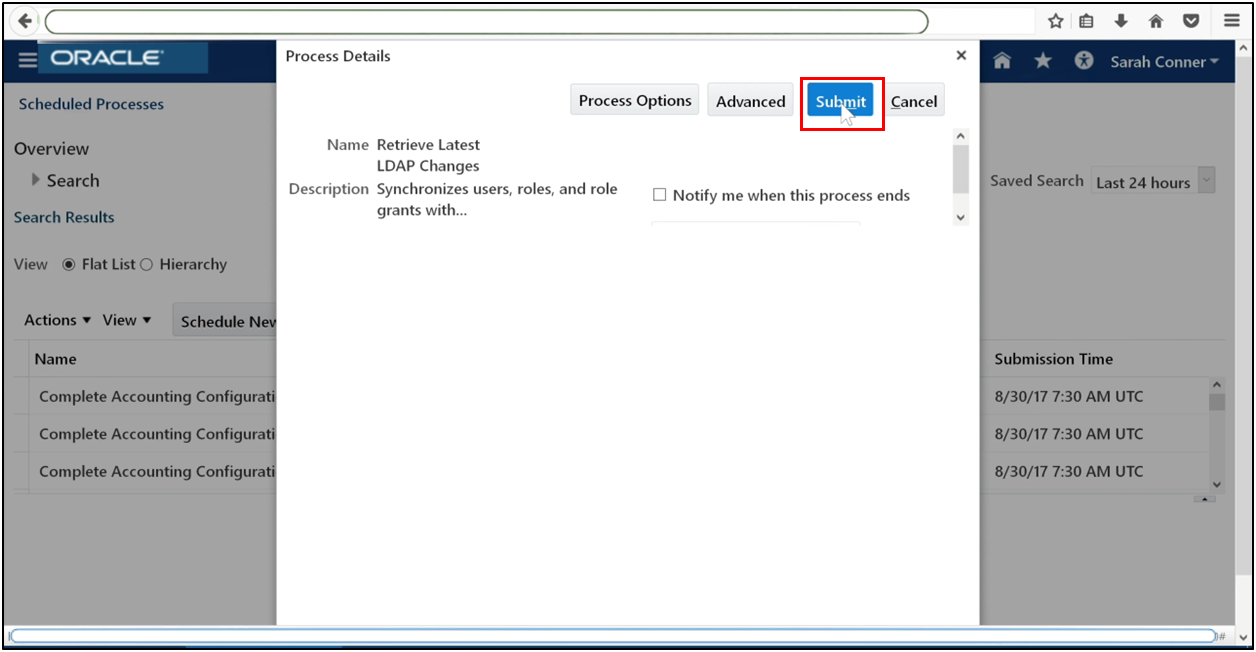
Wait until the process completes successfully.
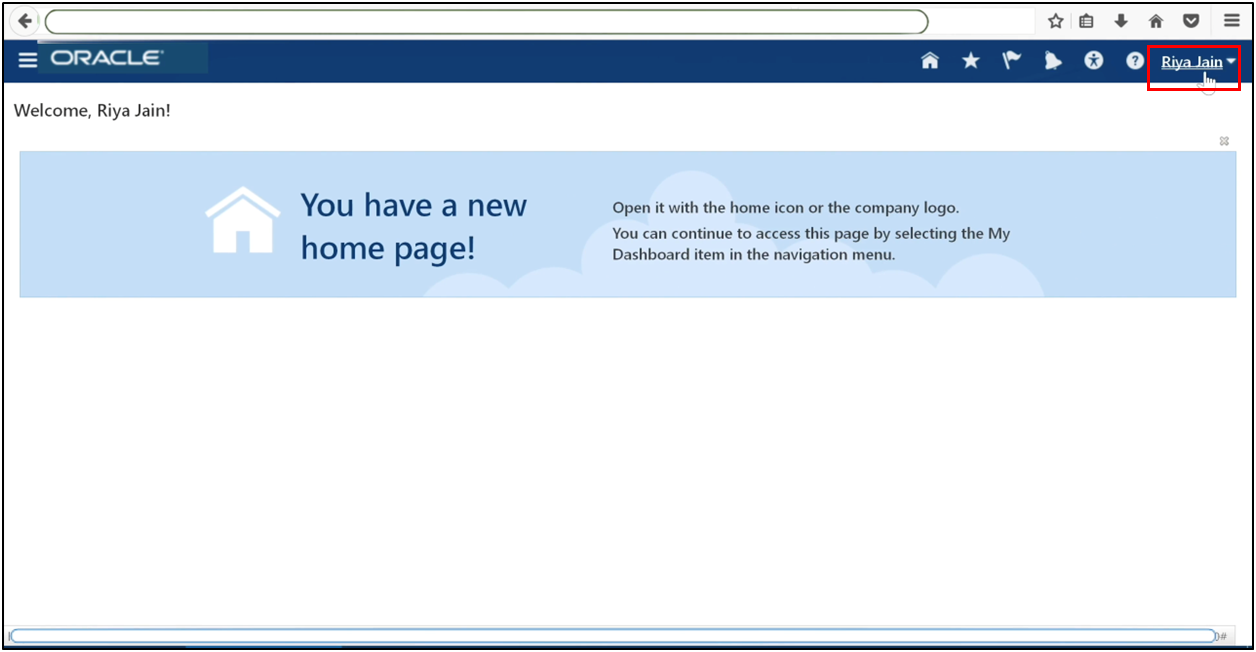
Step 17: Open Accounting Periods
Log in as the newly assigned user.
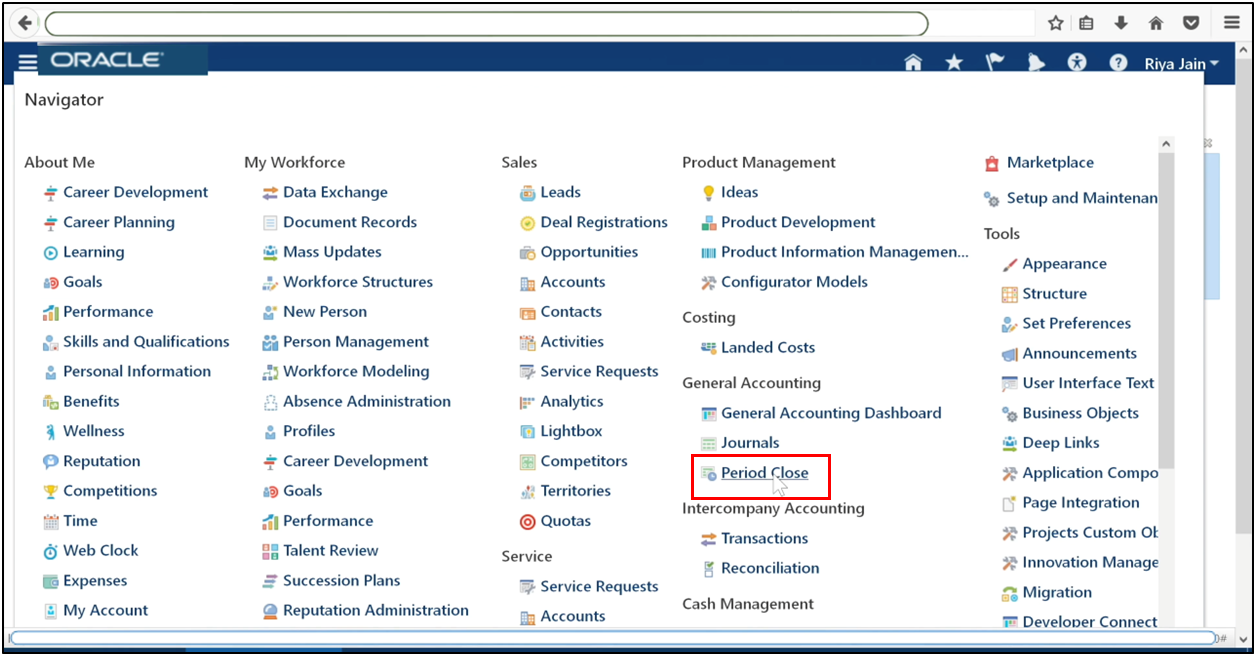
Navigate to General Accounting, then Period Close.
Select the Data Access Set as your ledger name.
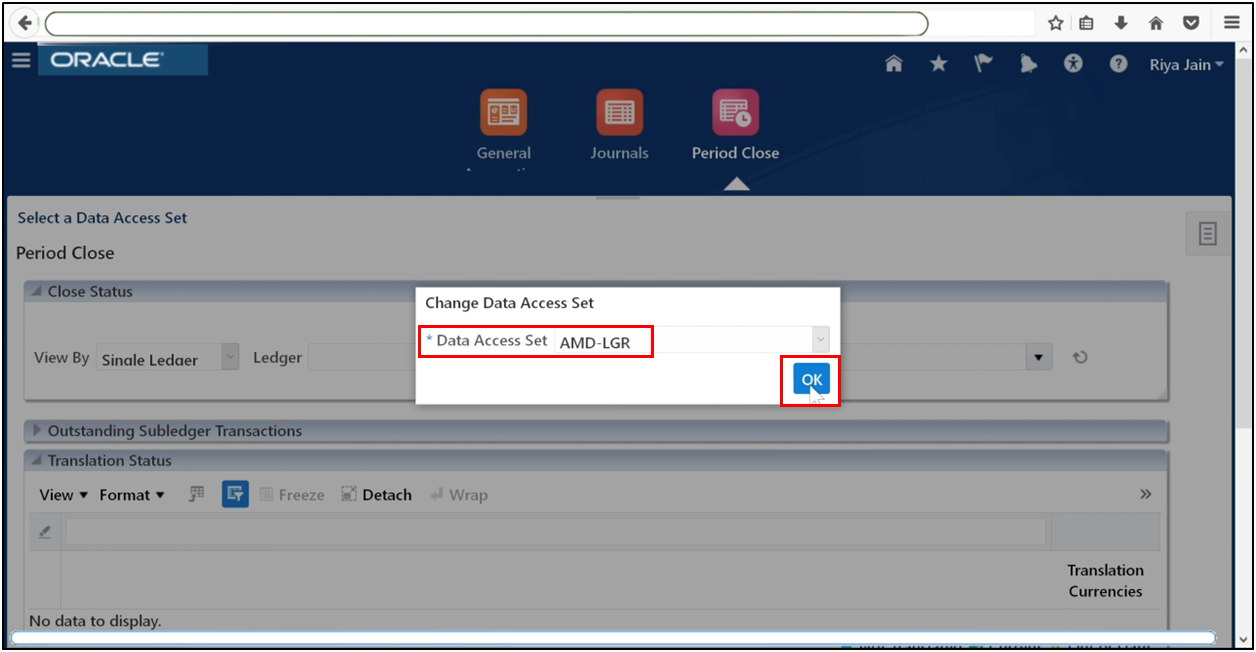
Open General Ledger.
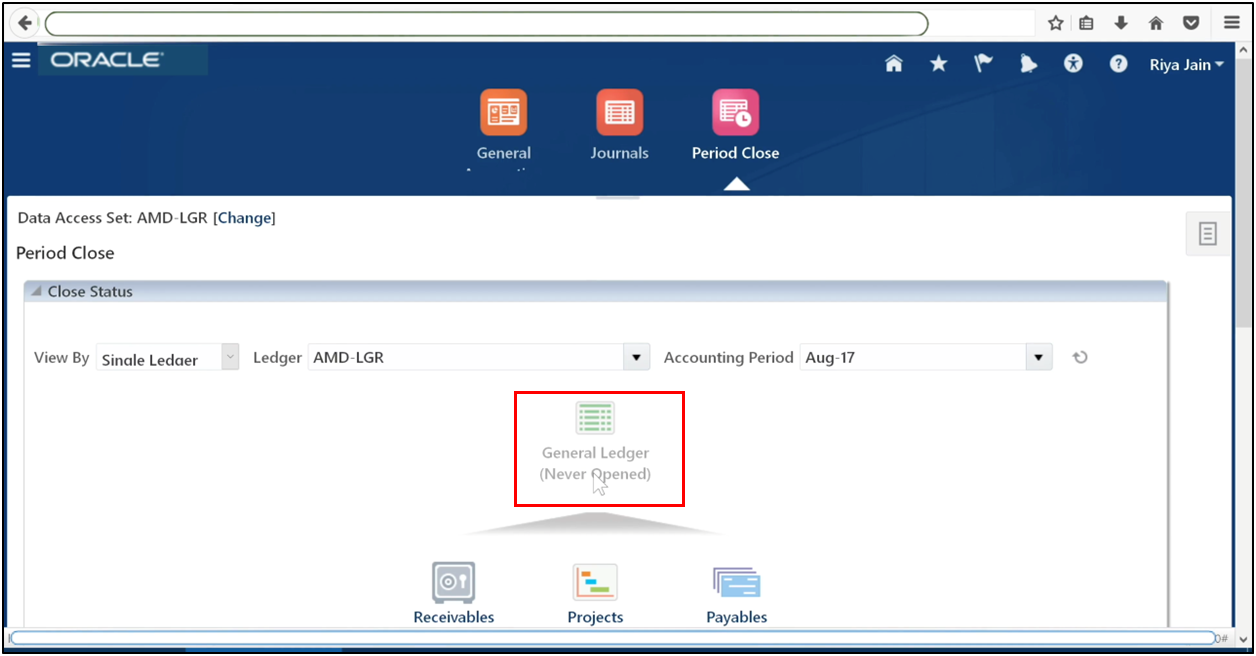
Click OK to open the first period.
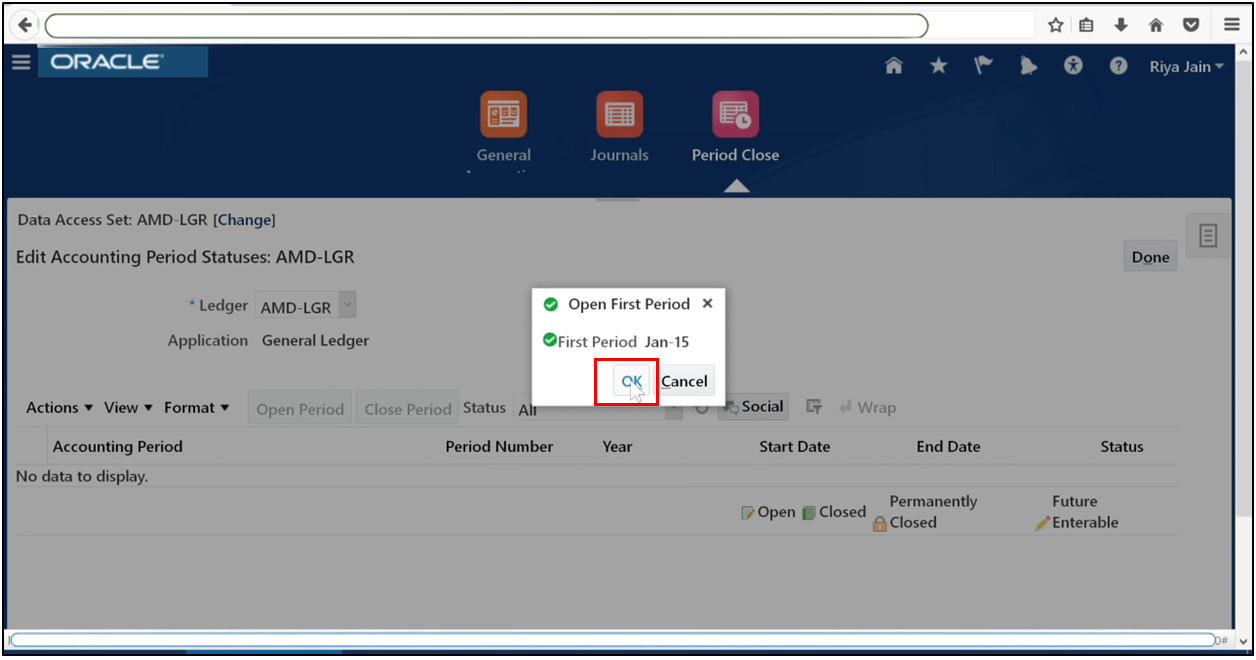
Click OK.

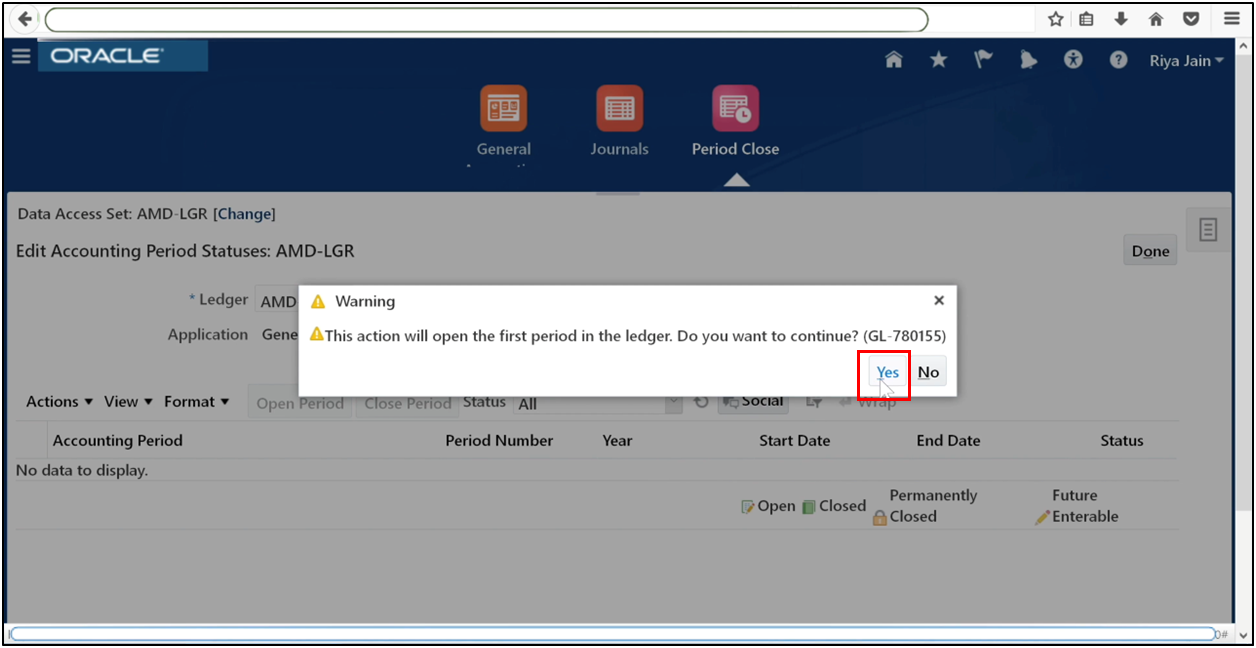
Click Yes.
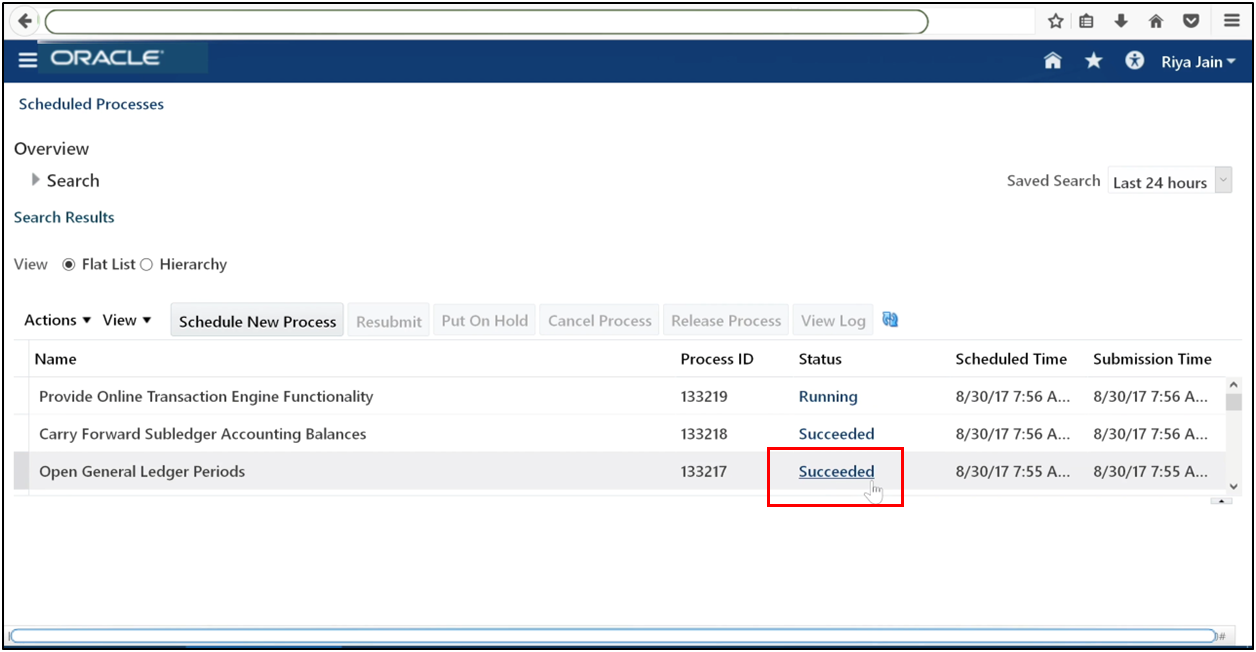
Monitor the submitted process until it is complete.
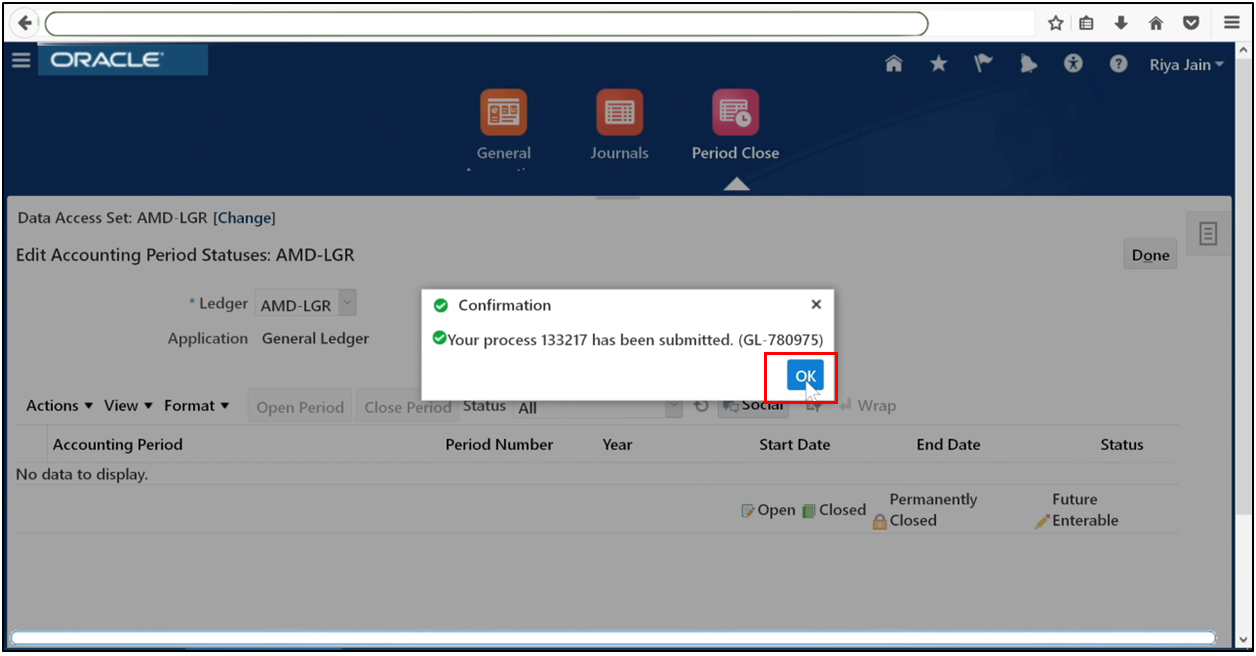
It will be shown as Succeeded.
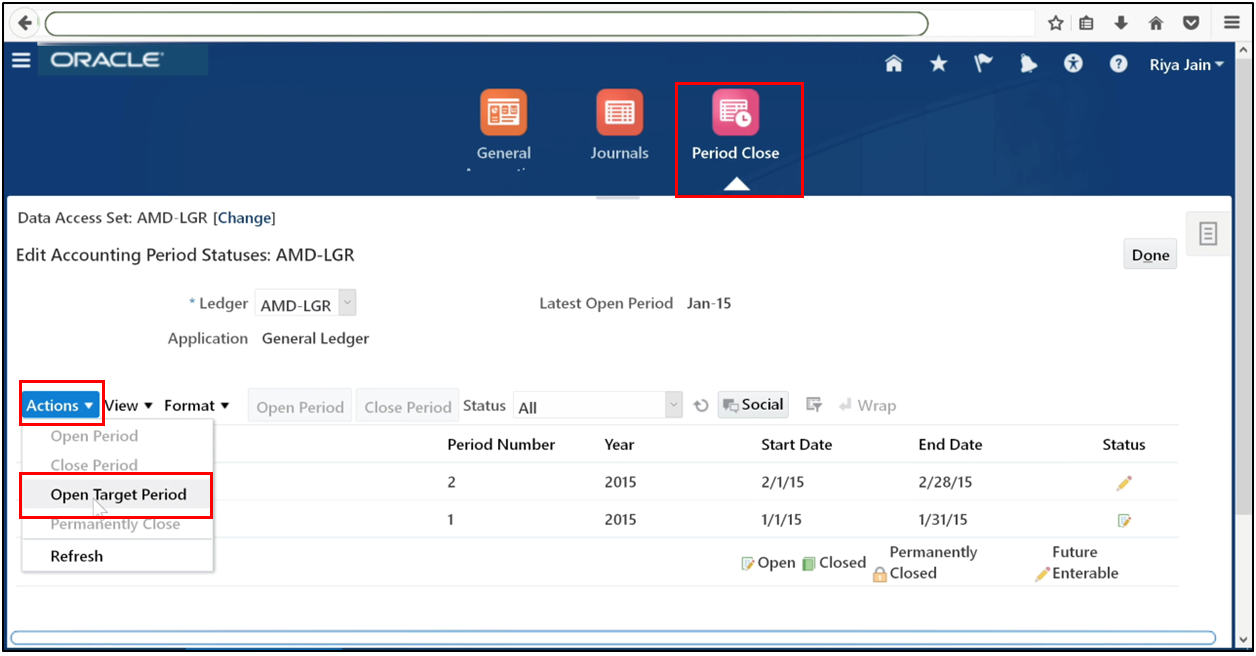
Refresh periods. Use Actions, then Open Target Period.
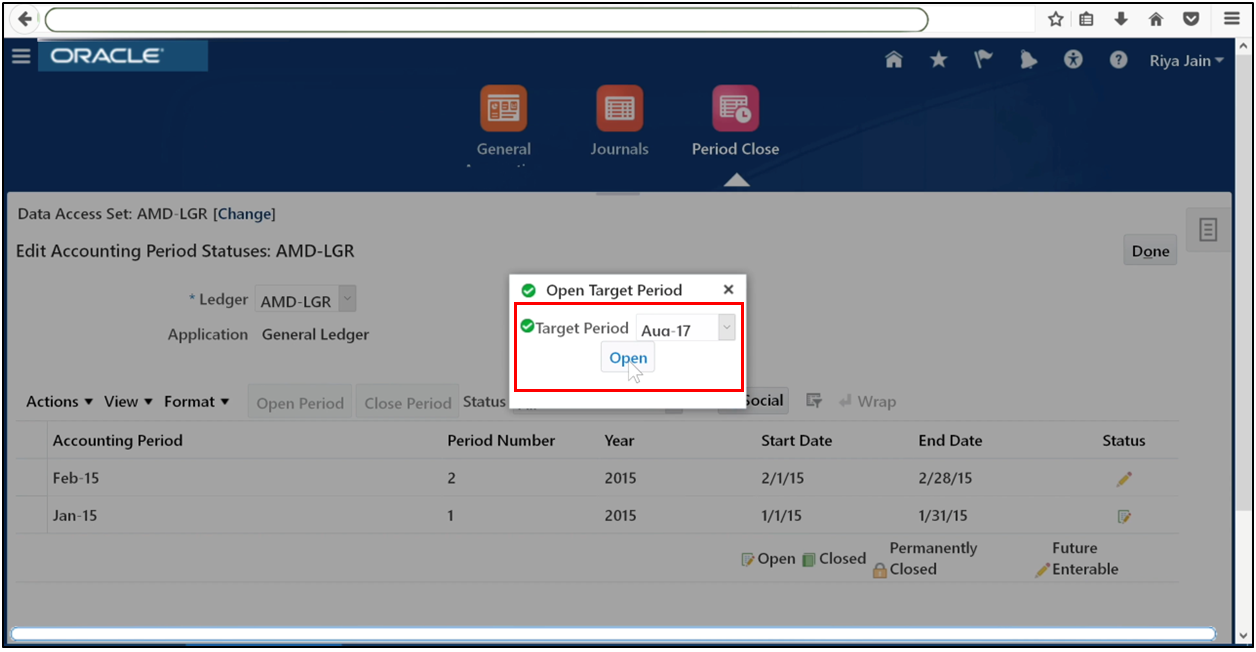
Open all periods up to the current period.
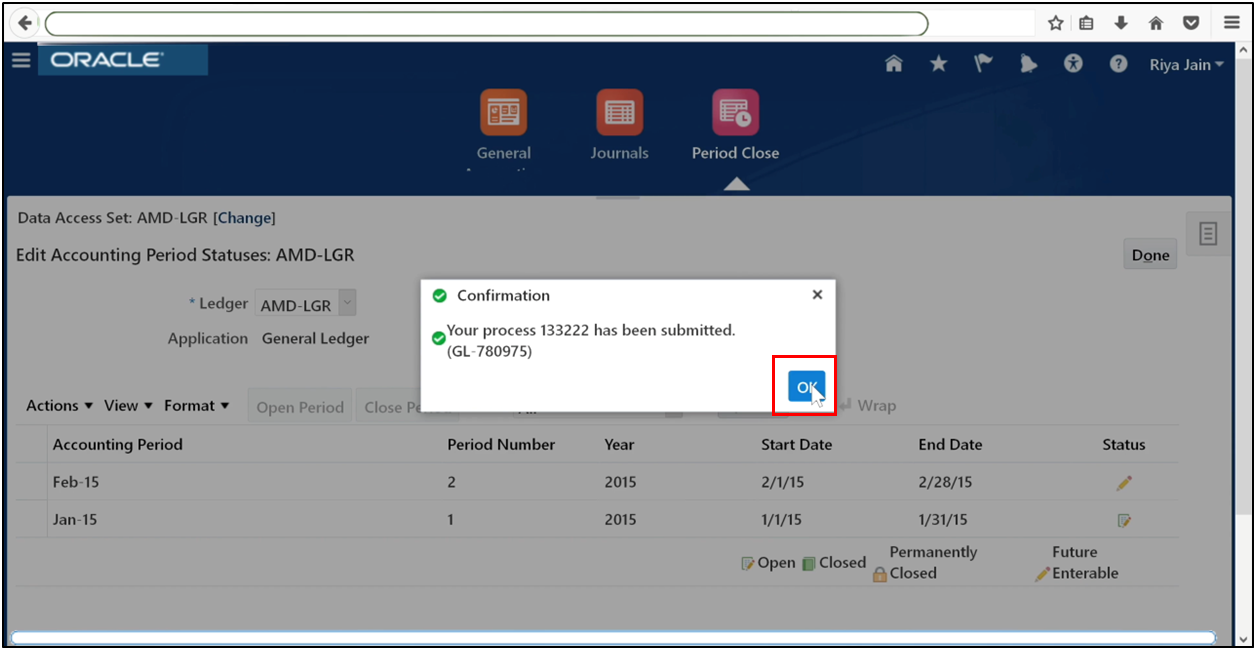
The process will be submitted; click OK.
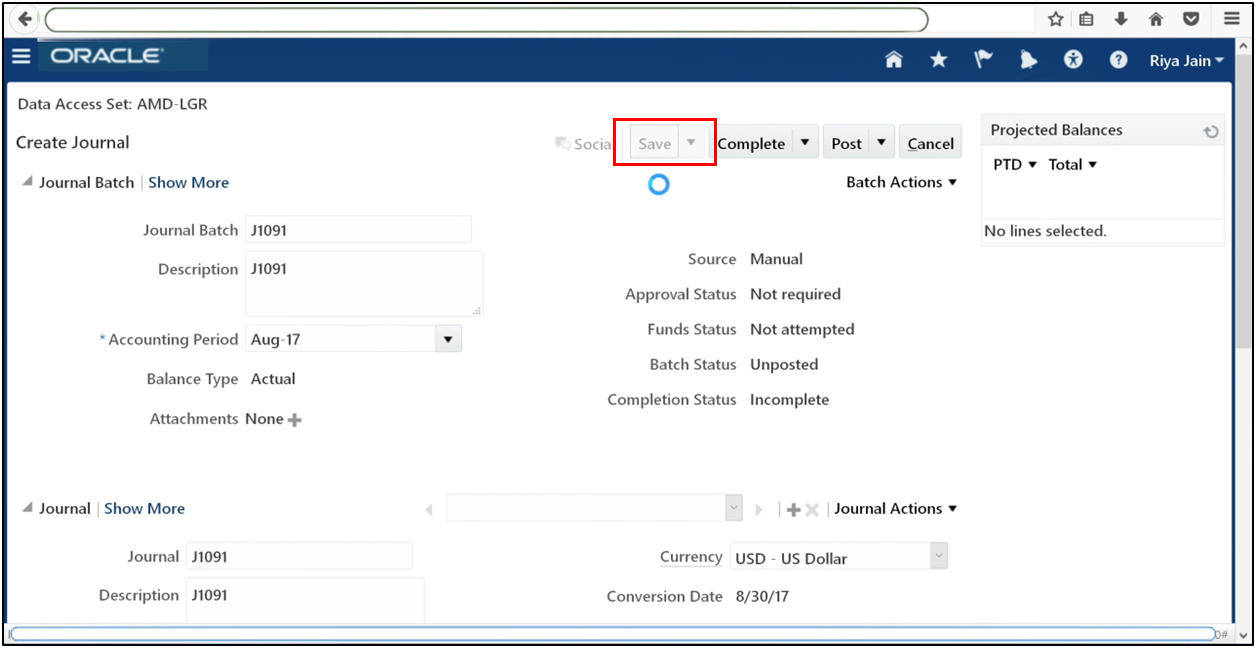
Step 18: Enter and Post a Journal
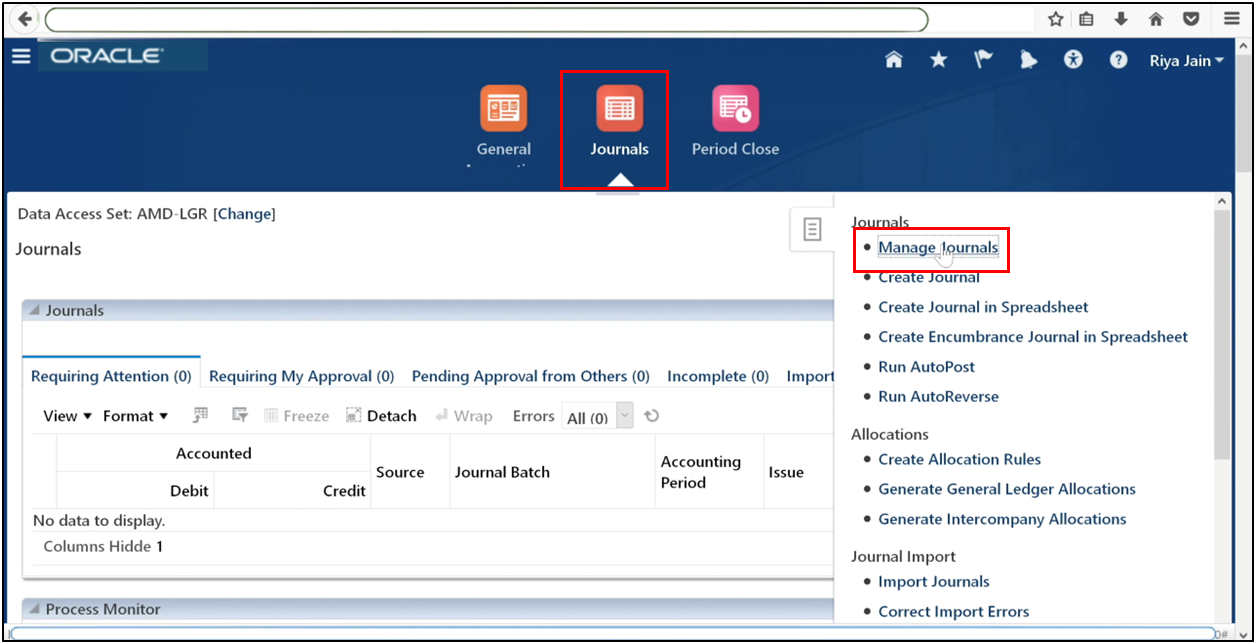
Go to the Journals work area.
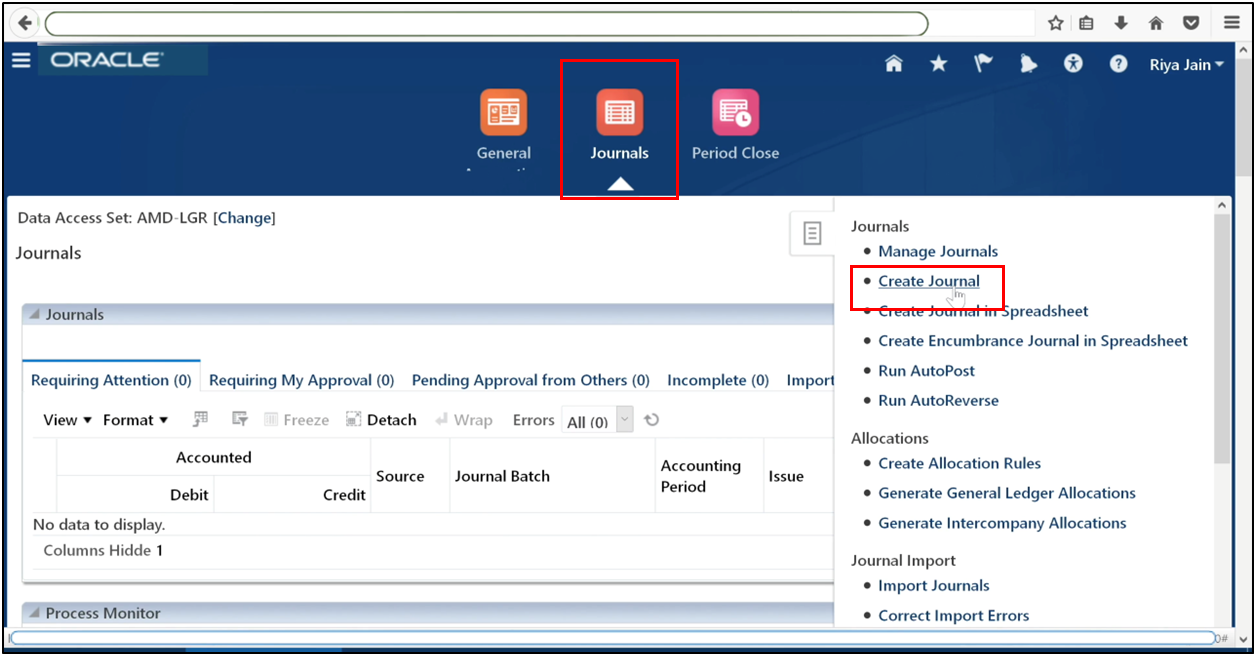
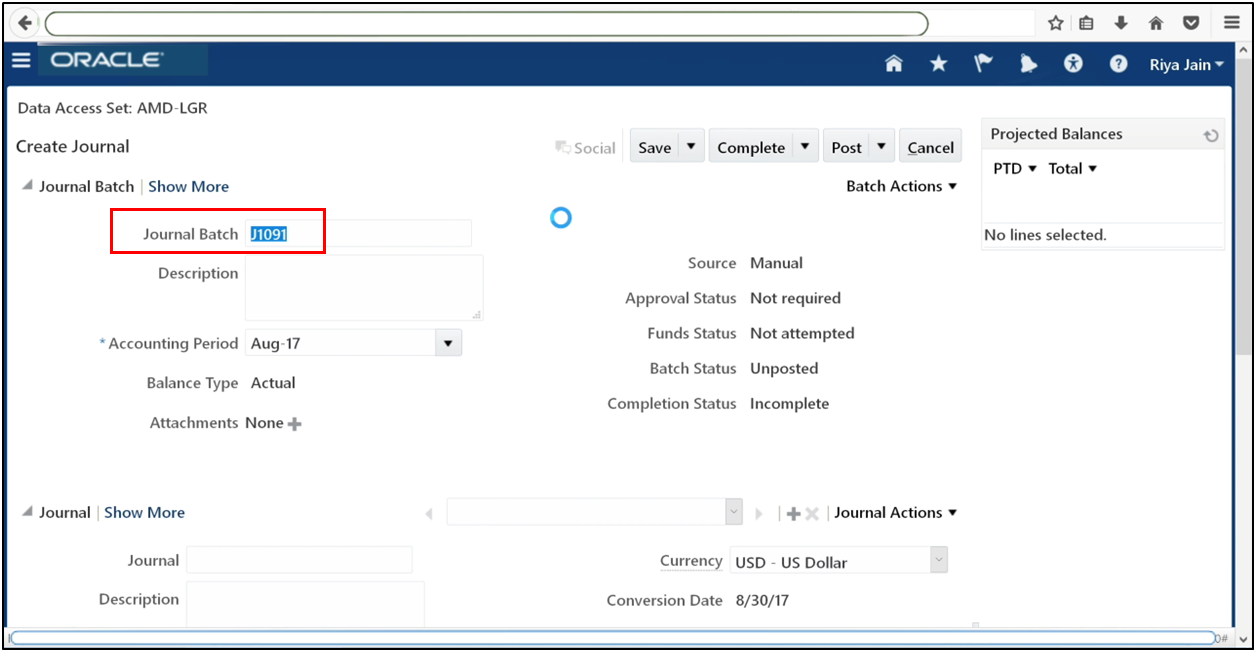
Open the right-side menu and click Create Journal. Enter journal header details.
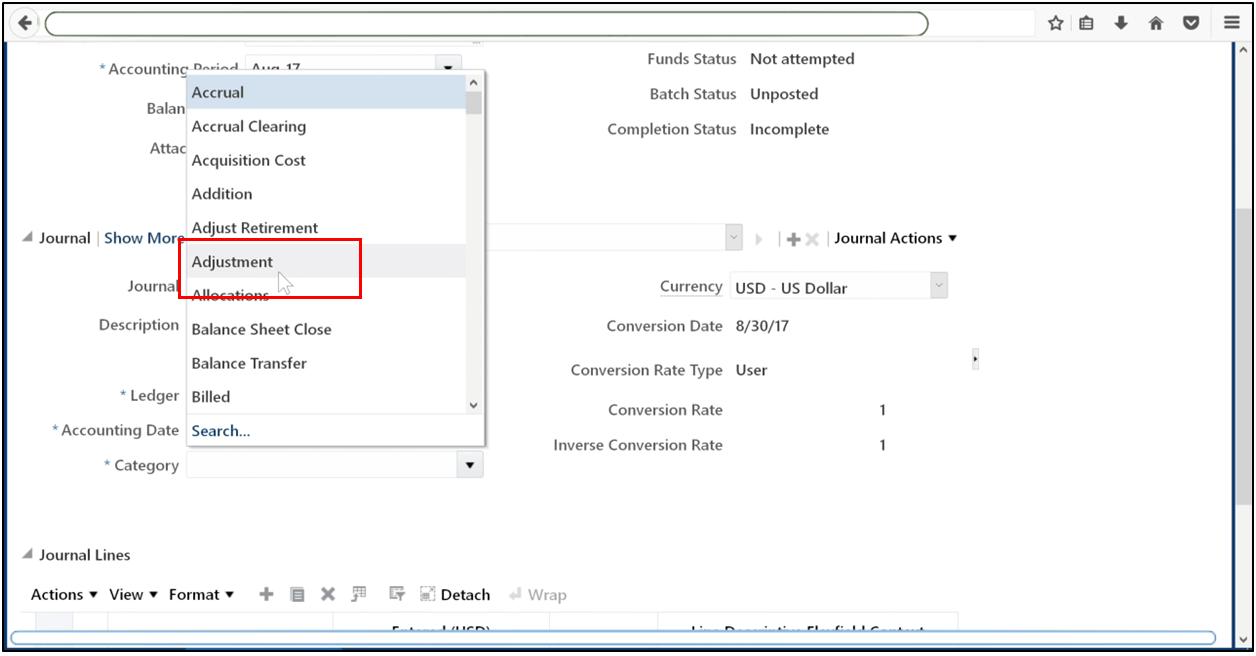
Define Category.
Enter journal lines.
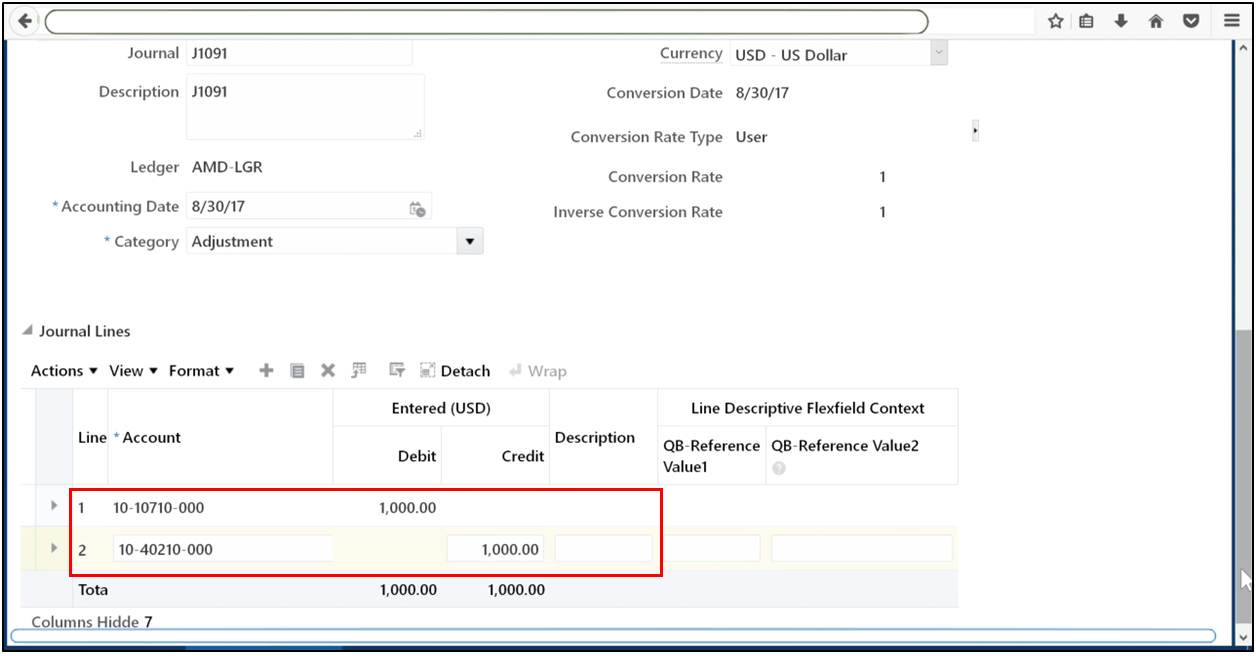
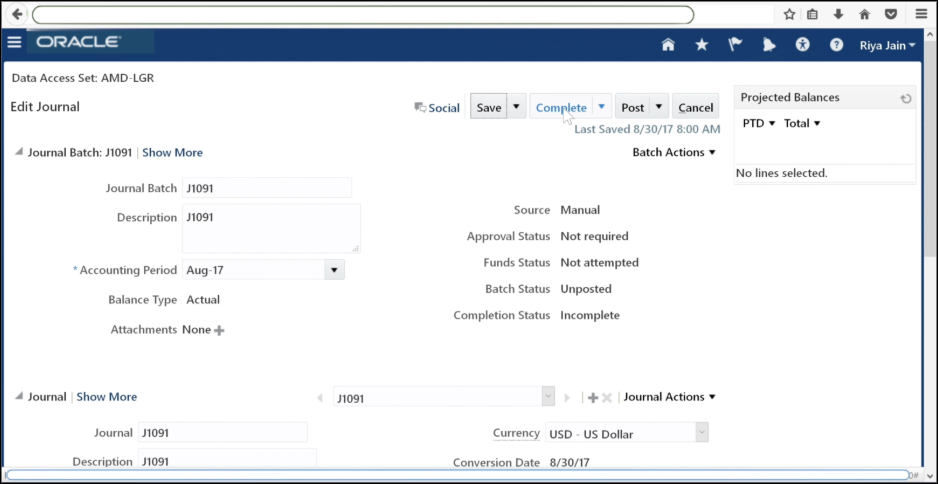
Save the journal.
Complete the journal.
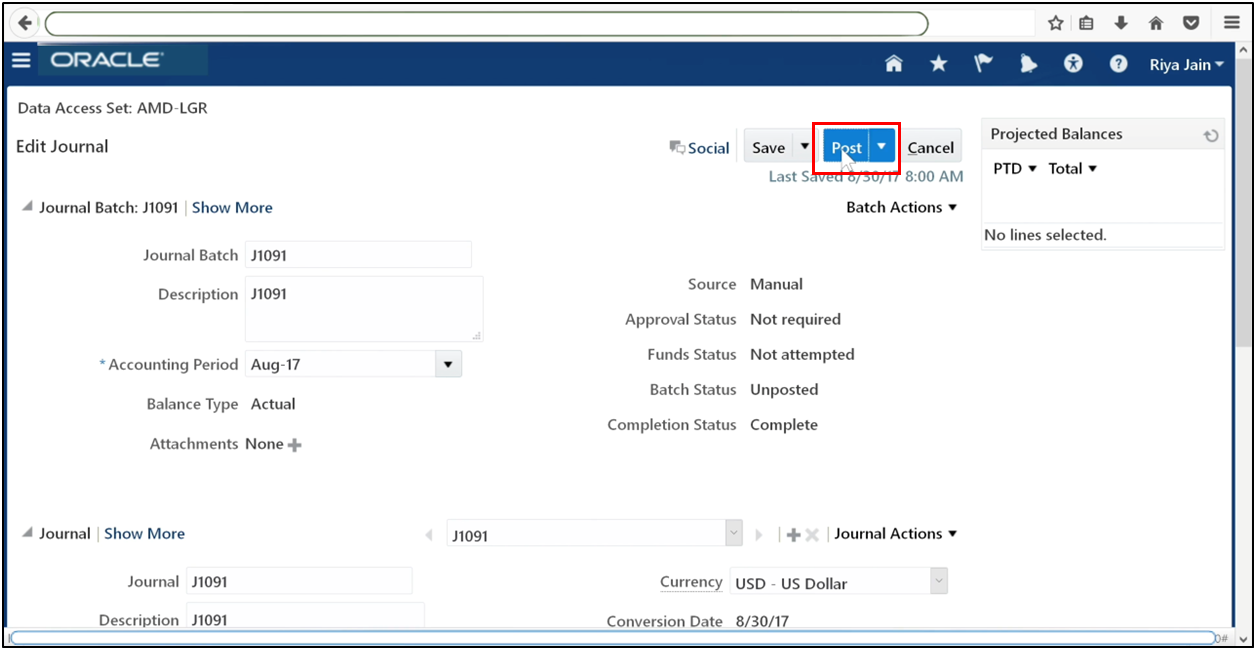
Post a journal.
The process has been submitted.
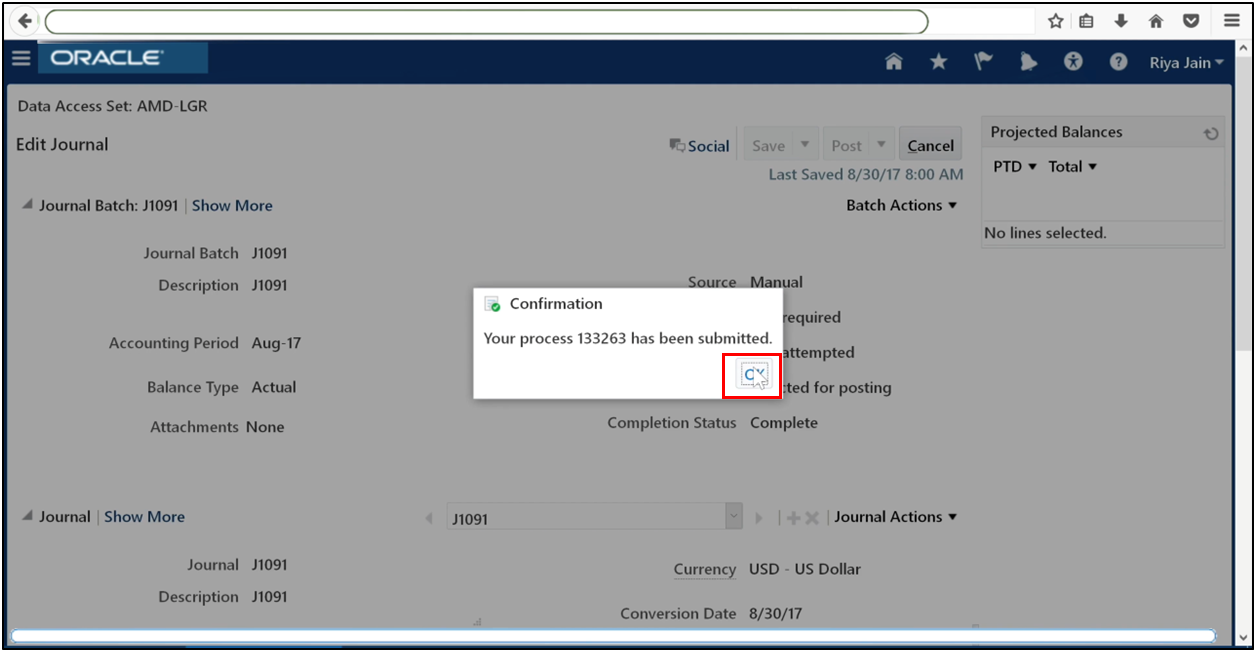
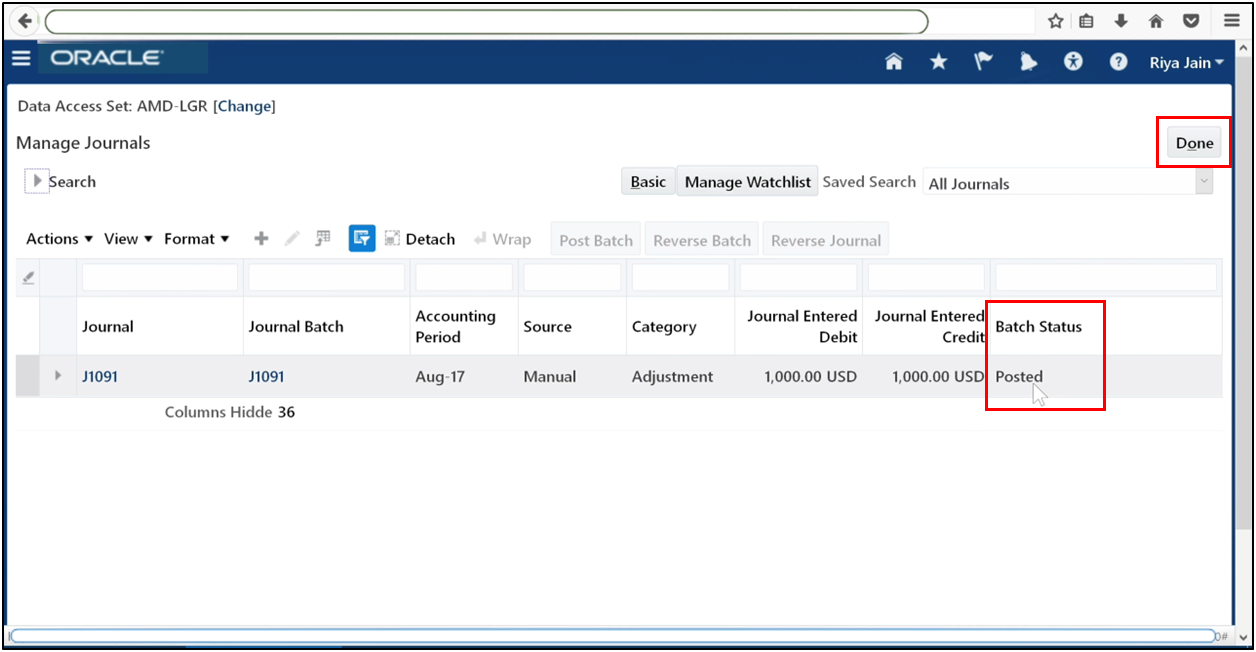
Verify successful posting from Manage Journals.
Step 19: Verify Posting Status
Navigate to Manage Journals.
Search for the journal.

See that the journal is posted and click Done.
Conclusion
With journals successfully posted, your setup is complete. Your ledger is now fully operational, and GL — Setting Up General Ledger in Oracle Fusion has been completed end to end. This configuration forms the backbone for accurate accounting, reporting, and financial control across your organization.
Frequently Asked Questions
Common errors when uploading the Chart of Accounts spreadsheet in Oracle Fusion
Errors during Chart of Accounts upload in Oracle Fusion General Ledger are usually caused by invalid segment values, duplicate entries, incorrect value set types, or disabled segments. Using an outdated template or incorrect parent-child hierarchies can also cause upload failures.
How to create and deploy flex field segments for GL in Oracle Fusion
To create flex field segments for GL, define the accounting flex field under Manage Chart of Accounts, assign value sets to each segment, and deploy the flex field. Deployment is required before the segments can be used in ledgers or journal entries in Oracle Fusion General Ledger.
Steps to open the first GL period after setup in Oracle Fusion
After completing GL setup, navigate to General Accounting, then Period Close, select the ledger data access set, and open the first accounting period. Monitor the submitted process until it completes successfully, then refresh and open periods up to the current period.
How to assign General Ledger roles to user profiles in Oracle Fusion
General Ledger roles are assigned through the Security Console. Edit the user account, add roles such as General Accountant, Controller, or Financial Analyst, save the changes, and run Retrieve Latest LDAP Changes to activate the roles in Oracle Fusion.
Best practices for defining legal entities and business units in Fusion GL
Each legal entity in Fusion GL should represent a statutory reporting unit and be correctly linked to ledgers and business units. Use consistent naming, assign legal addresses and jurisdictions early, and align entities properly to support accurate reporting and compliance.