Overview
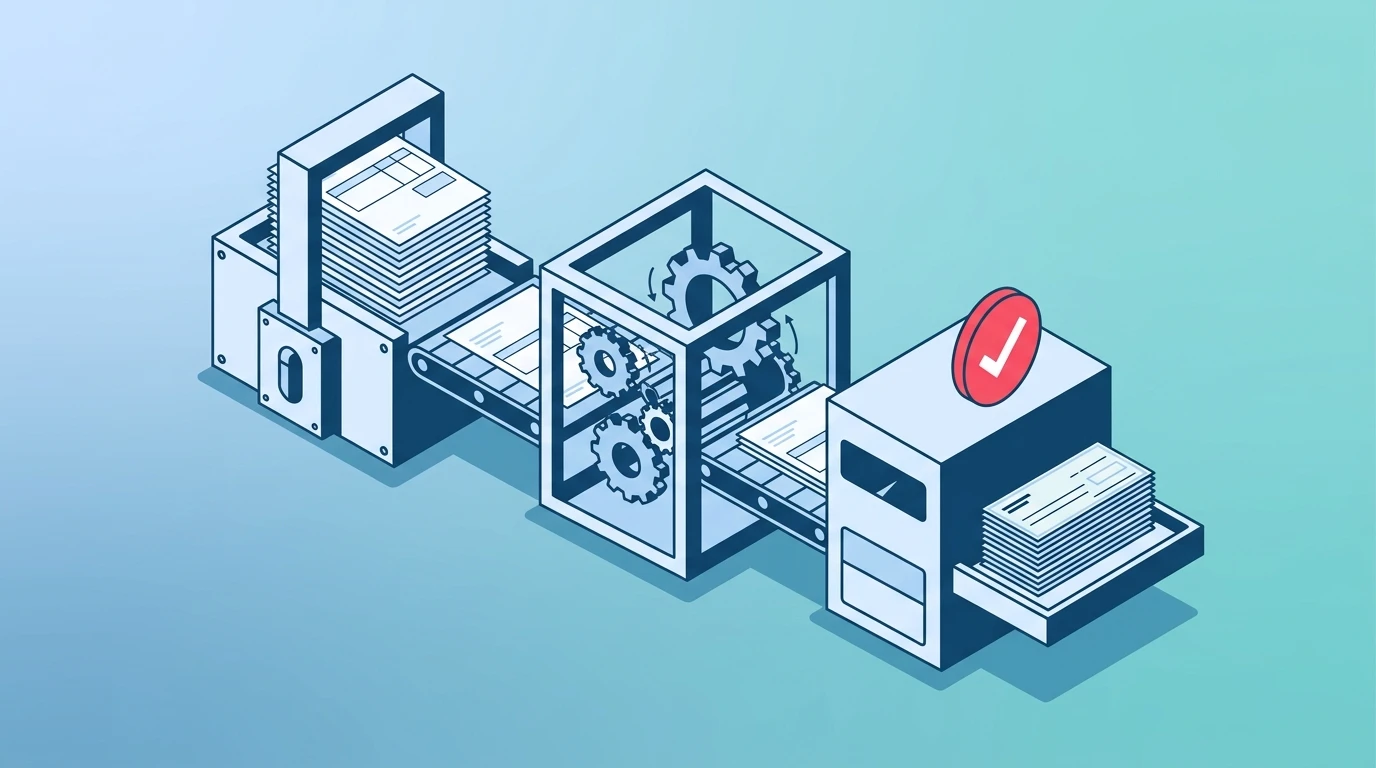
In the high-stakes world of corporate finance, efficiency isn't just a goal; it's a requirement. For an accounts payable accountant handling thousands of transactions, manual entry is a recipe for errors. The Oracle Fusion Accounts Payable module offers a robust solution: the Payment Process Request (PPR). This engine allows you to manage automatic payments for multiple suppliers simultaneously.
Whether you are reconciling accounts payable and receivable or managing a specific purchase order to a payment cycle, mastering the PPR is essential. This guide breaks down the end-to-end AP payment process, from invoice validation to final accounting.
For a comprehensive, hands-on walkthrough of Accounts Payable and the full Oracle Fusion Financials suite — including General Ledger, Fixed Assets, Cash Management, and more — check out our Oracle Fusion Financials Training. The course covers each of these topics in depth with live Oracle Cloud demonstrations.
For official Oracle documentation on Payment Process Request (PPR), payment processing, and payment formats, refer to the Oracle Financials Cloud Documentation. You can also access the Payables specific documentation and the detailed Payment Process Request guide for comprehensive reference materials.
Verification and Selection Criteria
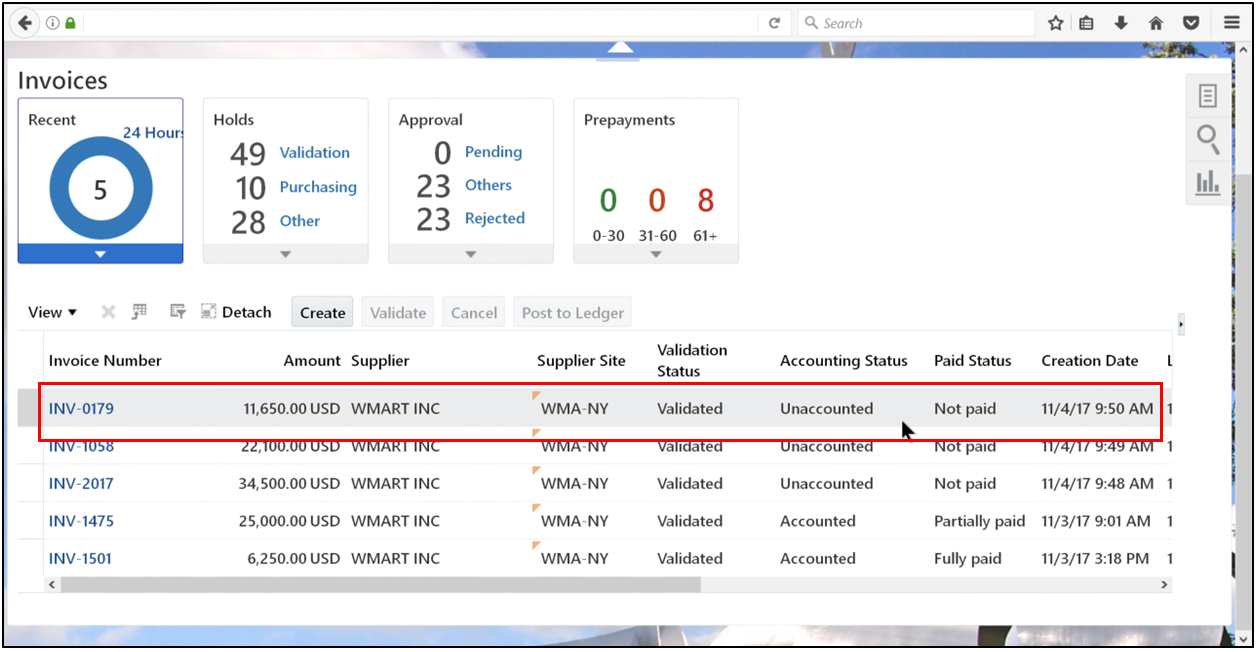
Before initiating automatic payment processing, your data must be clean. The system only picks up what is ready for the accounts payable approval process. Every invoice you intend to pay must meet two primary conditions:
- Status: The invoice must be validated.
- Paid Status: The status should be marked as Not Paid.
The system scans the ledger for invoices meeting specific criteria. If an invoice is stuck in Incomplete status, the PPR will ignore it. This distinction is crucial when evaluating accounts receivable versus payable workflows.
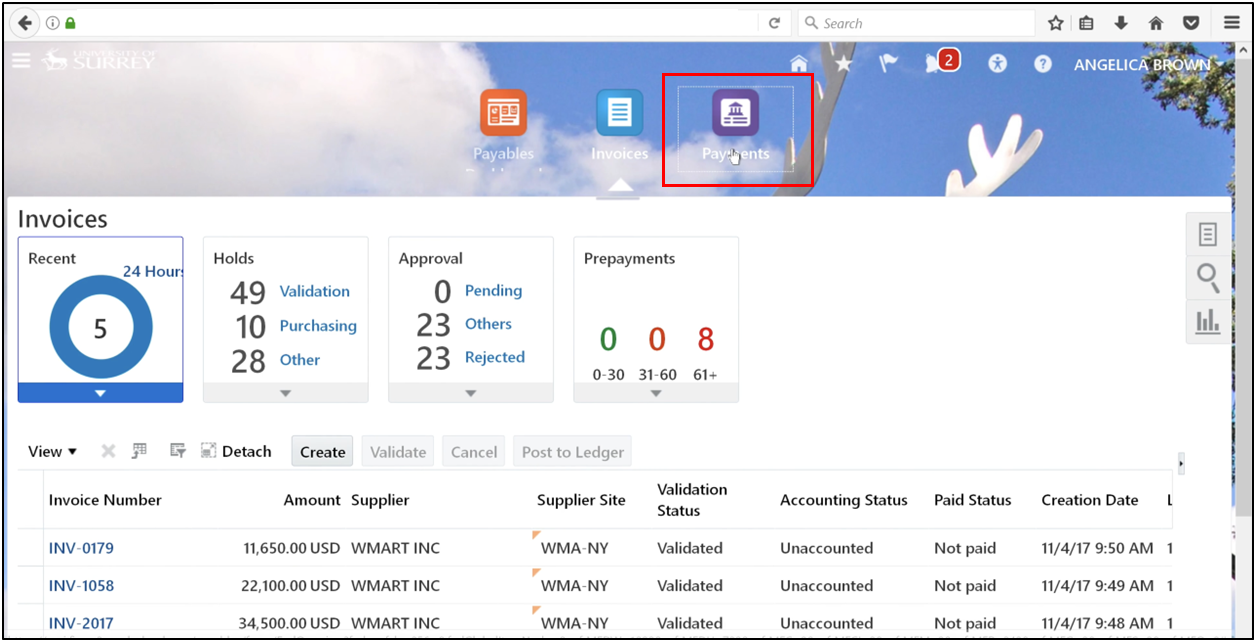
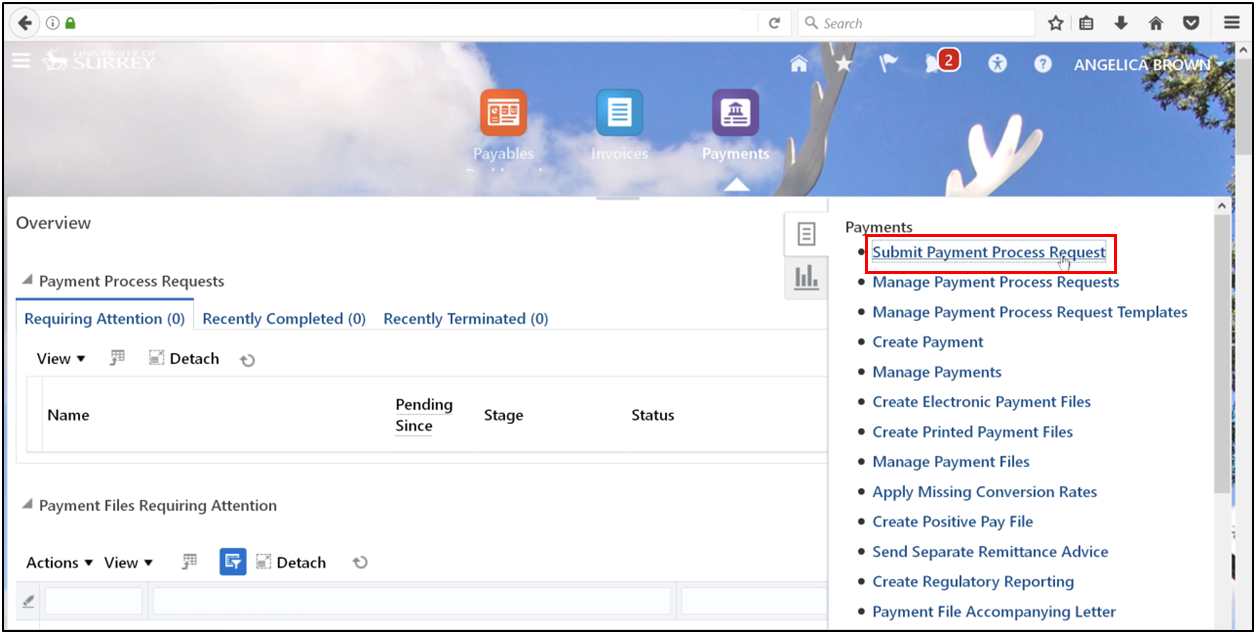
Initiating the Payment Process Request (PPR)
The journey begins in the Payments work area. Rather than paying one supplier at a time, you create a request that acts as a container for a batch.
Step-by-step Guide to Submit a Payment Process Request in Oracle Fusion
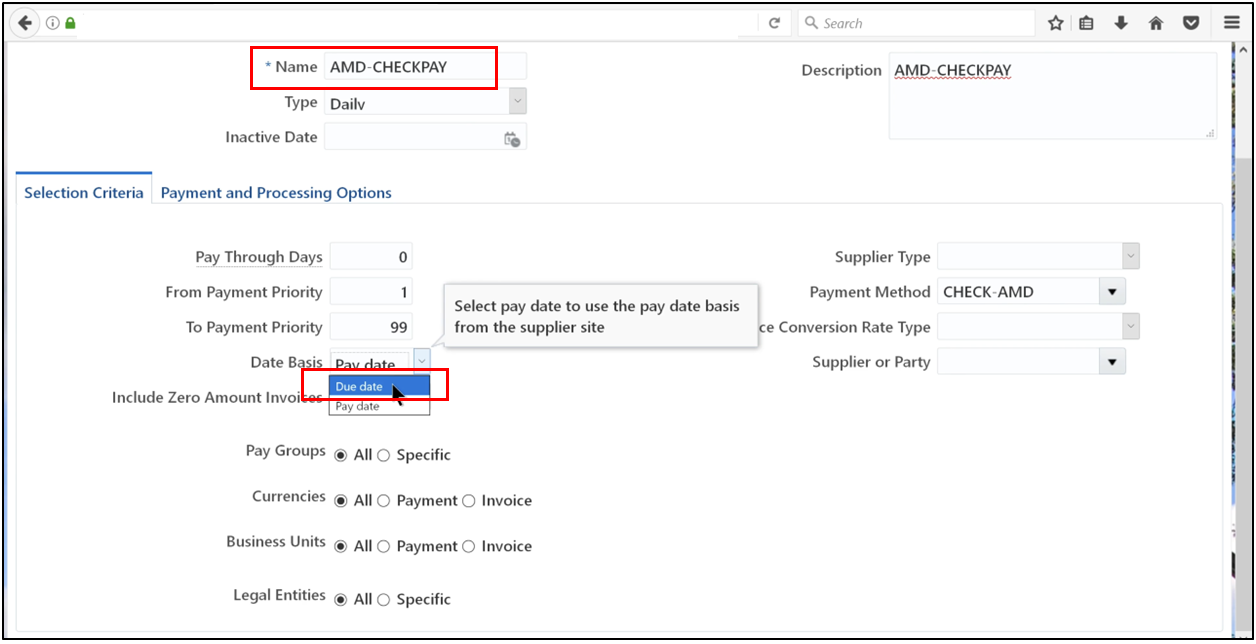
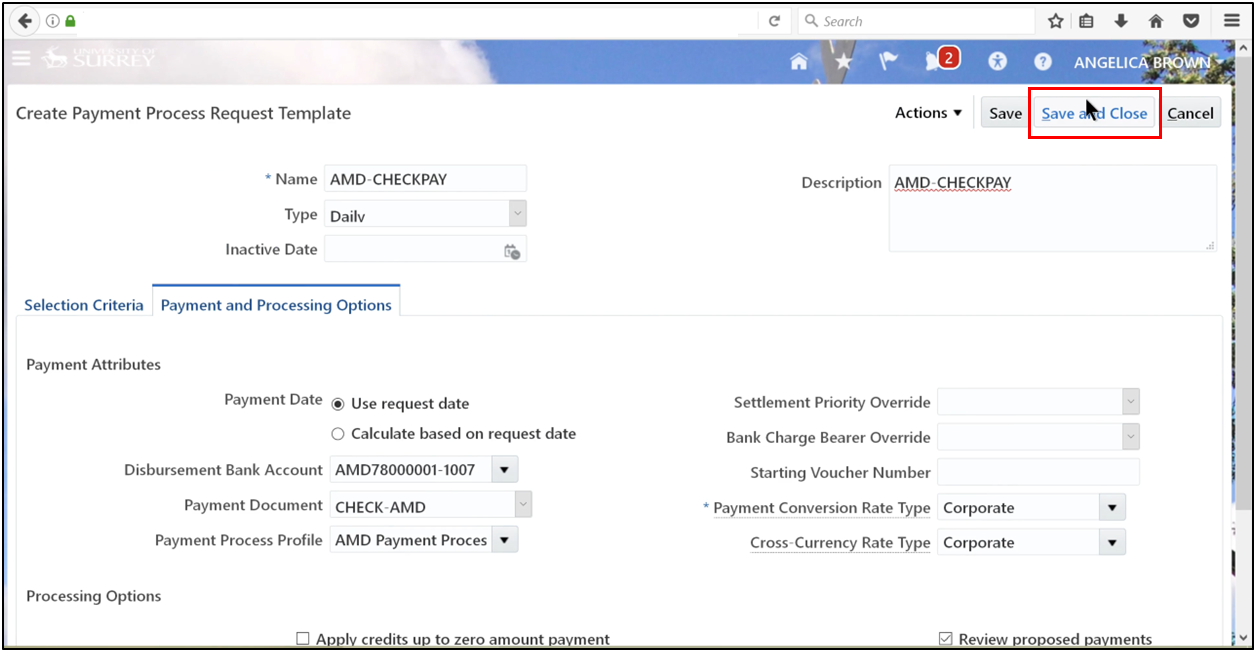
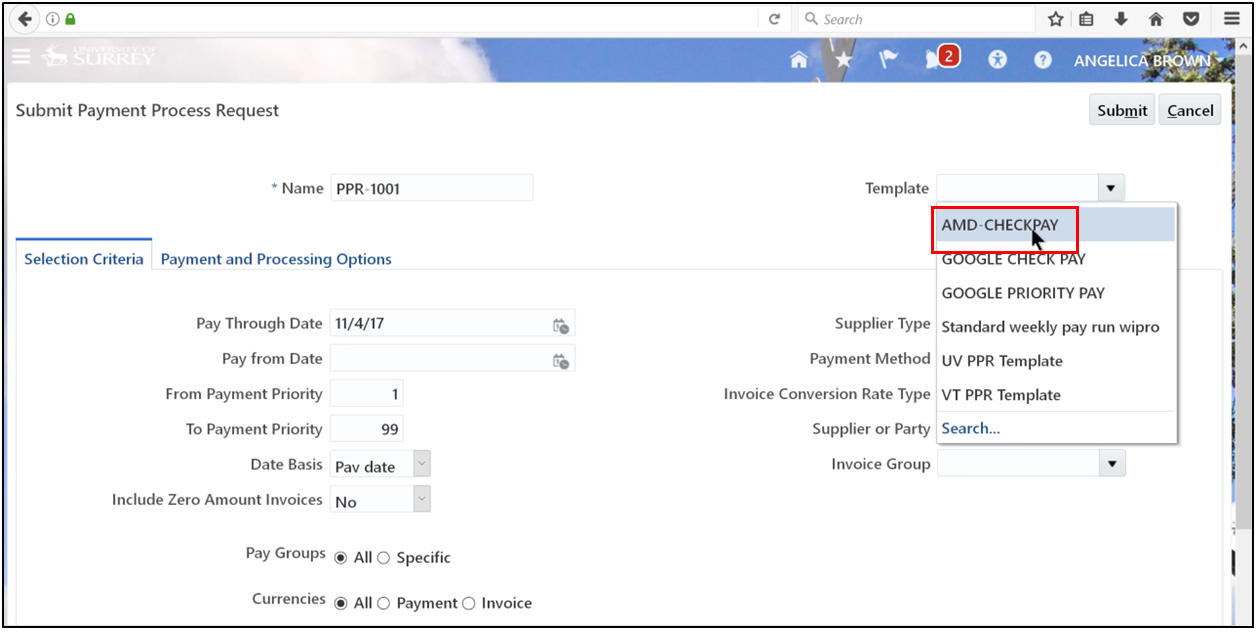
Step 1: Create a Payment Process Request (PPR) Template
- Navigate to Payables and enter the Payments area.

- Click Action and select Create.
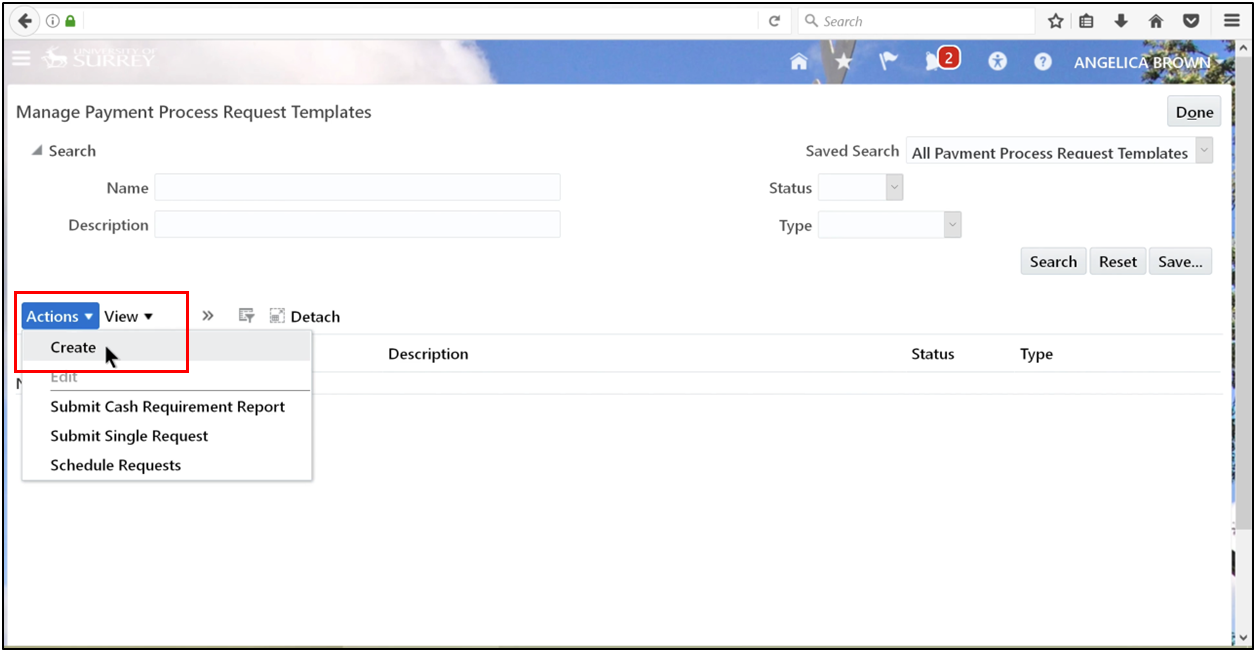
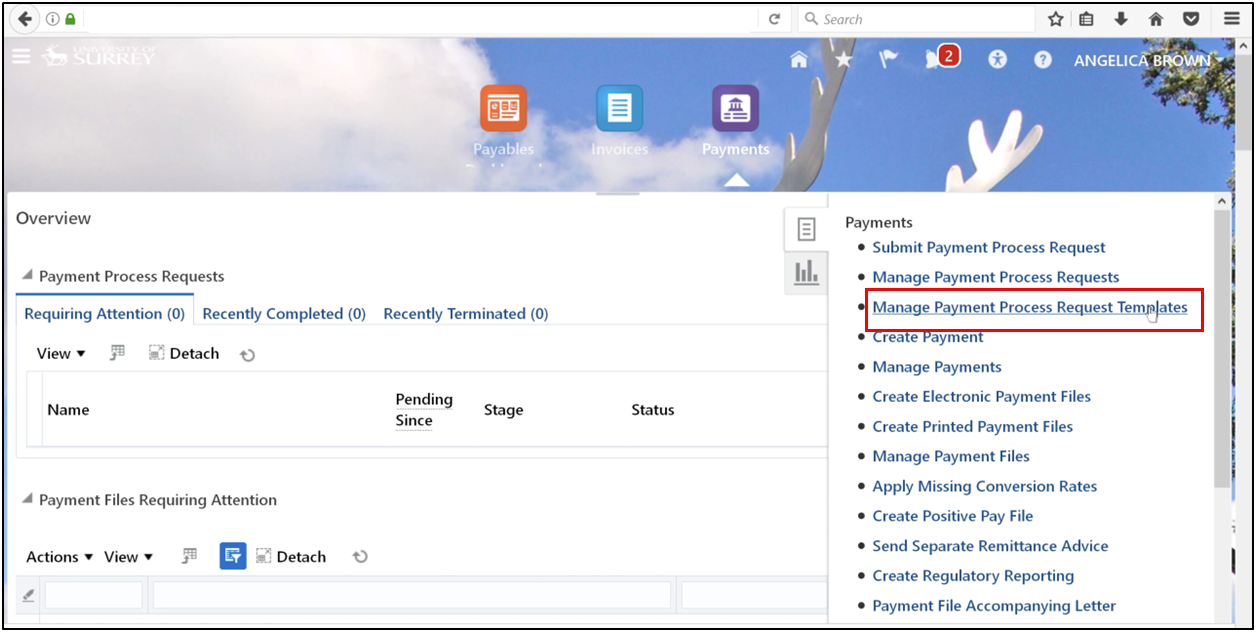
- From the right-side menu, select Submit Payment Process Request.
-
Enter a unique name for the request and choose a predefined template to default your configurations.
-
Select Due Date.
This image shows how users configure a Payment Process Request by entering a unique request name, selecting a predefined template, and defining the due date to support automatic payment processing in the accounts payable process within Oracle Fusion.
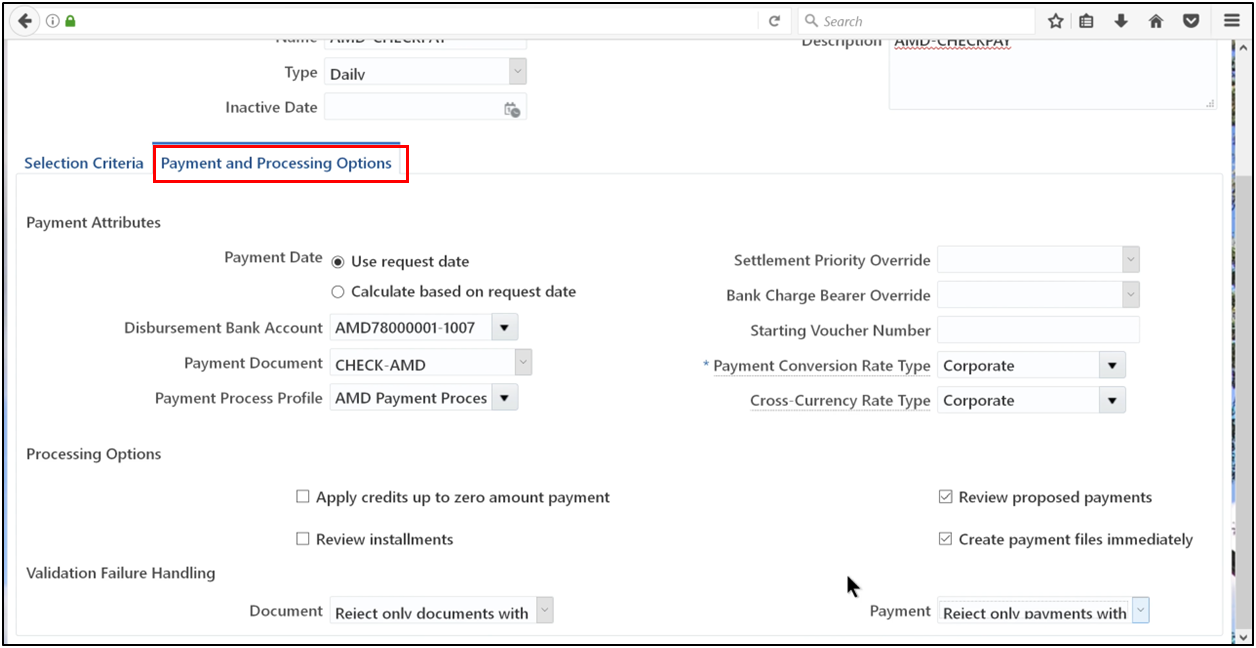
- Save and Close.
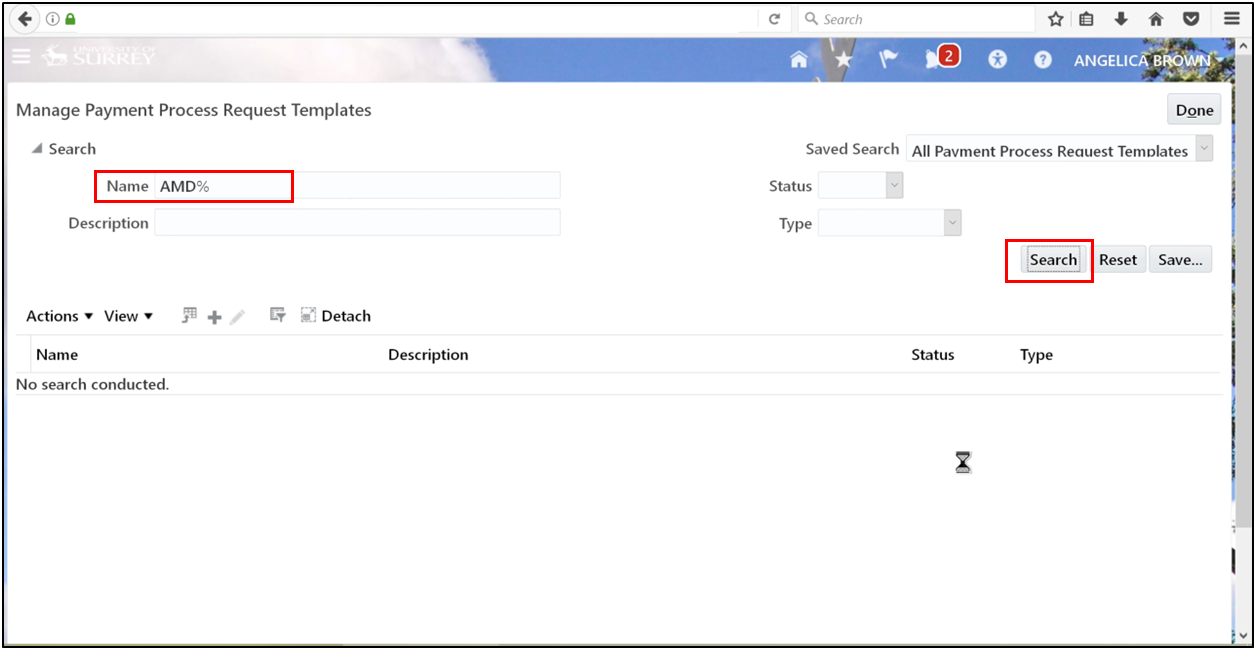
- Search Name% and click Search.
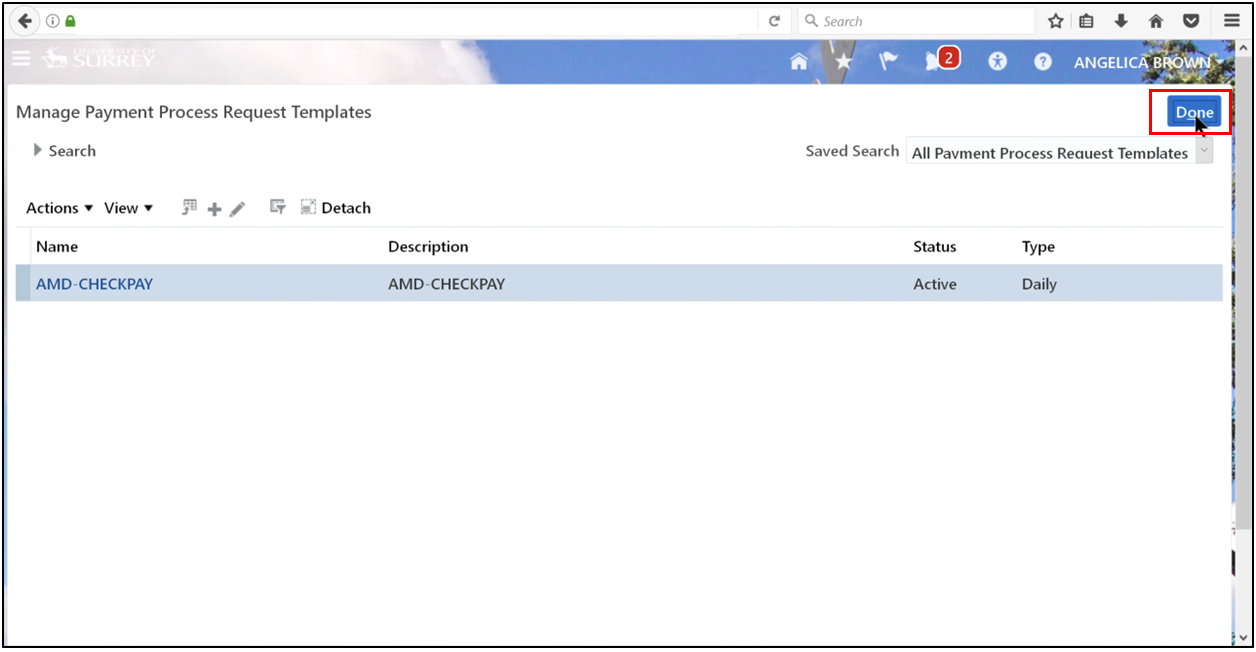
- Click Done.
Step 2: Enter Invoices
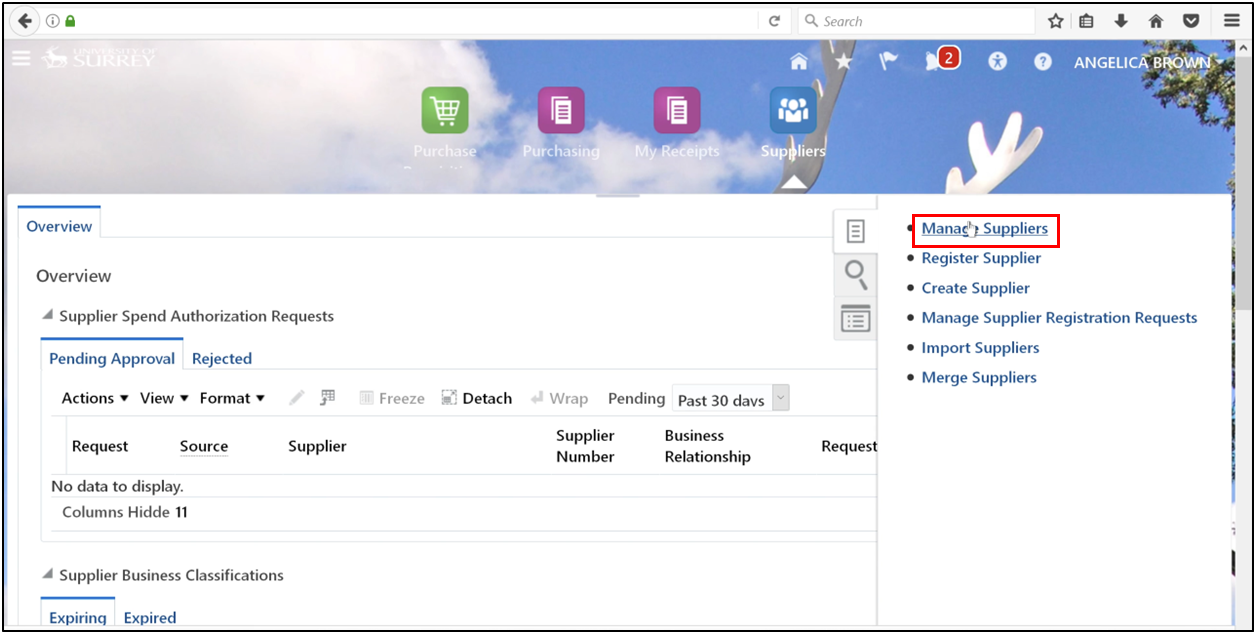
- Go to the task and click Supplier.
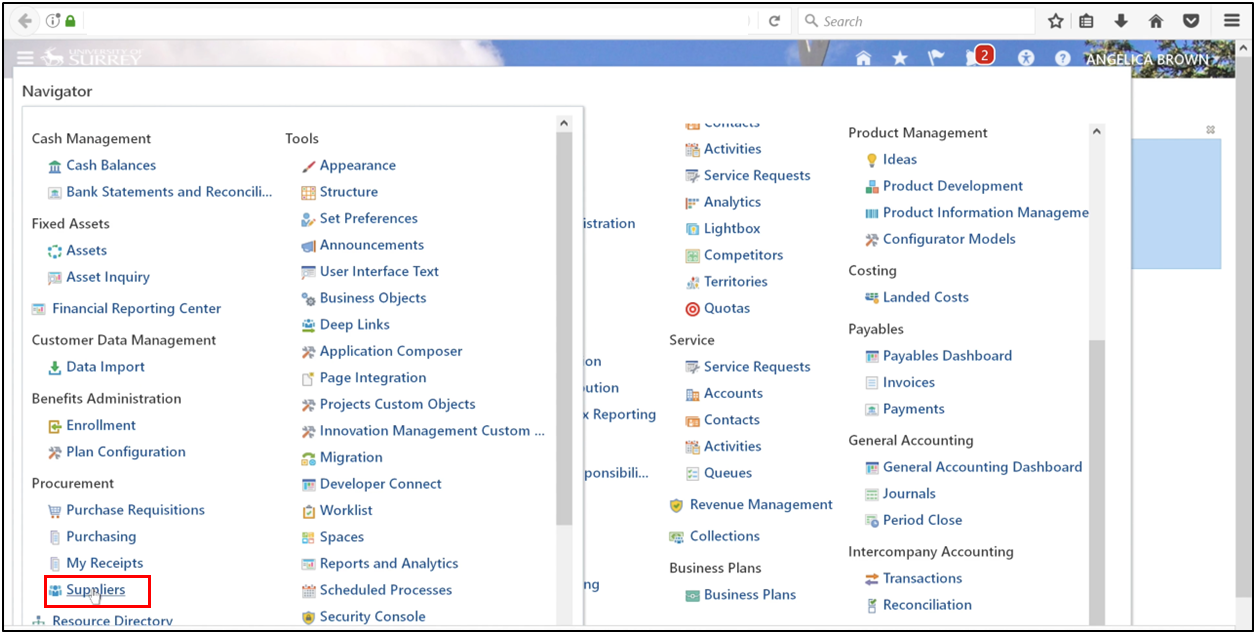
- Manage Supplier.
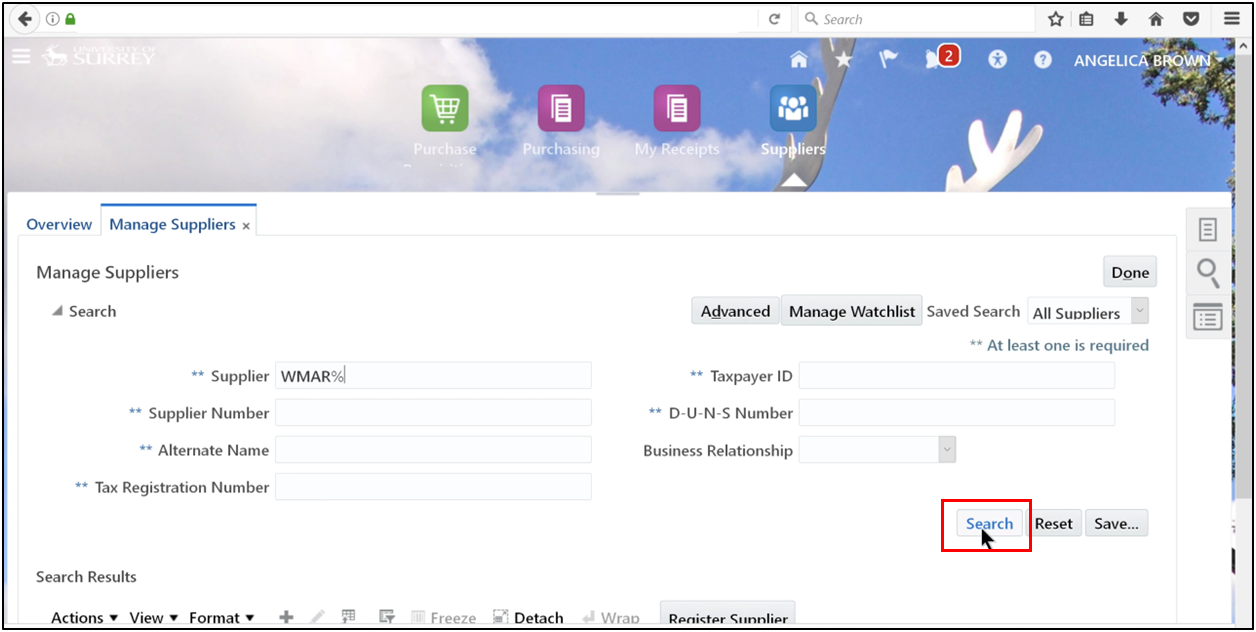
- Define the already present supplier's name and click Search.
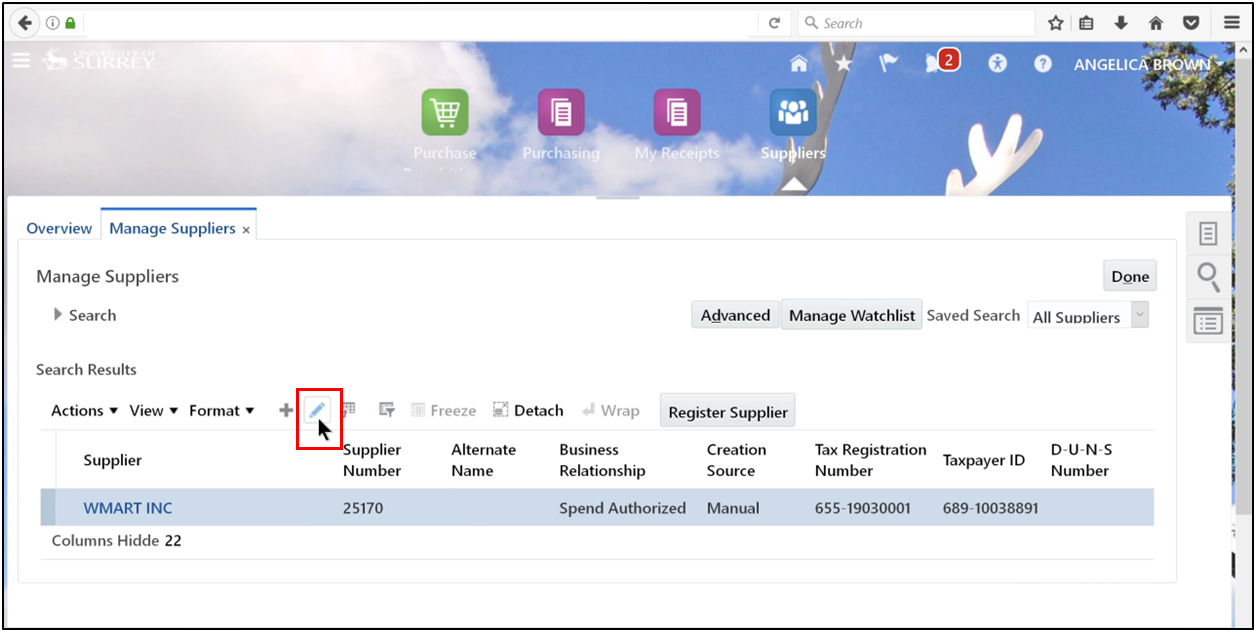
- Click the edit icon.
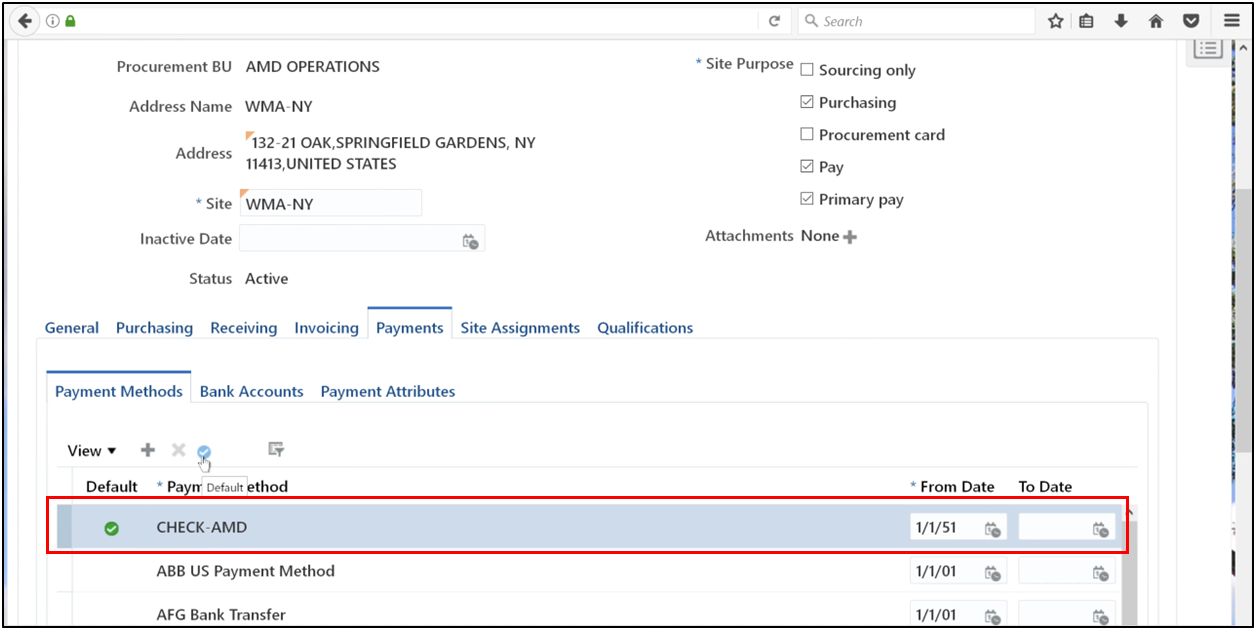
- Check for "CHECK-AMD" as the default.
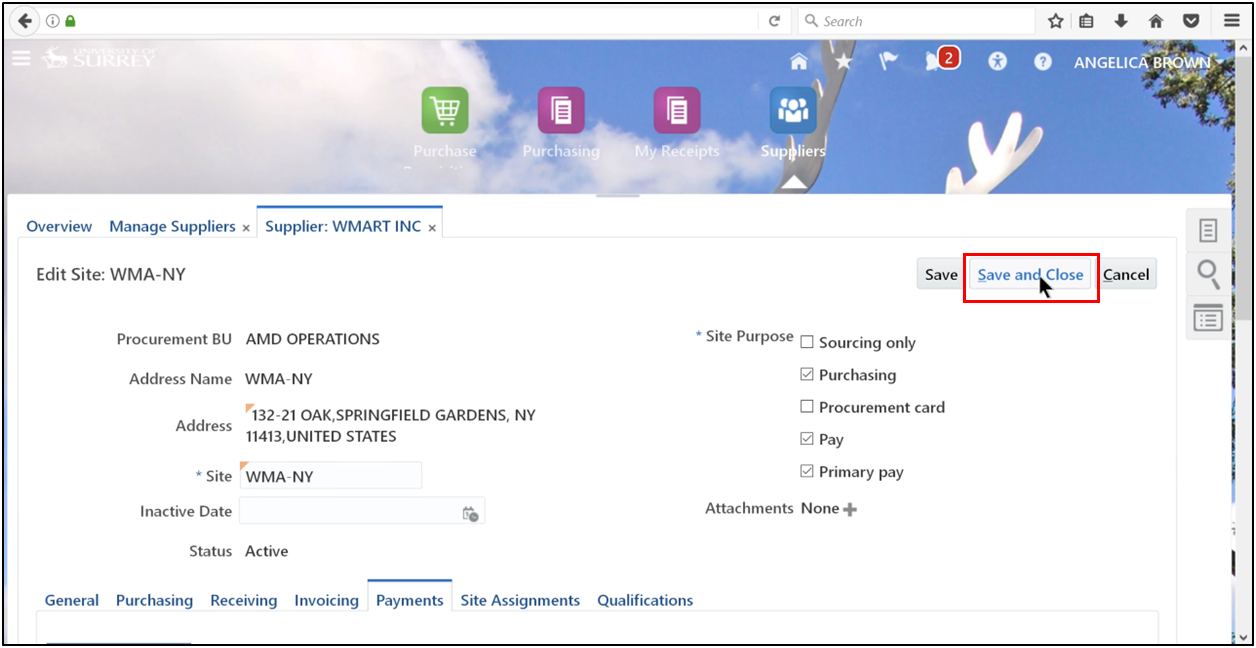
- Click Save and Close.
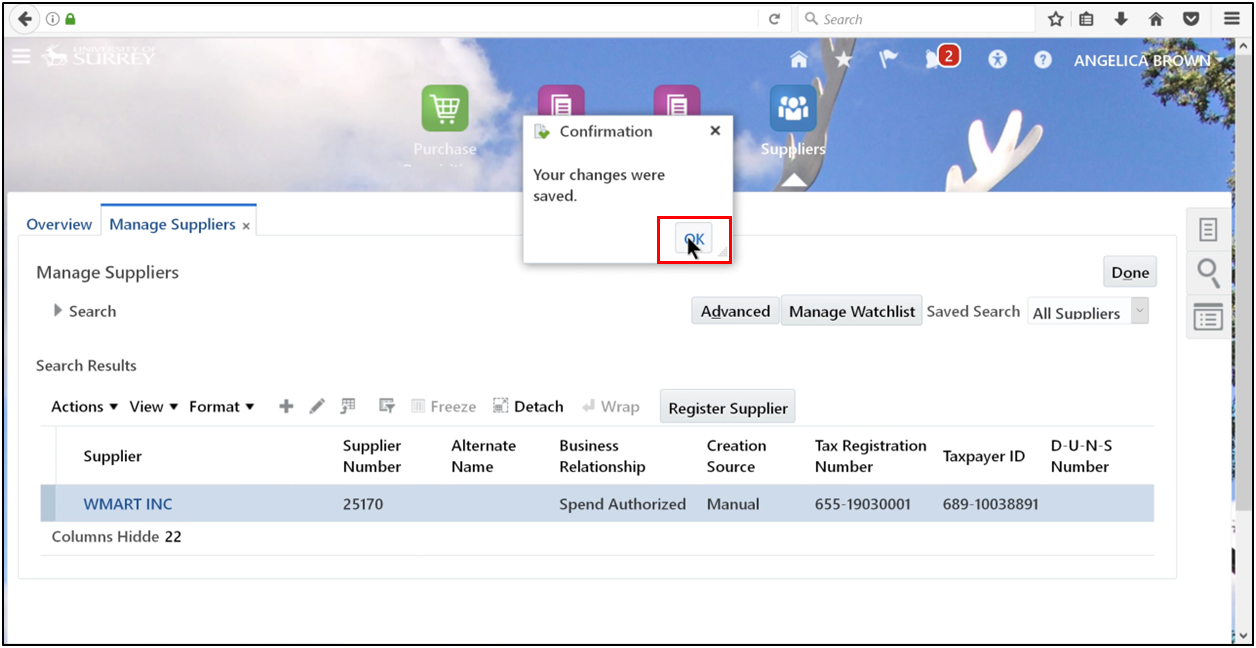
- Click OK.
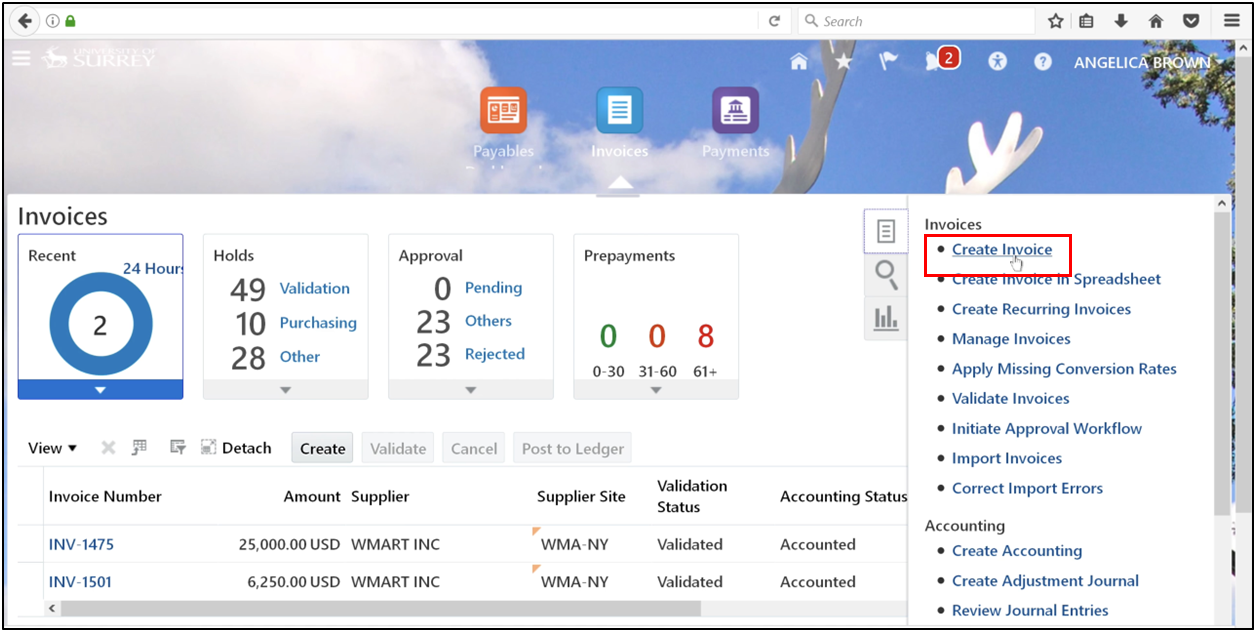
- Open the task and click Create Invoice.
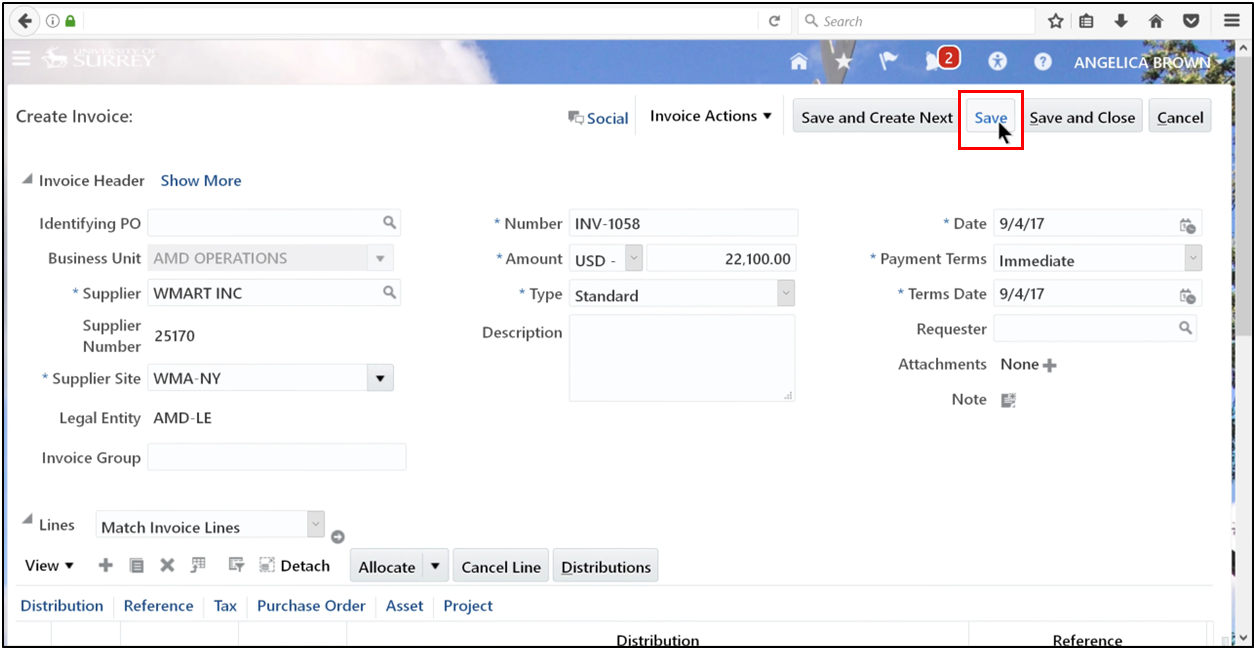
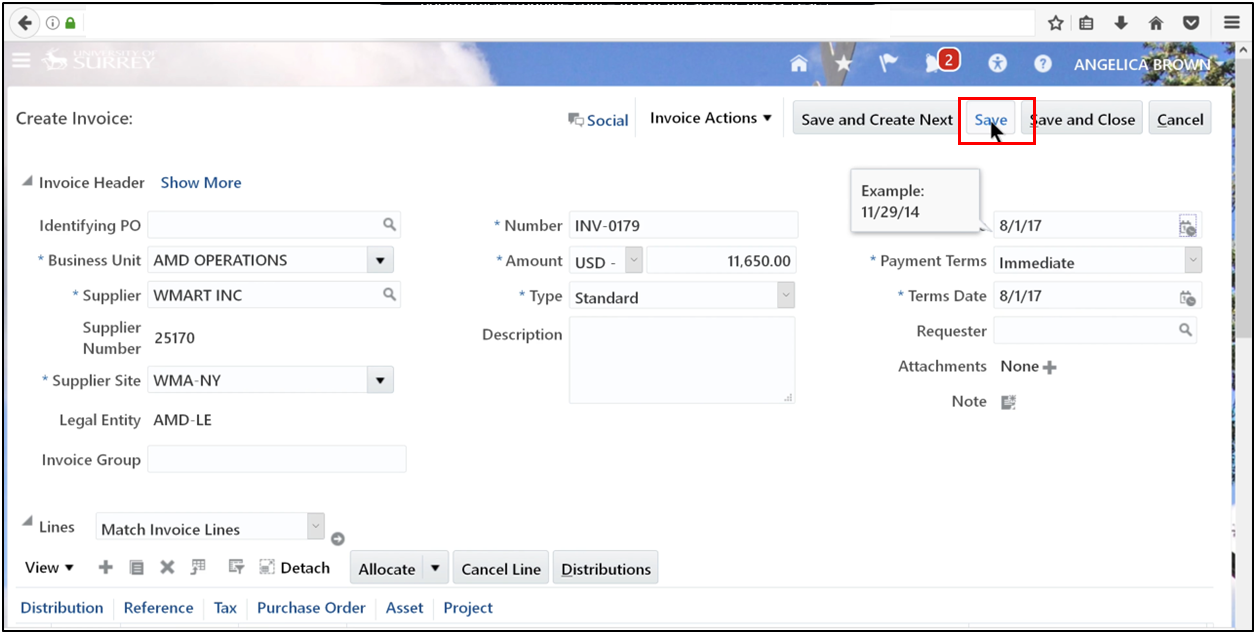
- Enter all required invoice details and click Save and Close.
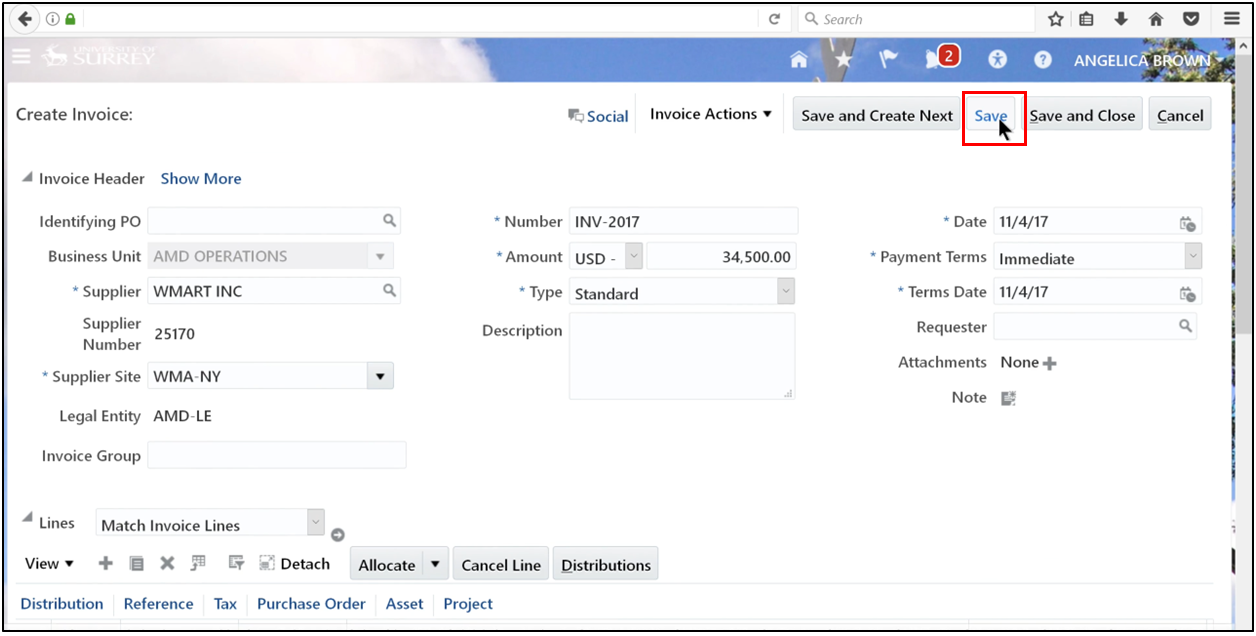
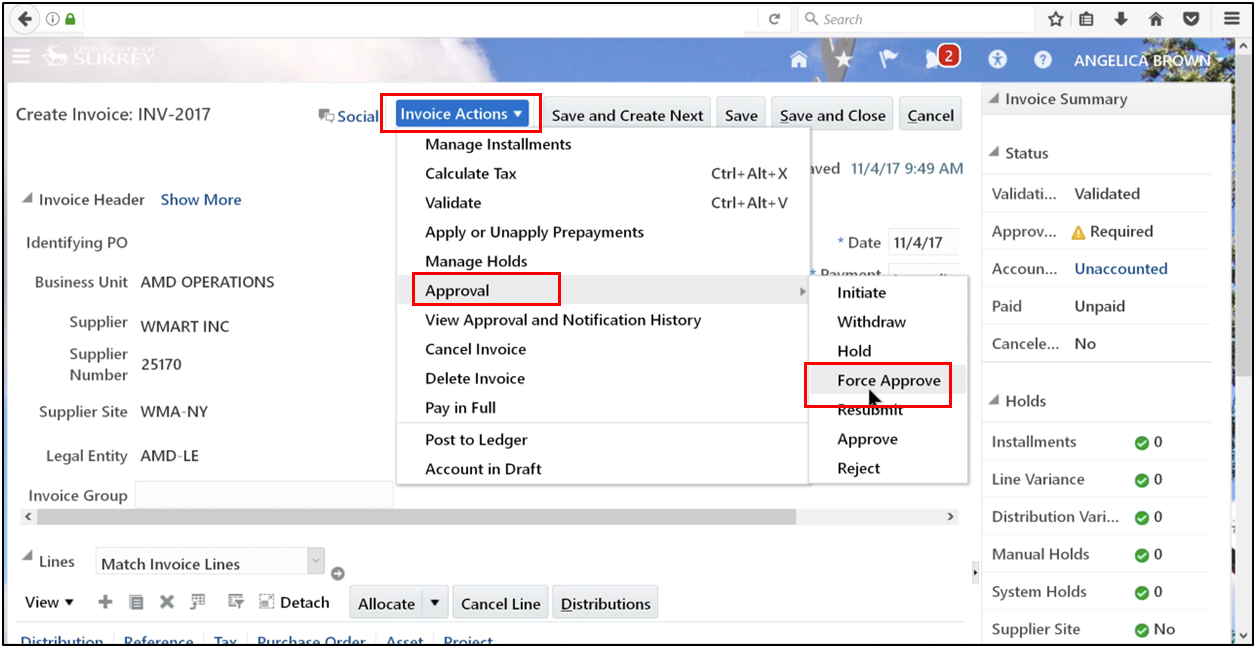
- Click Invoice Actions and select Validate to validate the invoice.
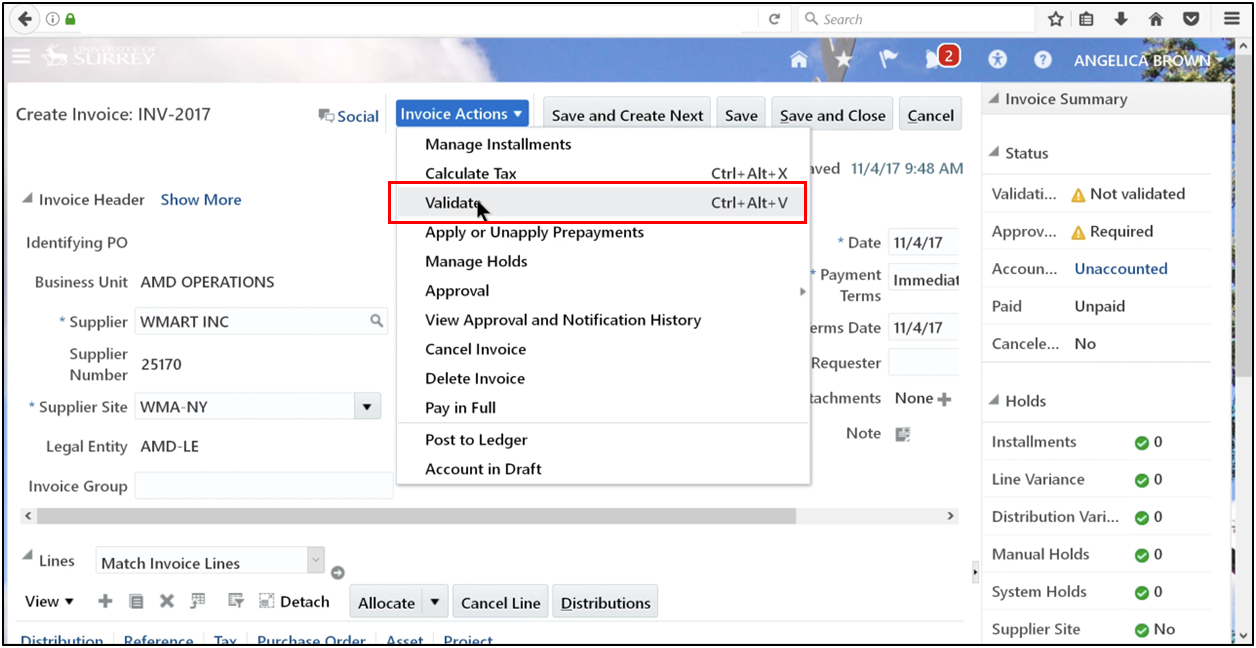
- Apply force approval if required.
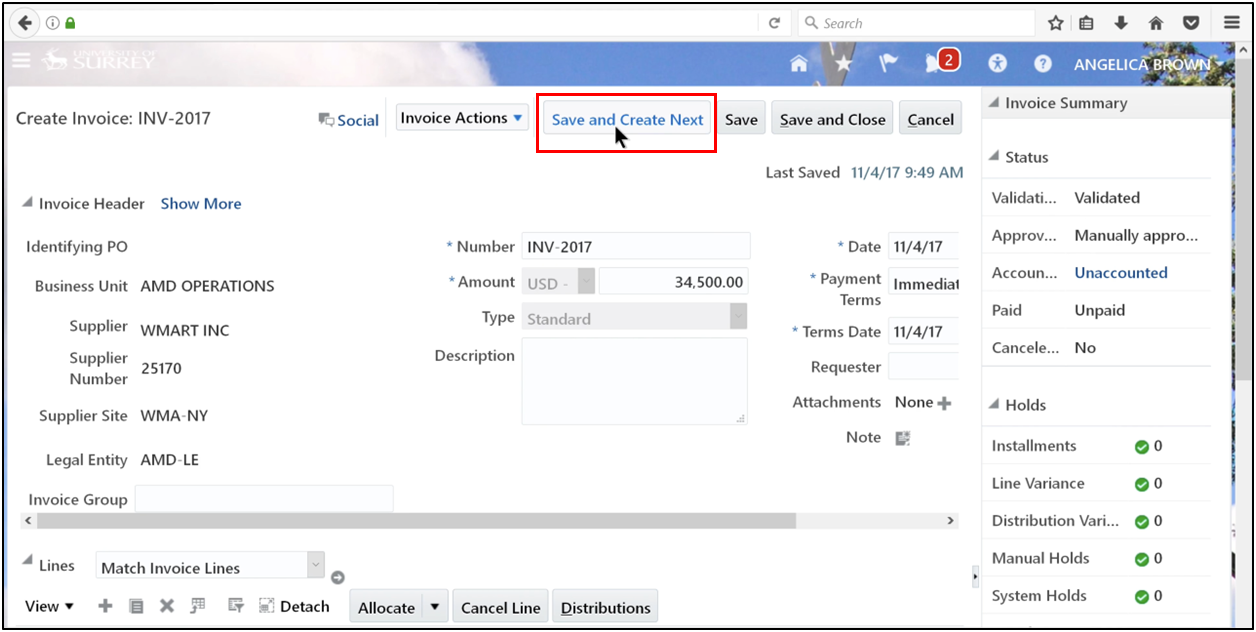
- Click Save and Create Next.
- Define amount.
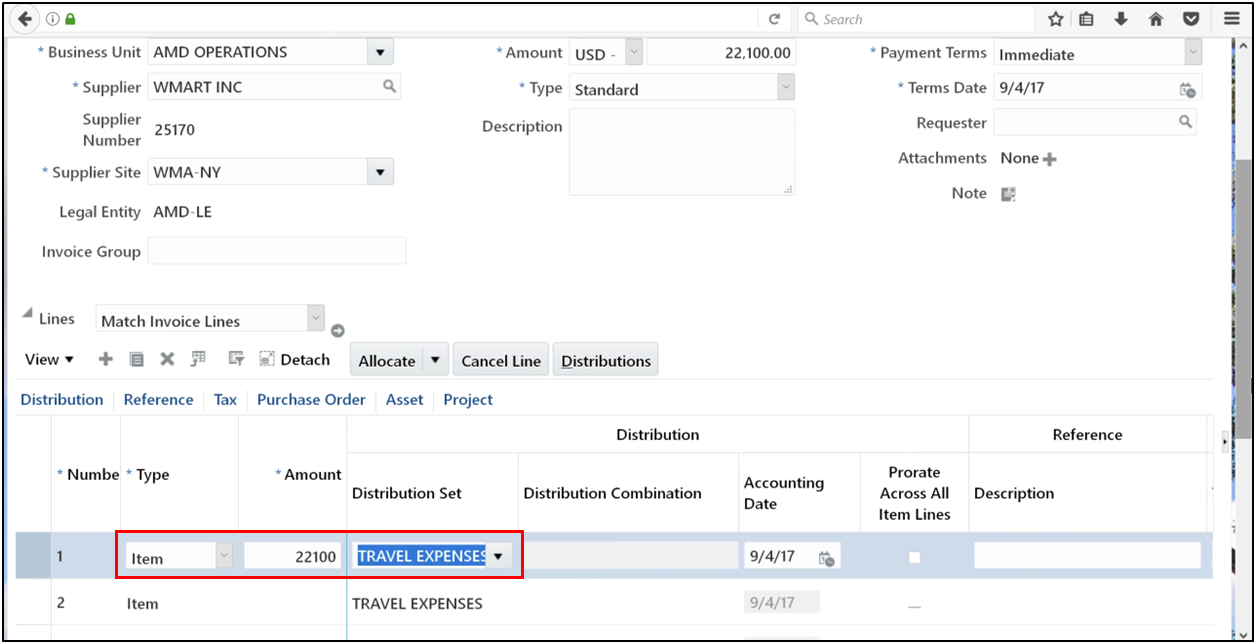
- Click Save.
- Enter the business unit, supplier, supplier number, supplier site, legal entity, number, amount, type, payment terms, and date, then click Save, followed by Save and Create Next.
- Continue after the request status updates to Succeeded.
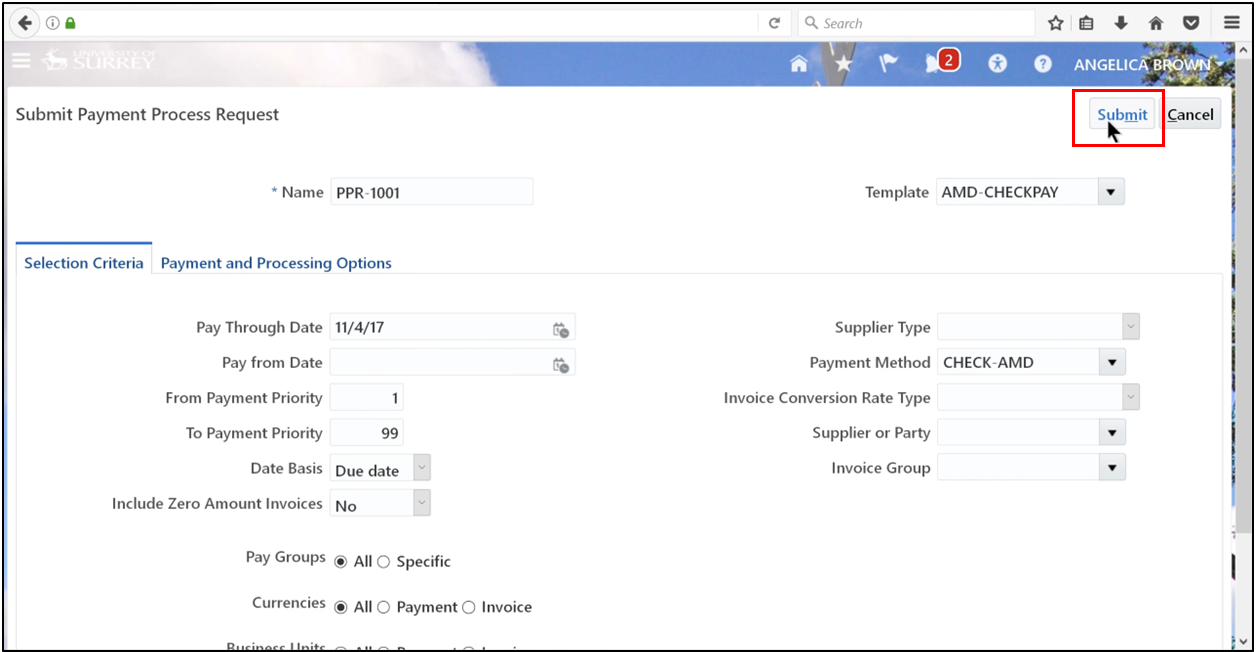
Step 3: Submit the Payment Process Request (PPR)
- Navigate to Payment.
- Open the task and click Submit Payment Process Request.
- Define Name and click on Template by selecting AMD-CHECKPAY.
- Click Submit.
- Click OK.
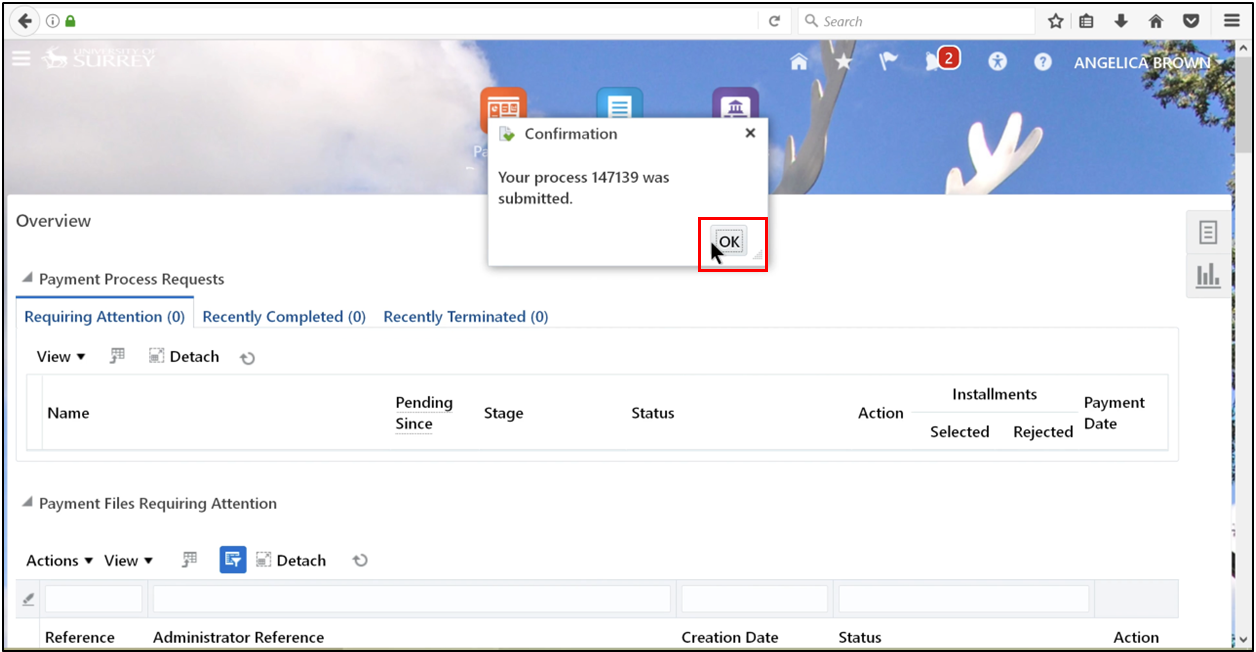
- Succeeded.
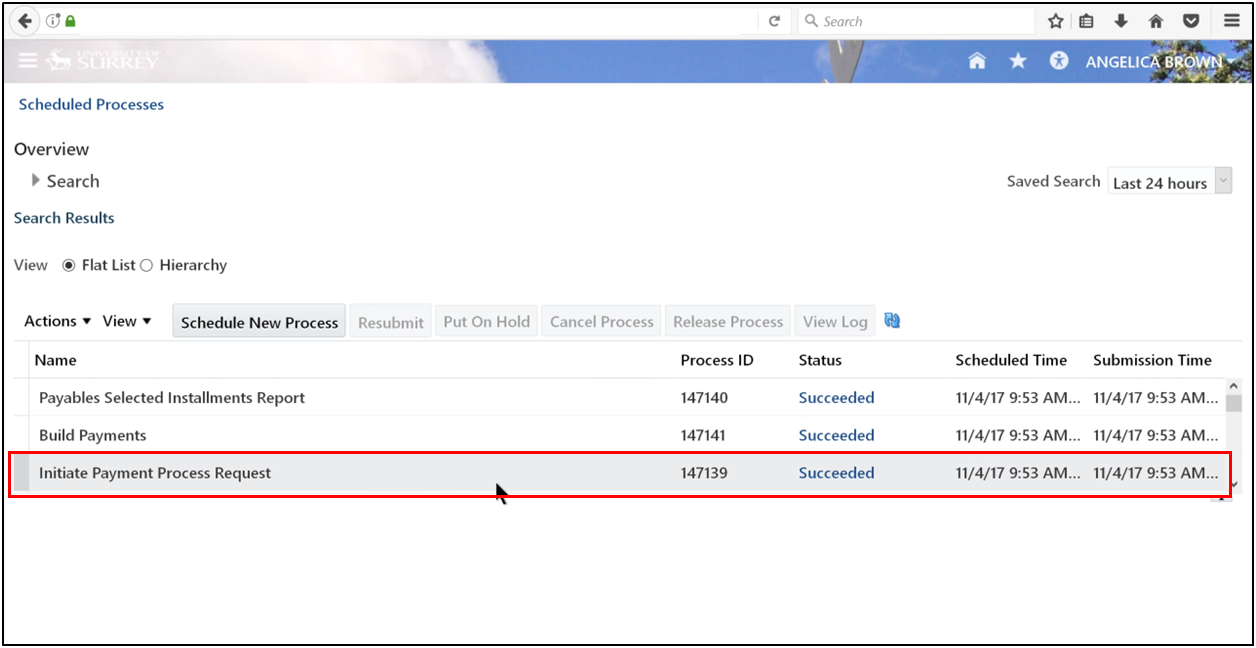
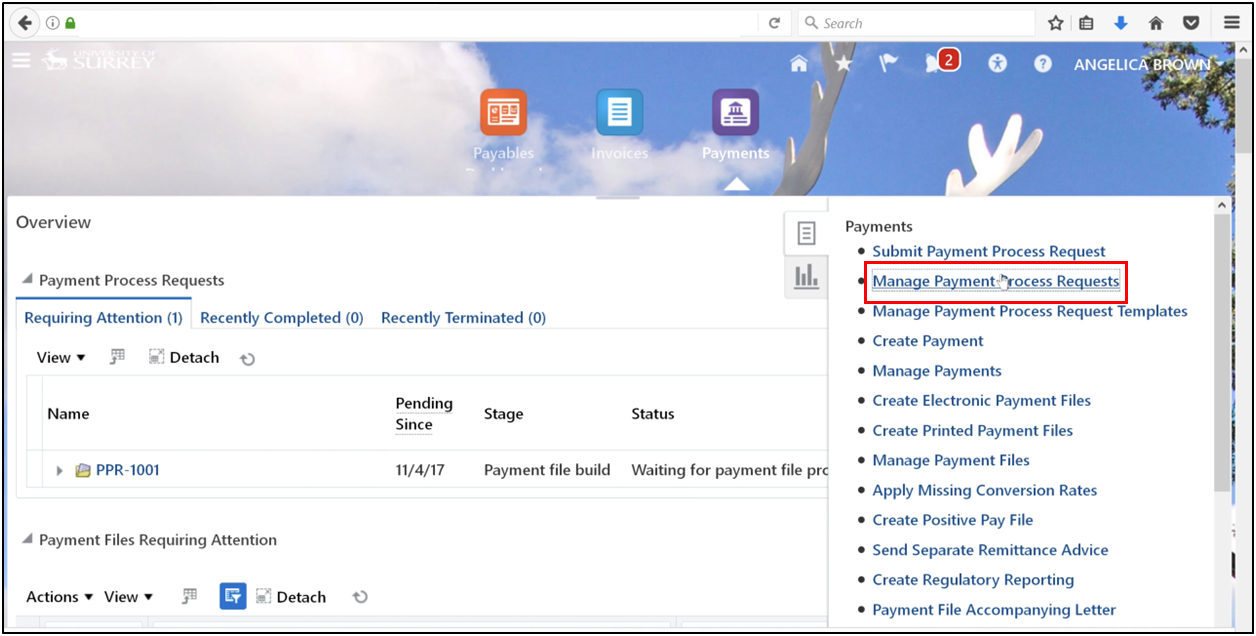
Step 4: View Payment Process Request (PPR) Status
Automation requires oversight. If the review option was enabled during submission, the status will show Pending Proposed Payments. At this stage, the accounts payable process permits manual intervention.
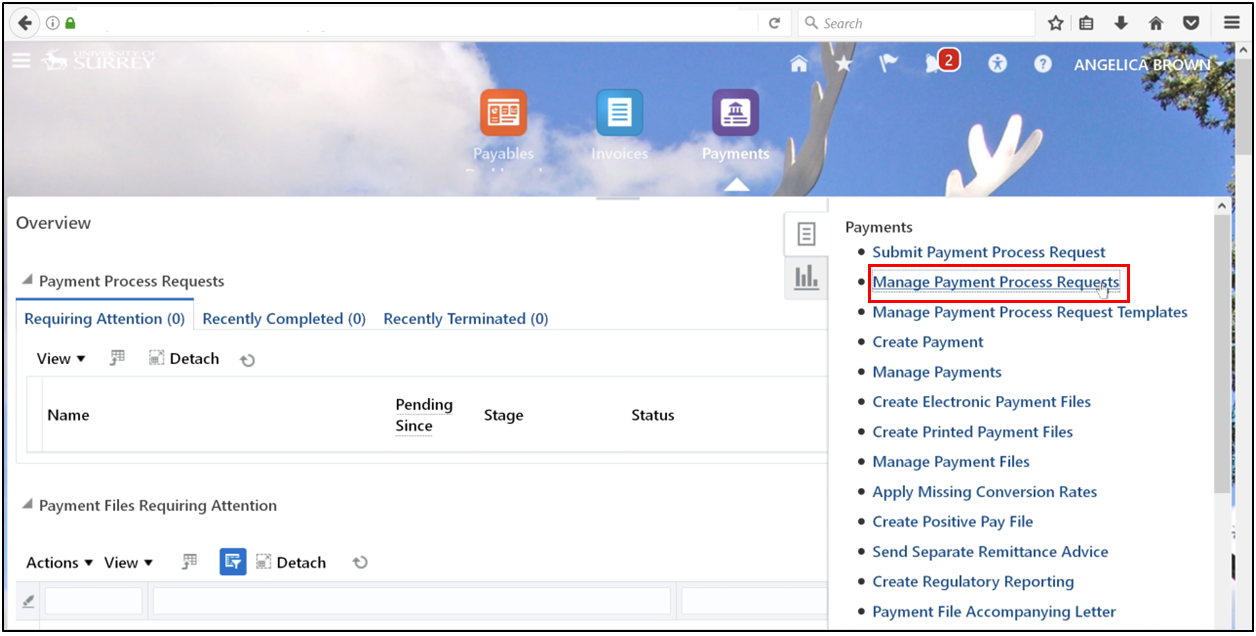
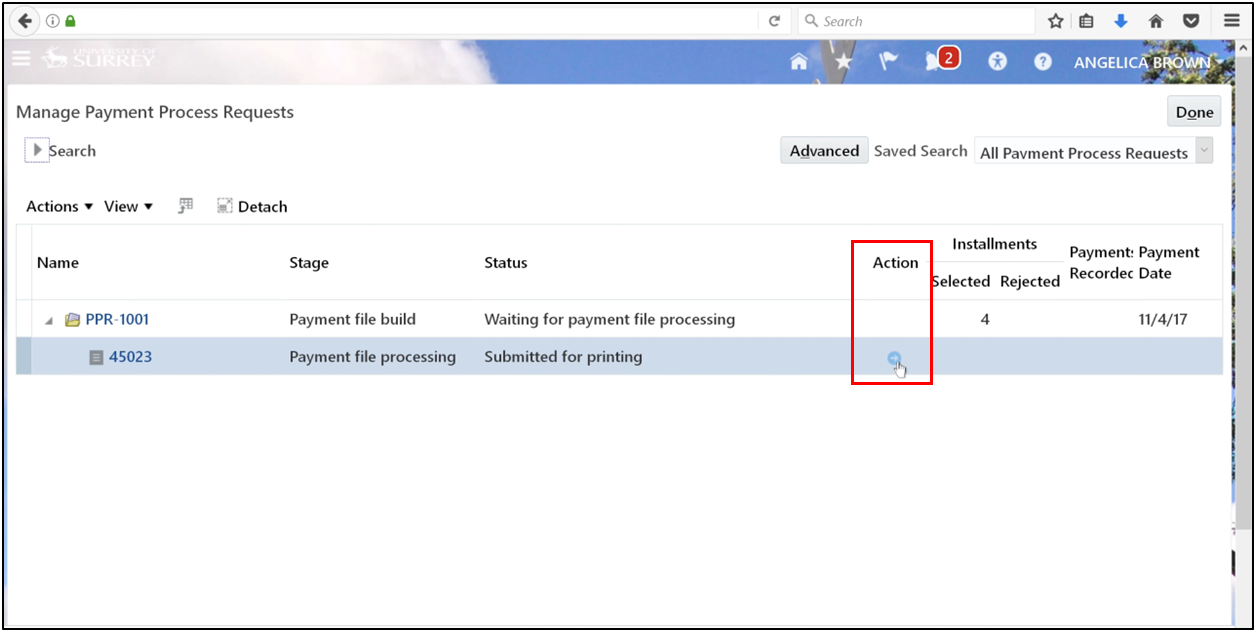
- Click on the task and select Manage Payments Process Requests.
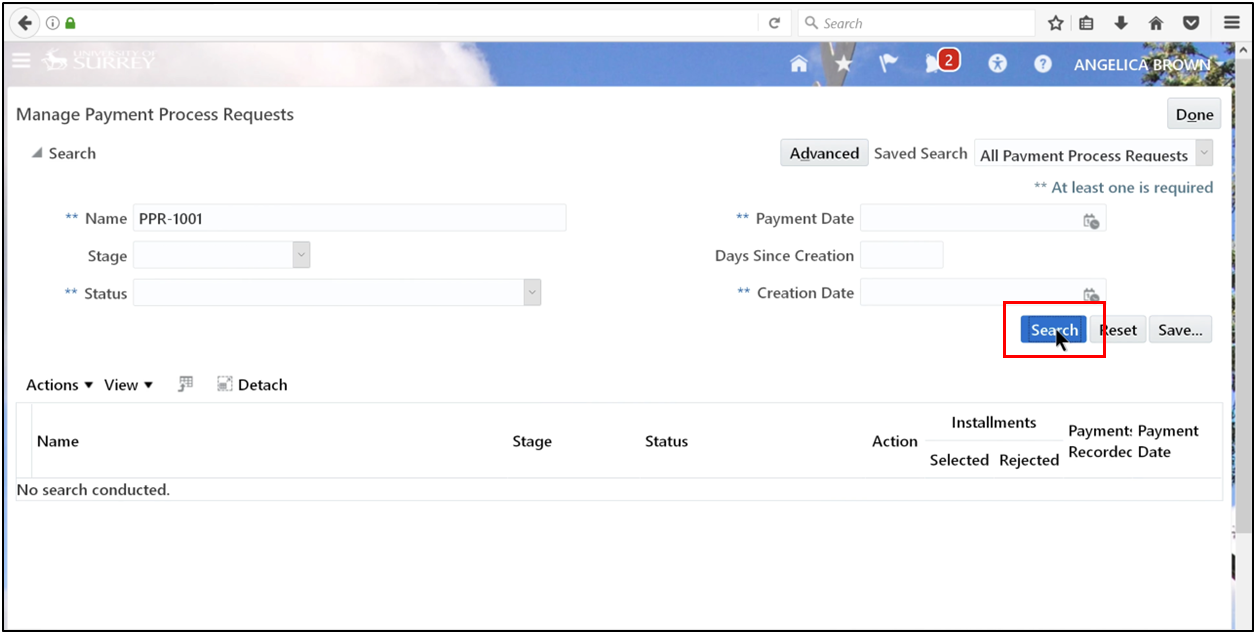
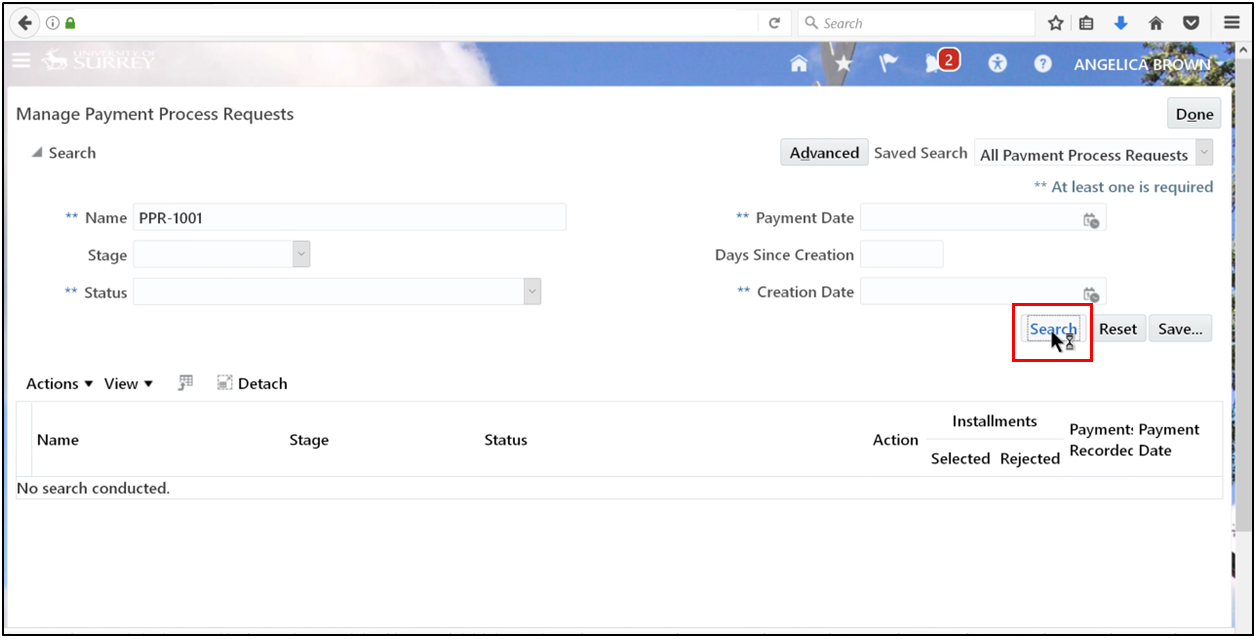
- Search using the request name PPR-1001.
- Click the Action Arrow.
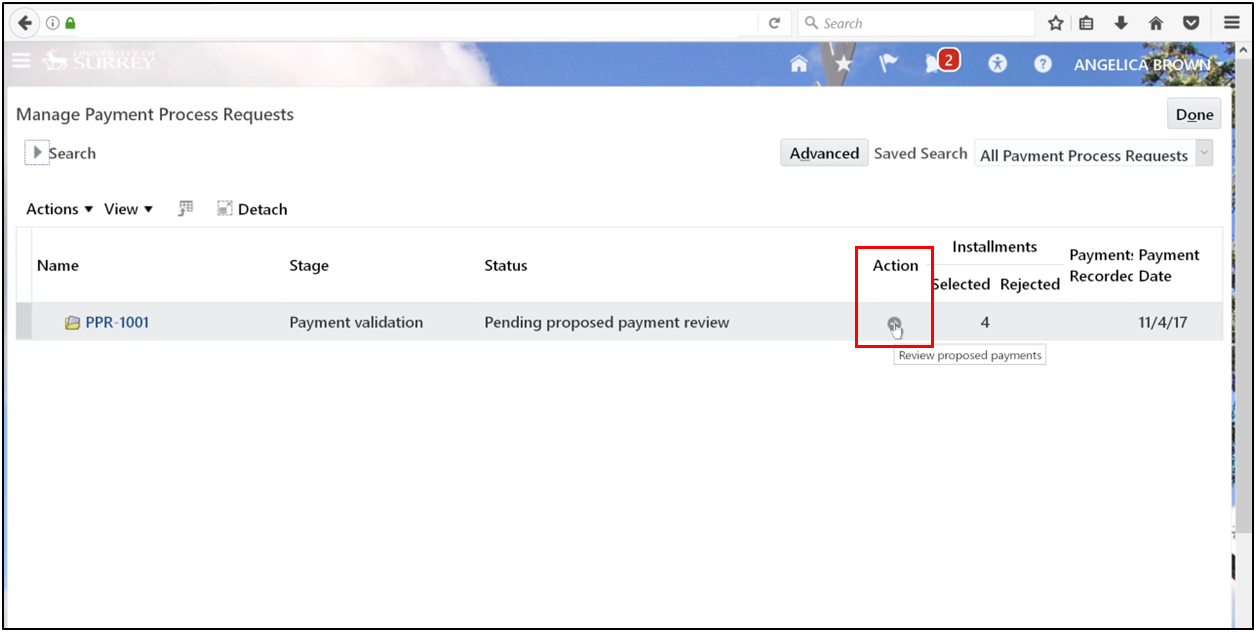
- Select the payment that needs to be resumed.
- Click Resume Payment Process and click OK.

- Refresh until "Succeeded" appears.
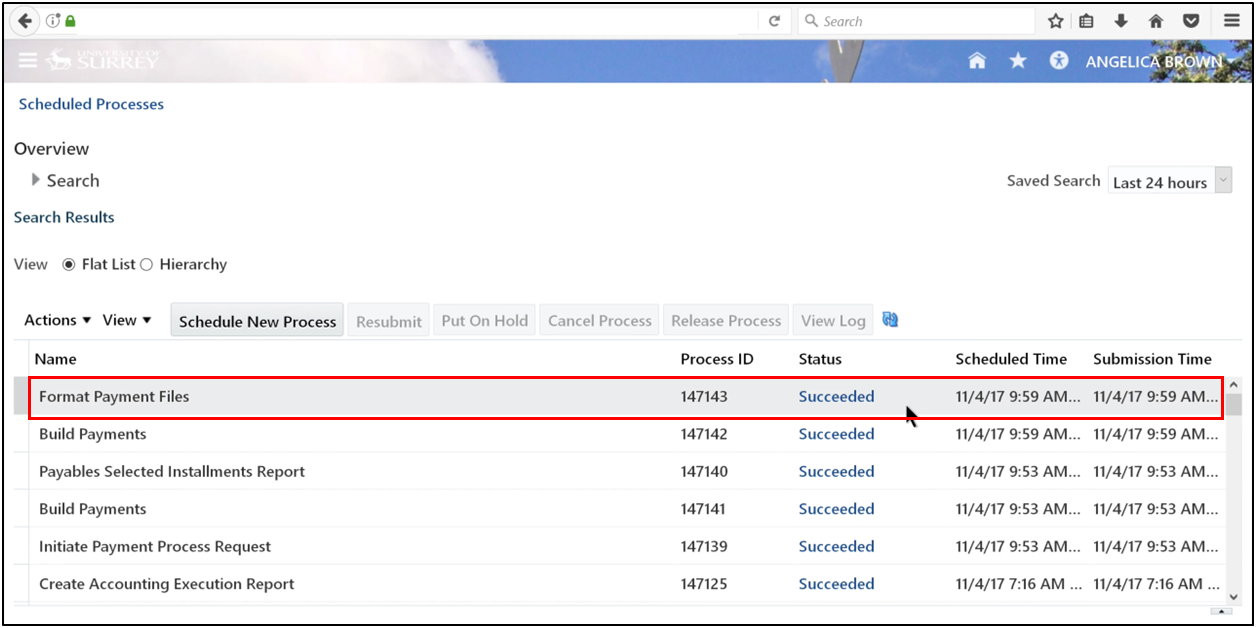
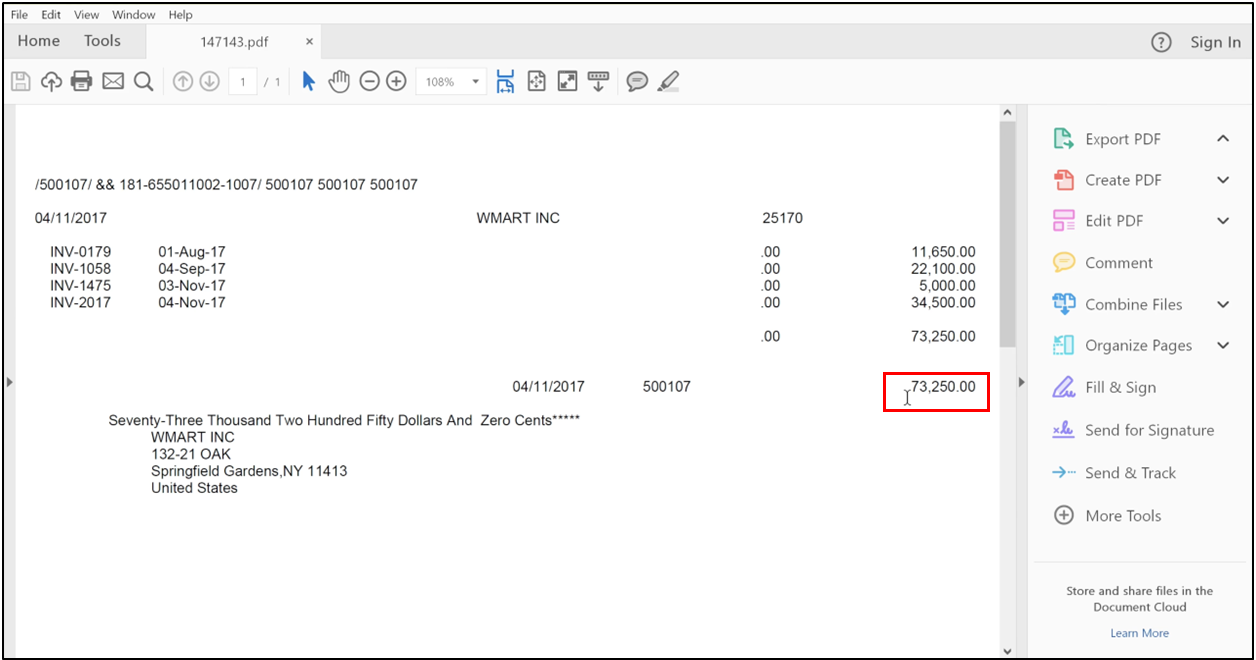
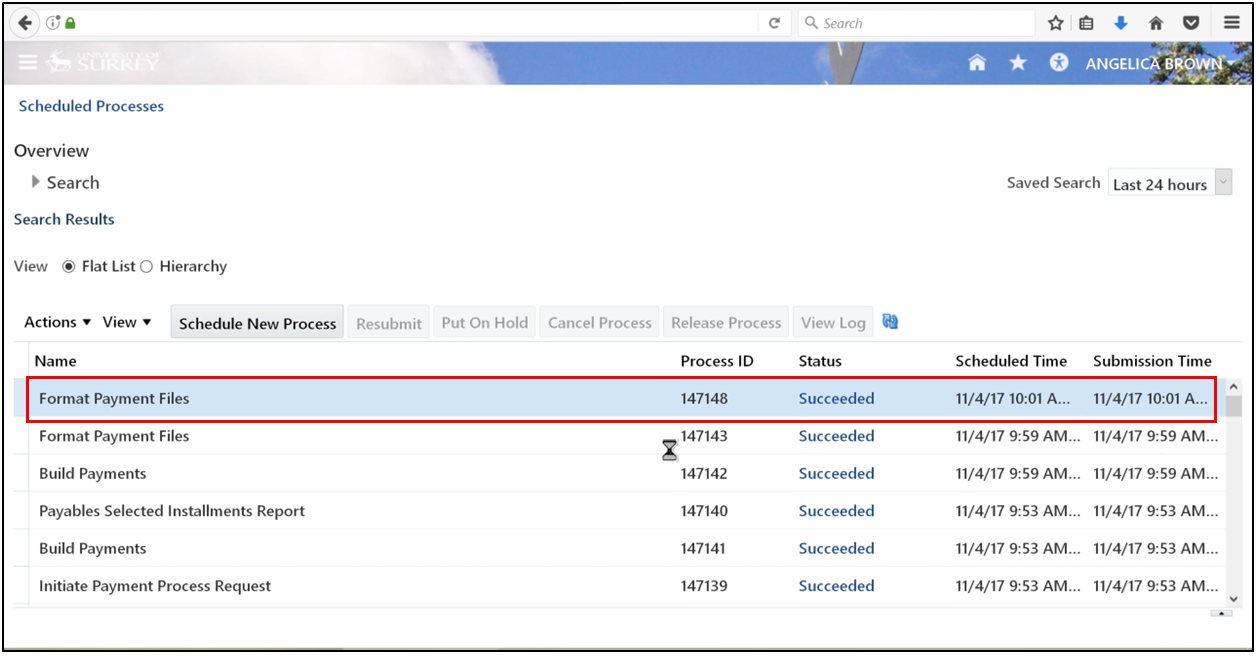
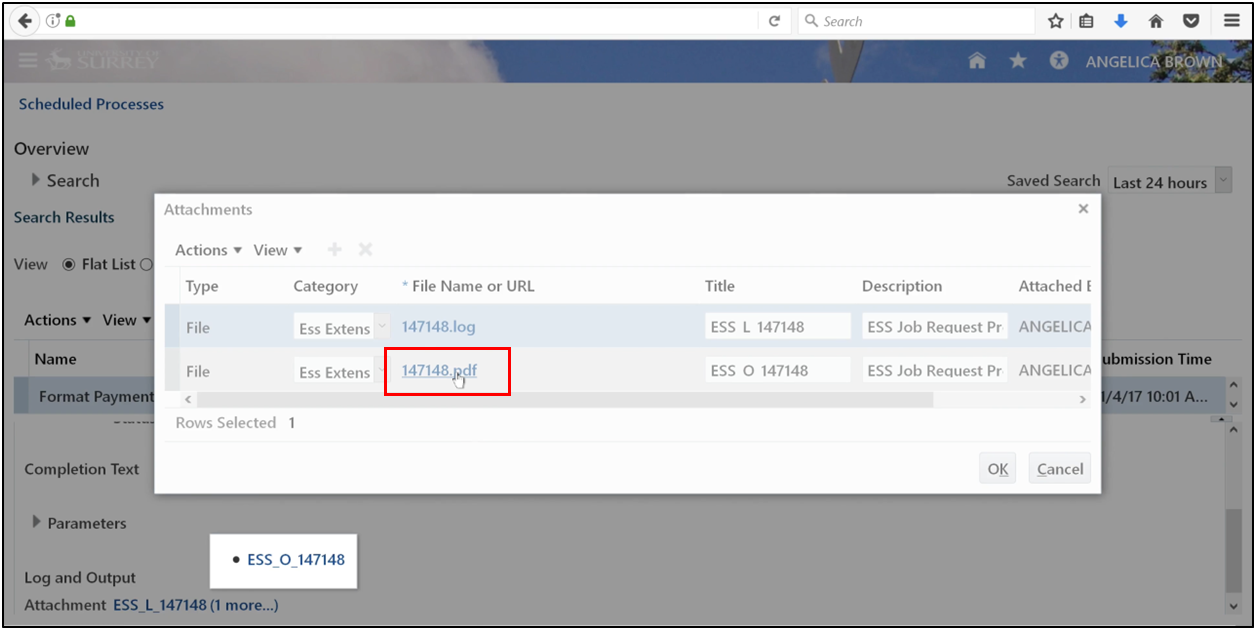
Step 5: View Formatted Payments
- Select the format of payment files and scroll down, then click More.
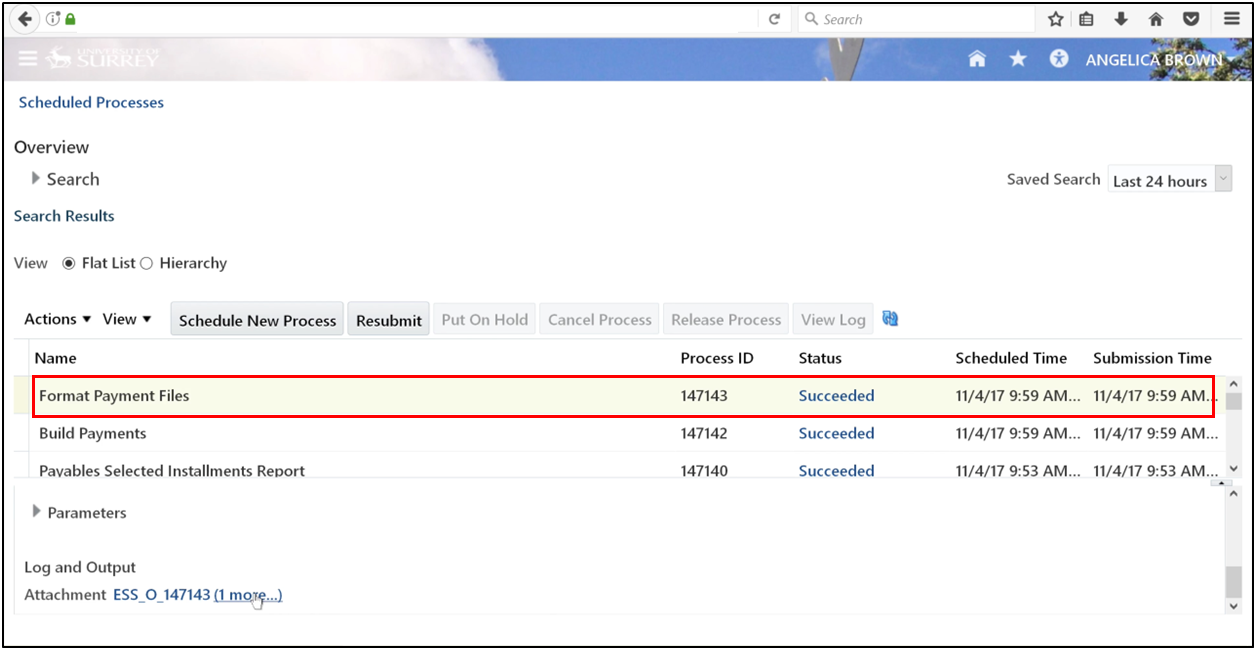
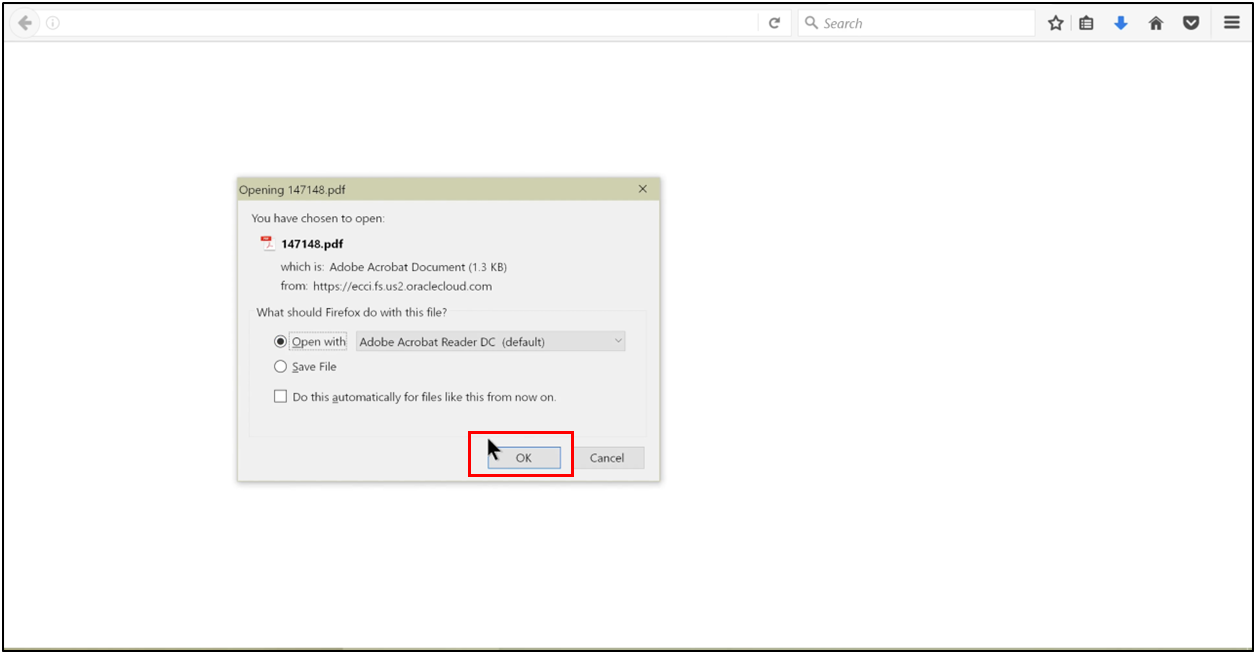
- Open the PDF file.
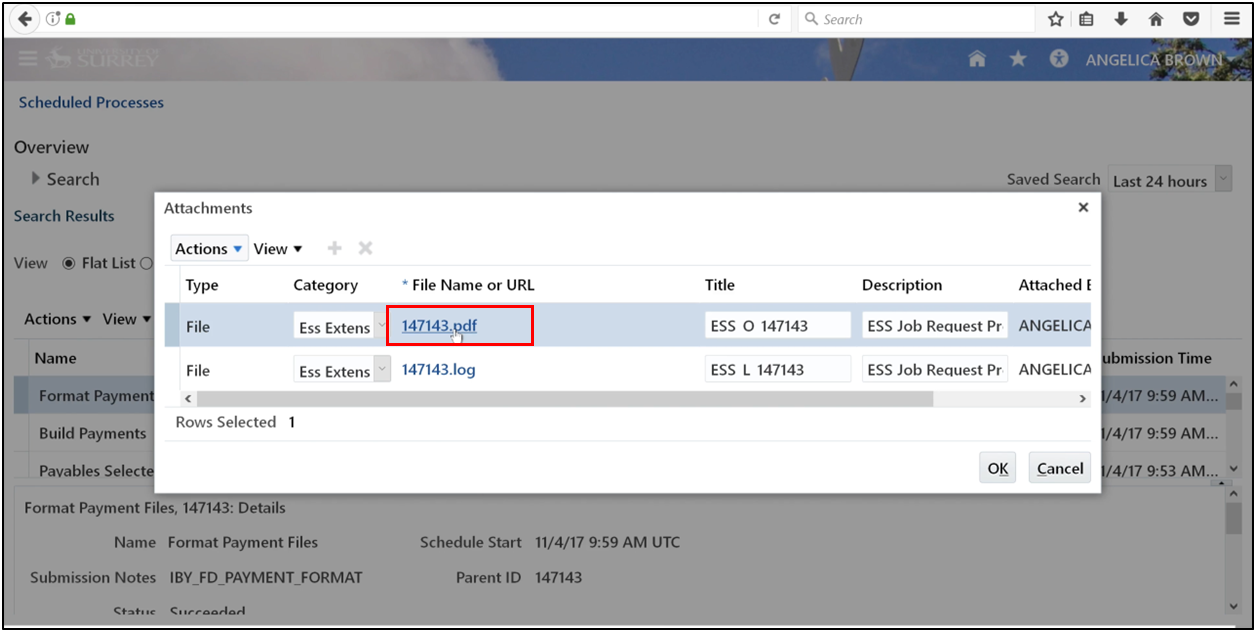
- Open with Adobe Acrobat Reader and click OK.
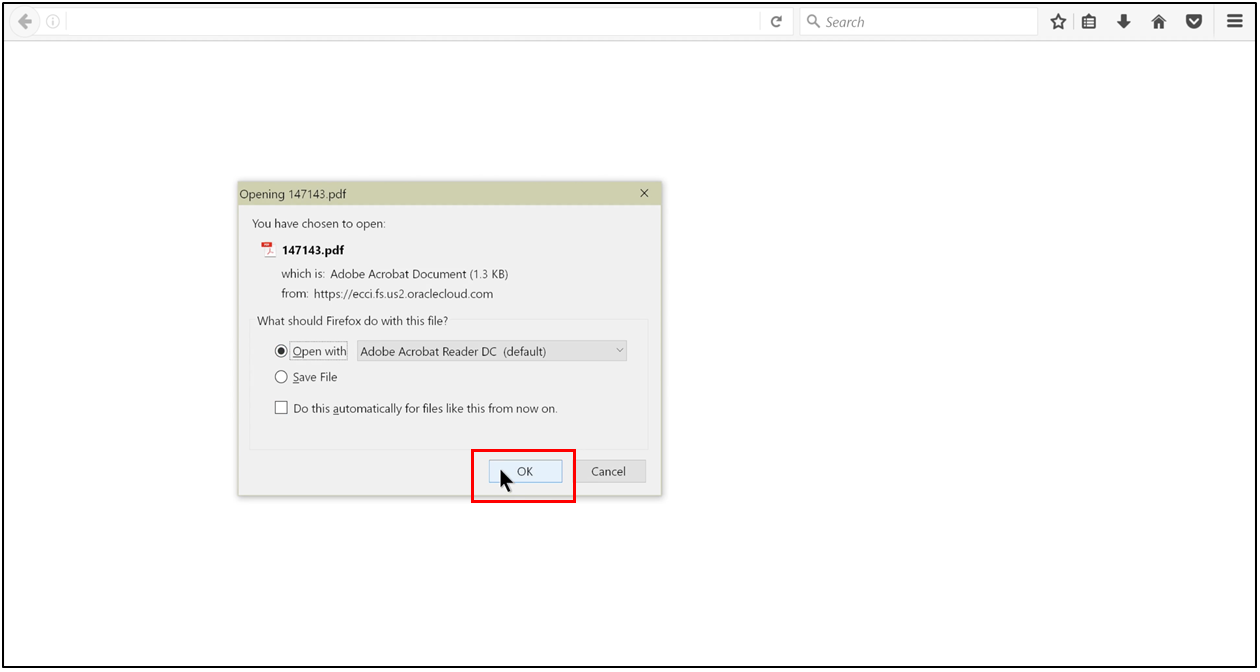
- The payment file has been generated.
Step 6: Print Supplier Checks
- Go to the task and click on the Manage Payment Process Request.
- Search using the request name.
- Go to Action, select Terminate Payment Process, then click the Action Arrow and click OK.
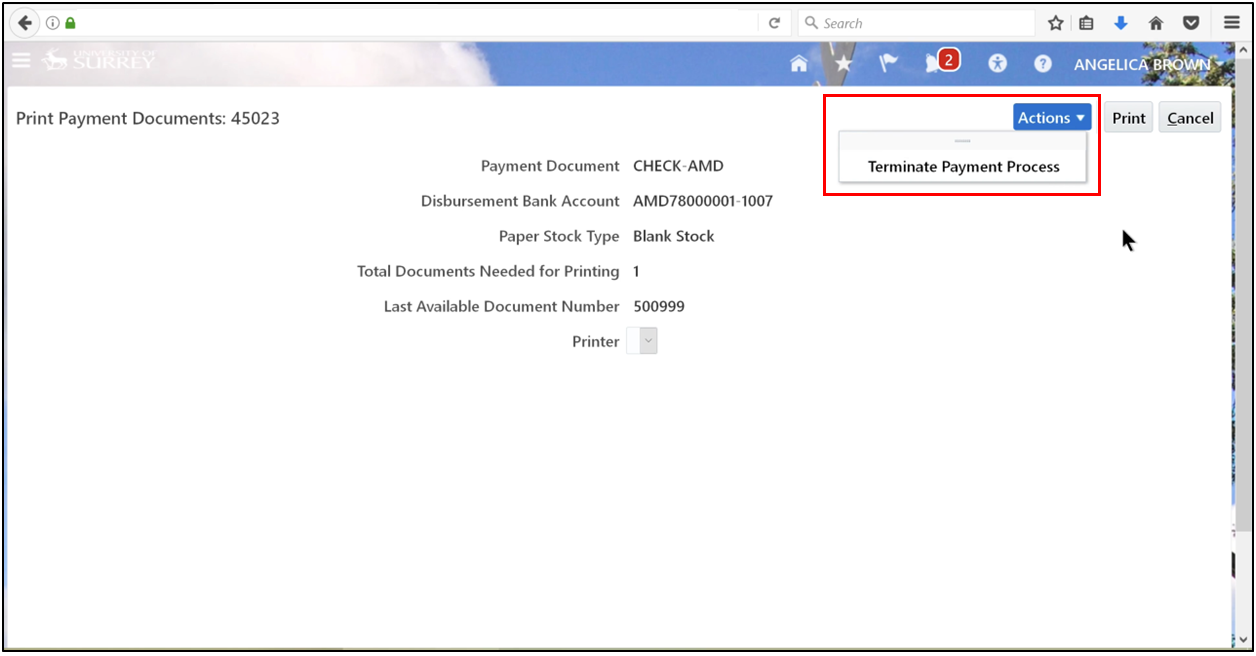
- Refresh until Succeeded appears, then go to Format Payment Files and select More.
- Click More.

- Select PDF.
- Open with Adobe Acrobat Reader.
Step 7: Confirm Check Print Status
After the review, the Build Payments process is triggered again to rebuild the file. This is a core function of accounts payable in Oracle to ensure the data is prepared for physical or electronic output.
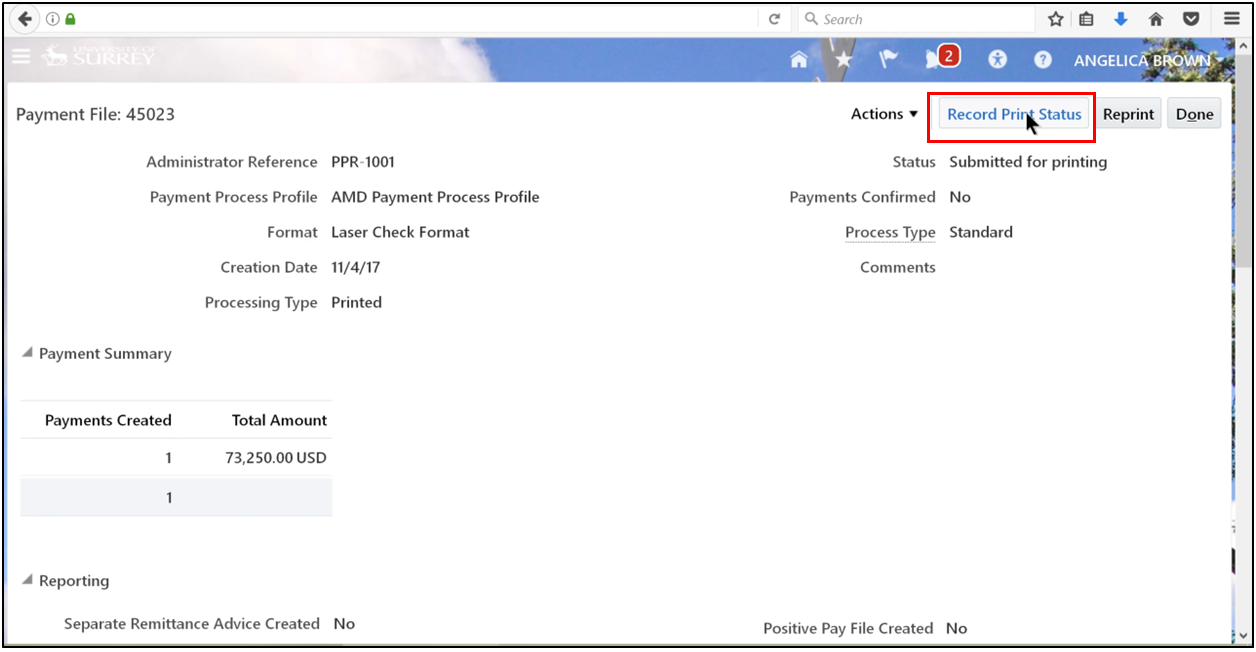
- Search using the request name.

- Select action arrow.
- Click Record Print Status.
- Check the details and click Submit.
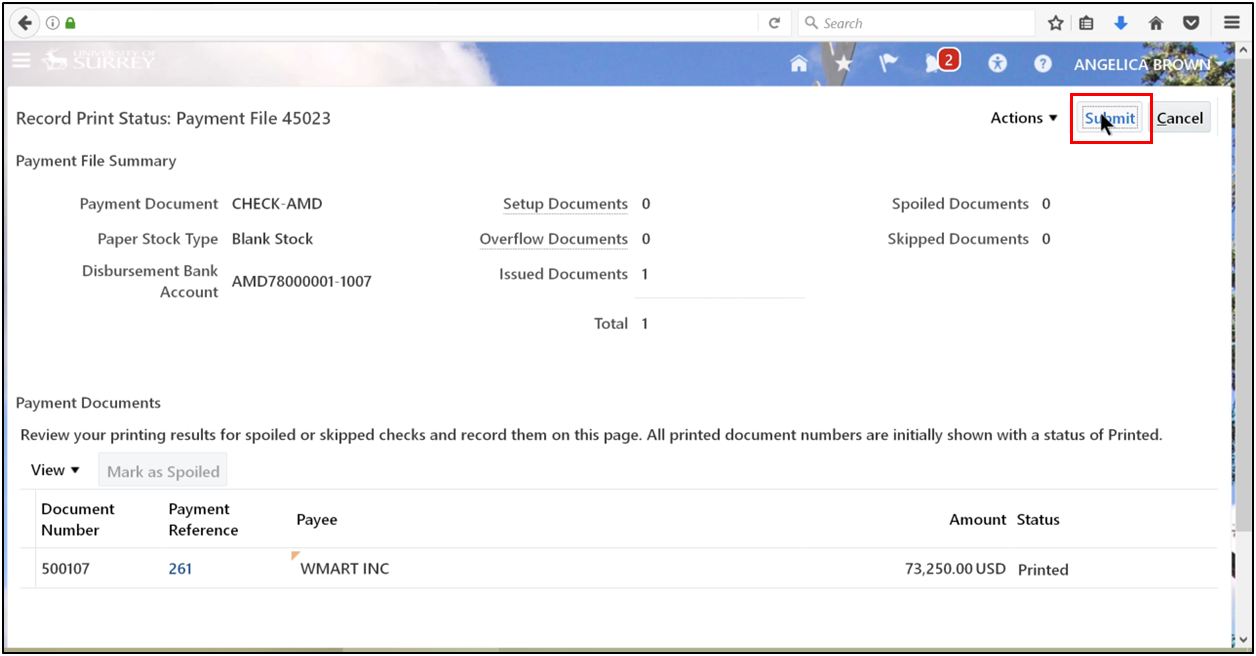
- Select Record Print status.
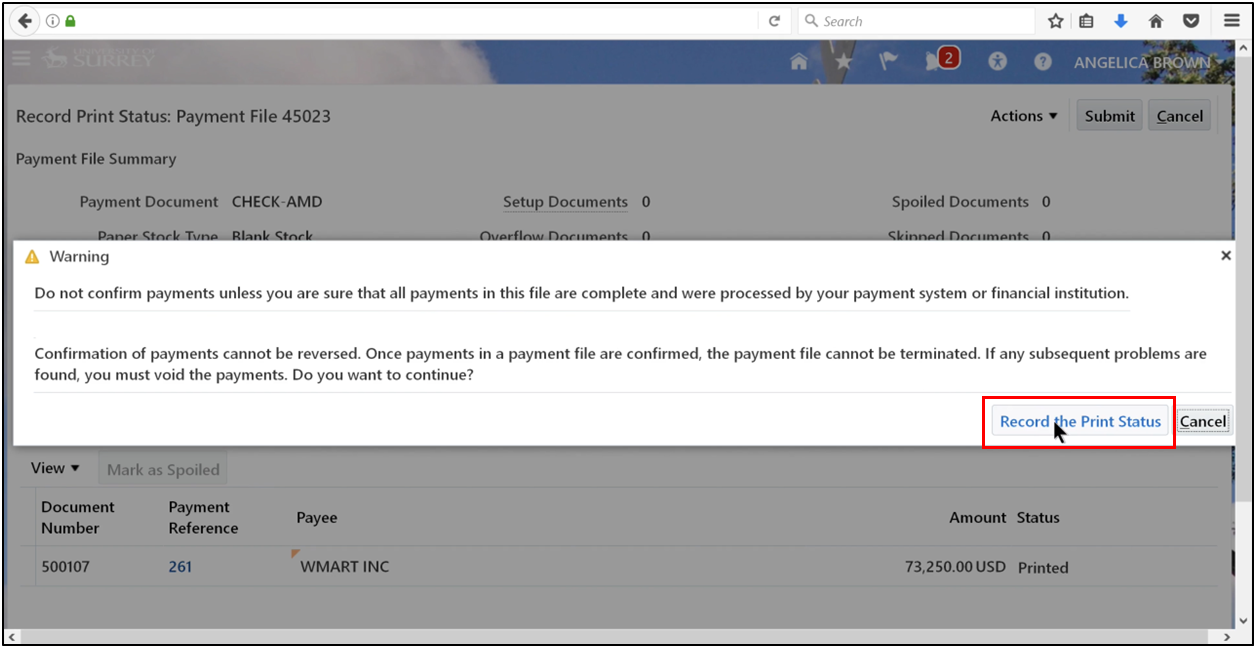
- Click OK.
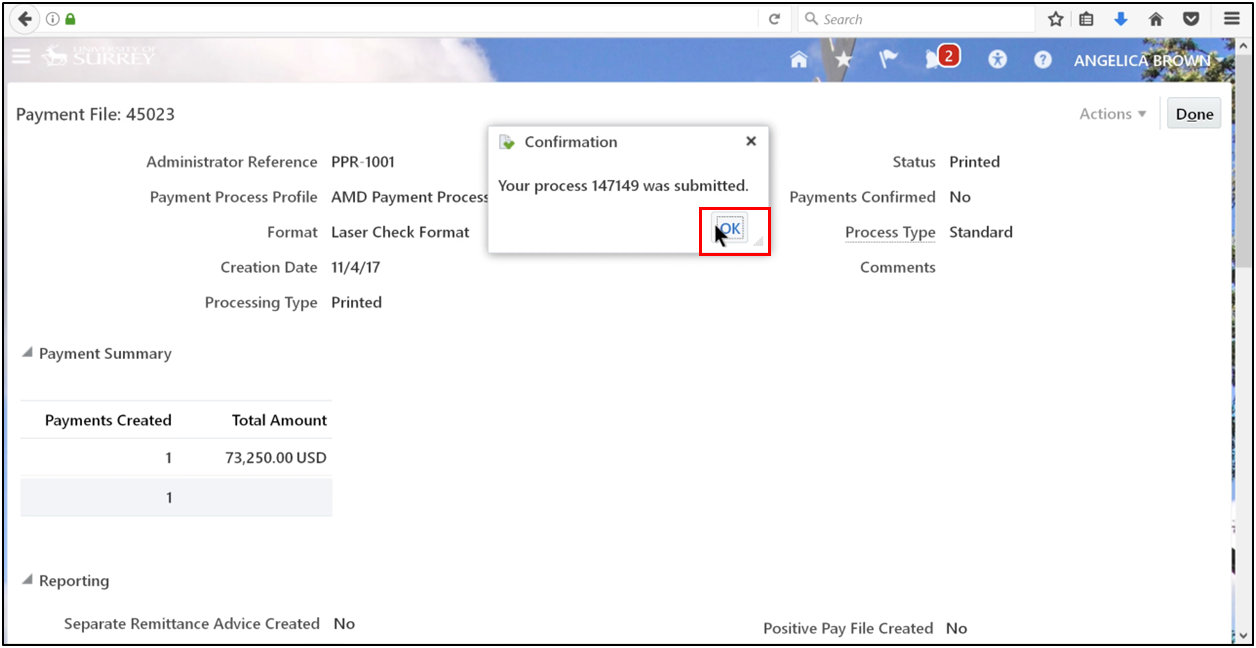
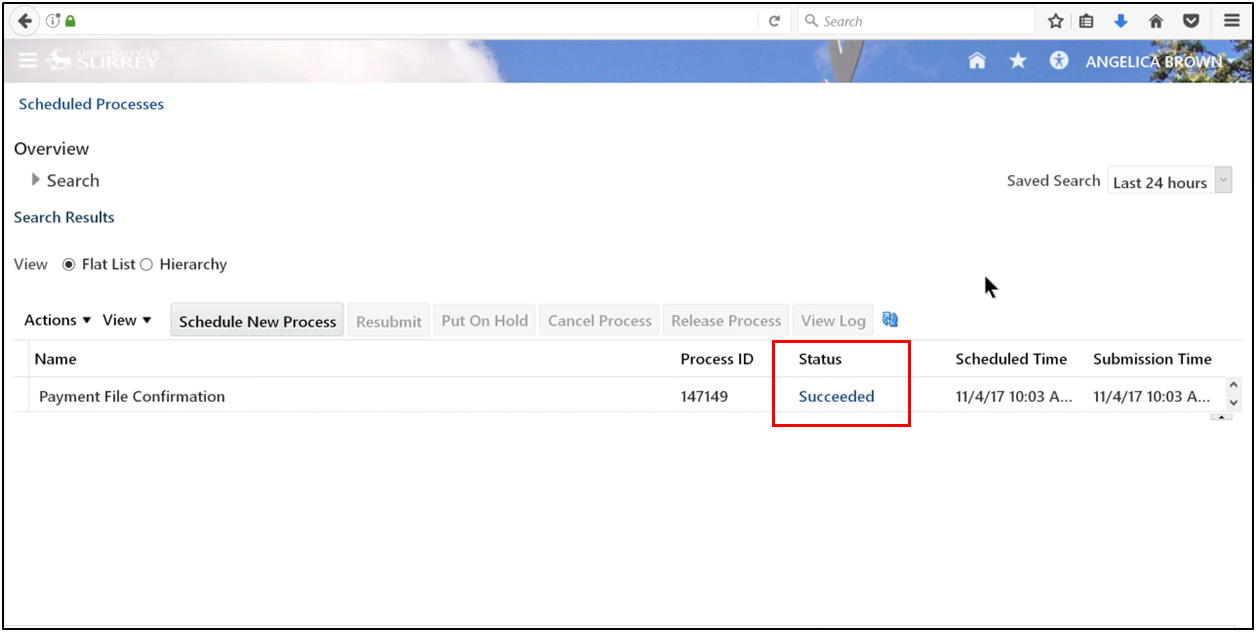
- Refresh until "Succeeded" appears.
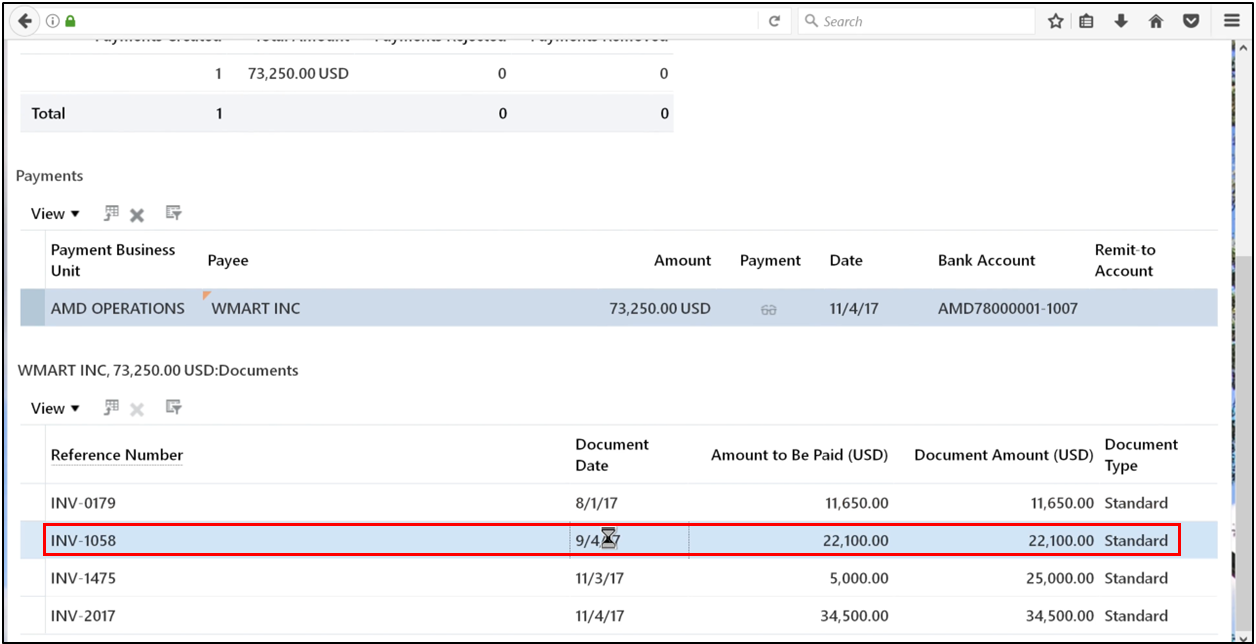
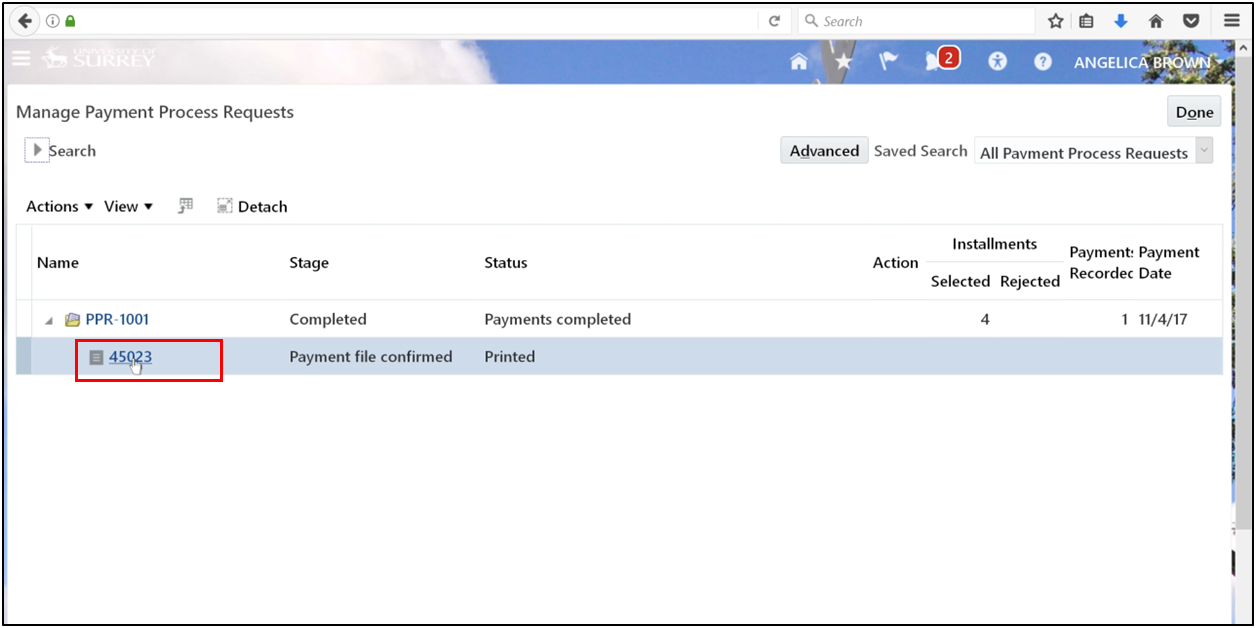
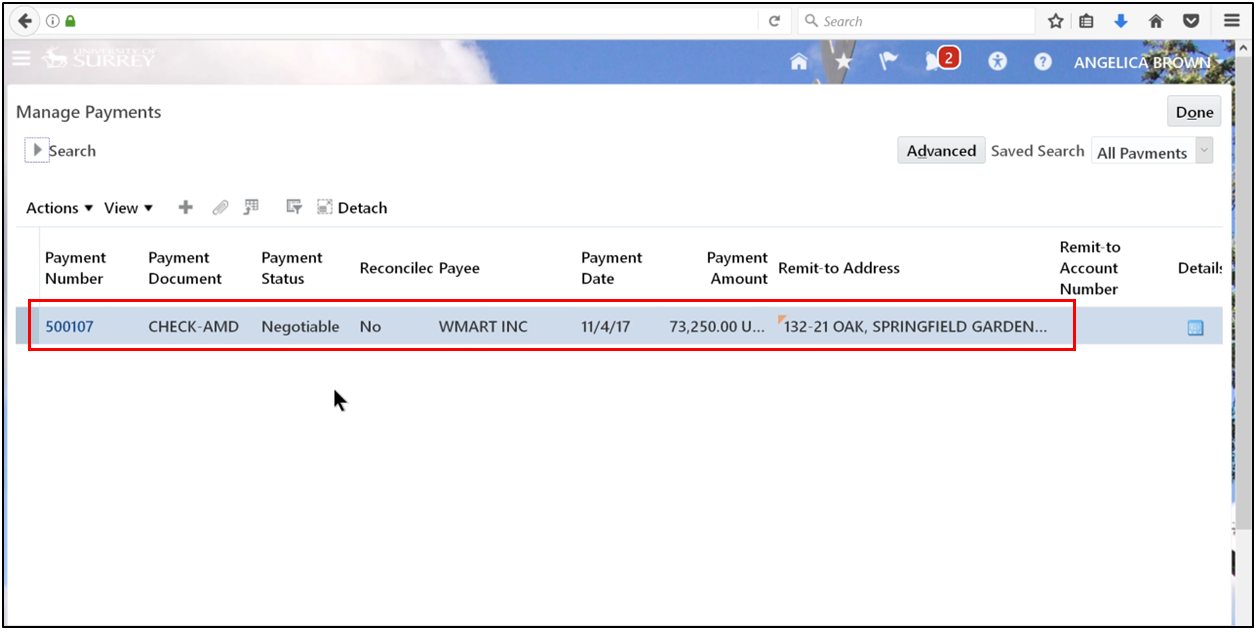
Step 8: View Payments
- Search using the request name.
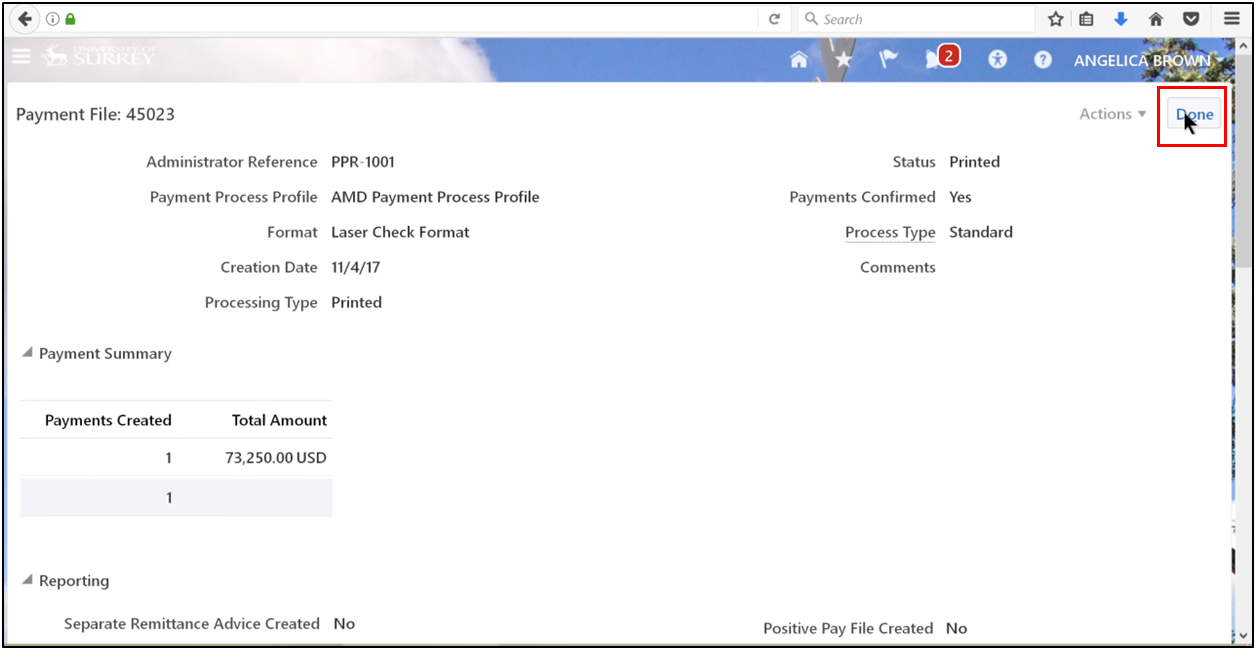
- Ensure the payment file is confirmed and the status is printed, then open the file.
- Scroll down and copy the paper document number.
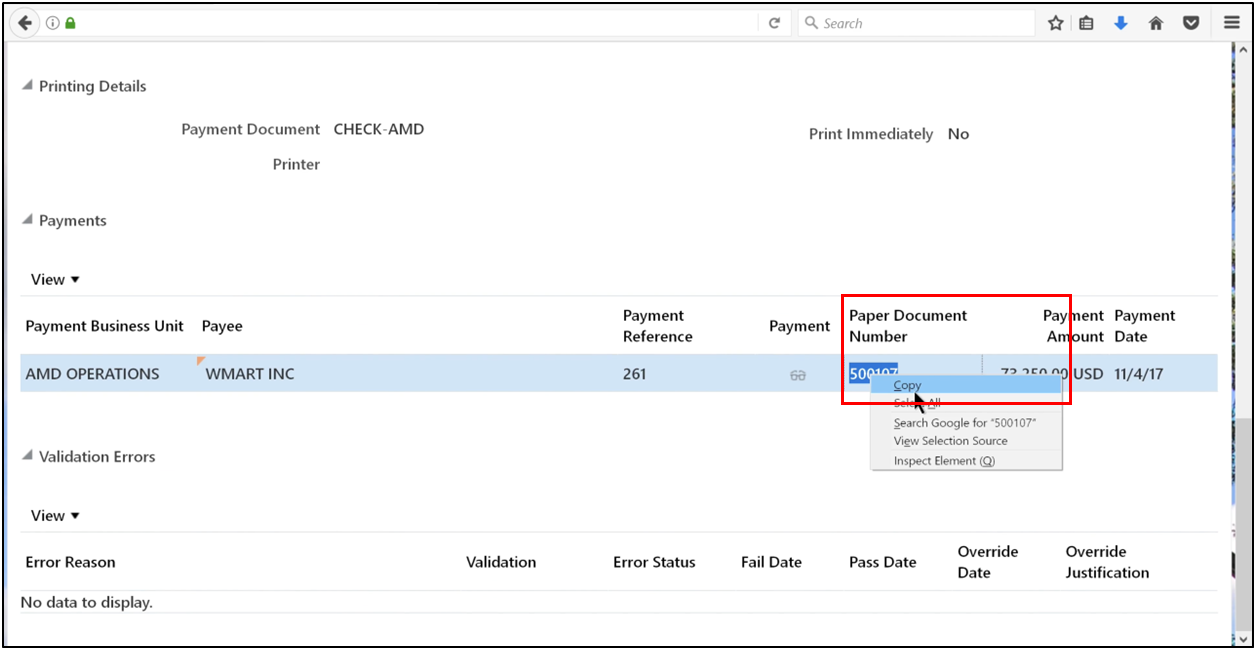
- Scroll up and click Done.
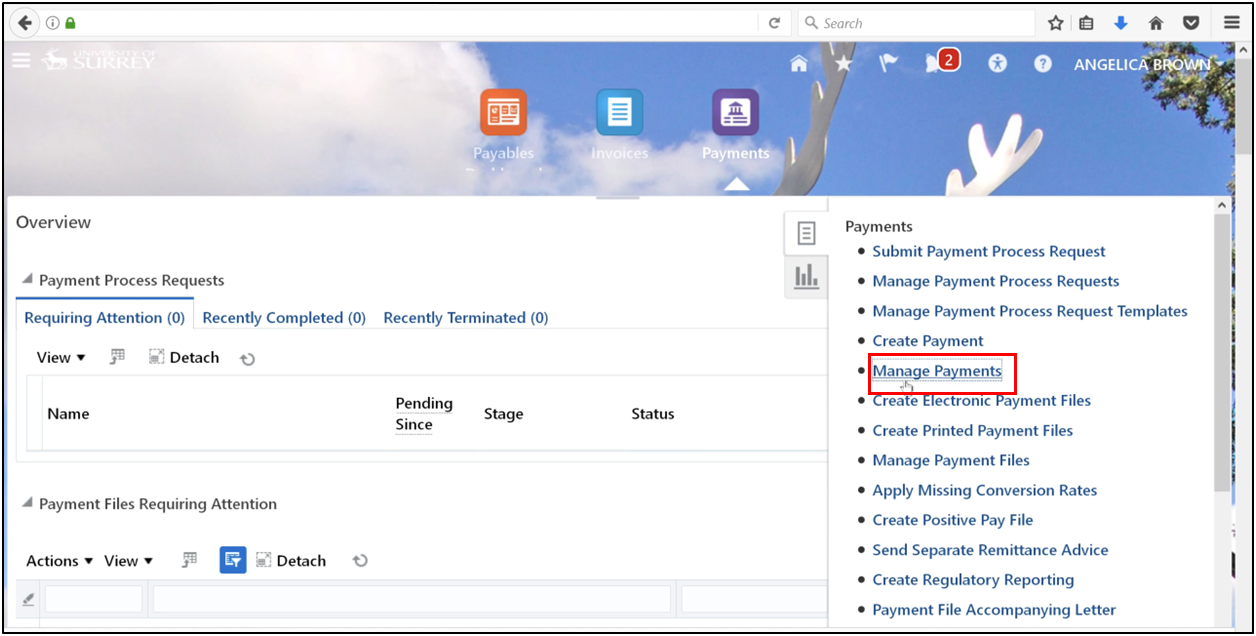
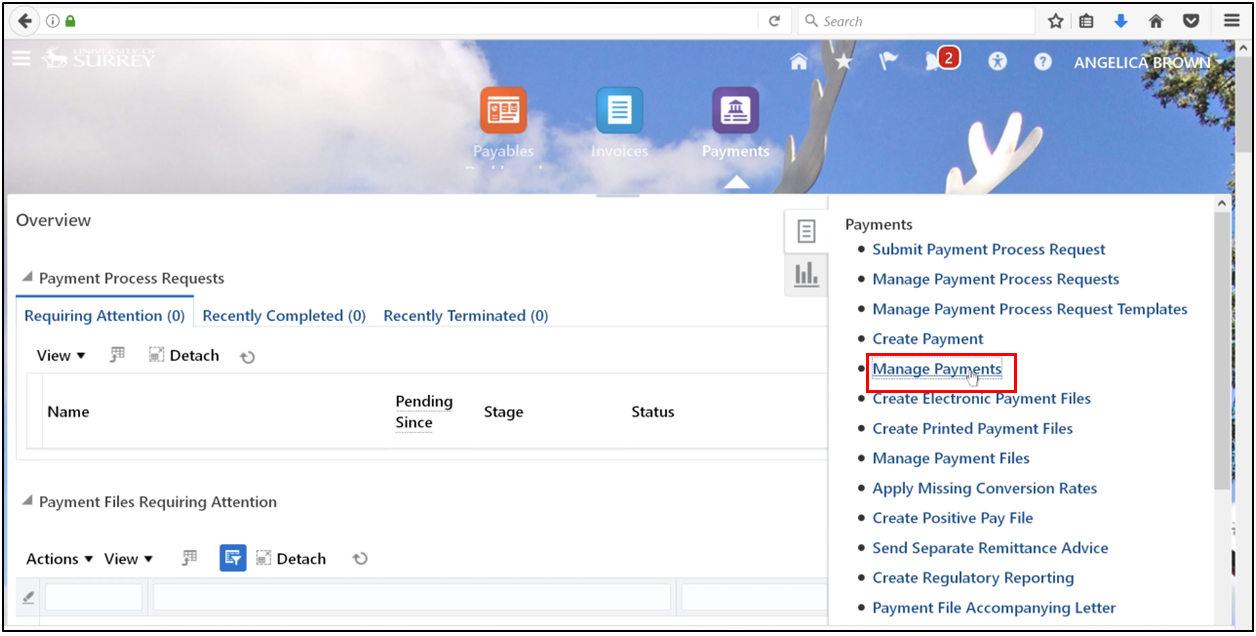
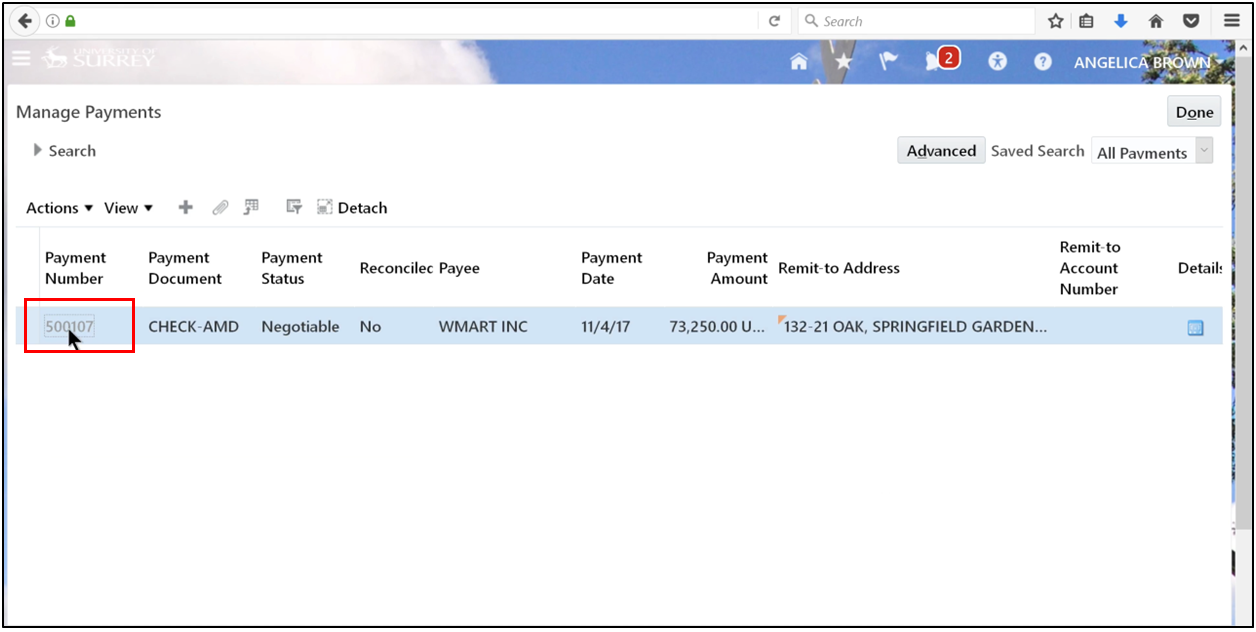
- Open the task and click on Manage Payments.
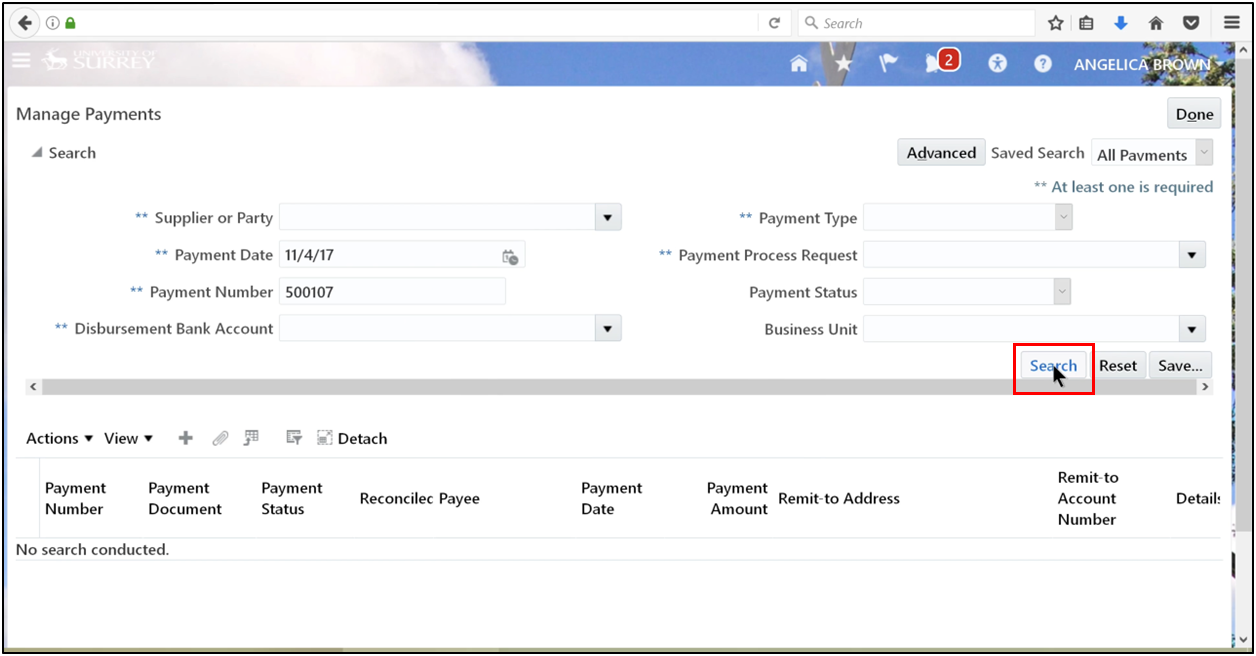
- Enter the copied number and select the date; click Search.
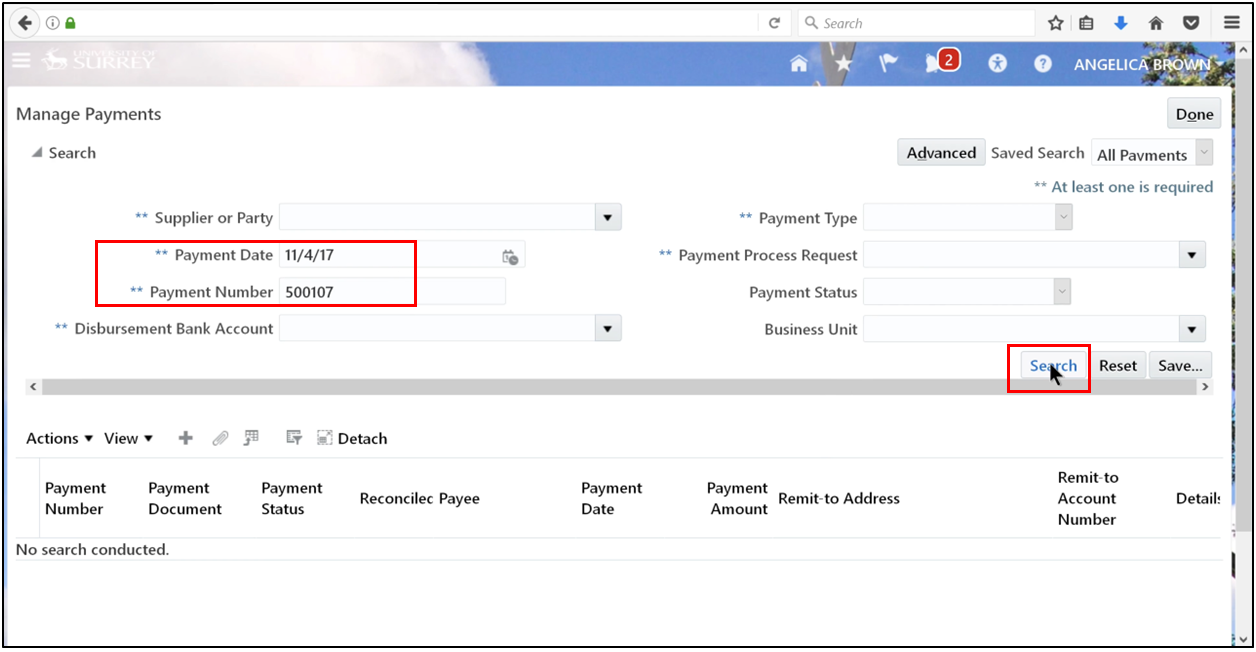
- Ensure the status is set to Negotiable.
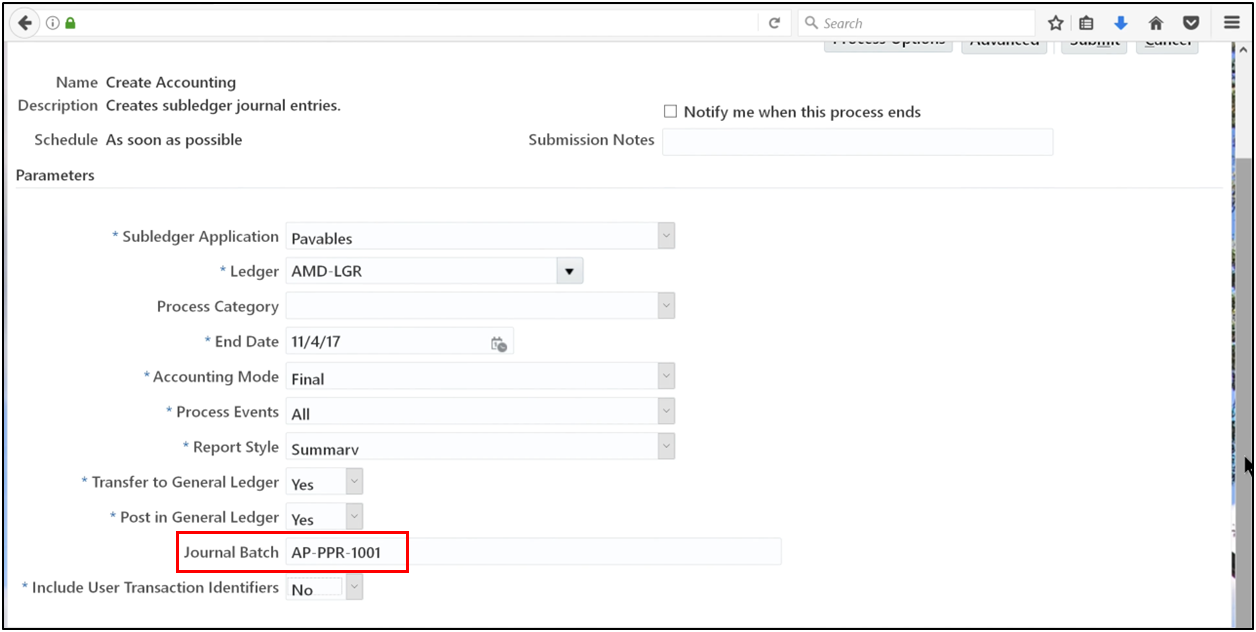
Step 9: Run Payment Accounting Process
The last step is to move the transaction from the subledger into the general ledger. For those wondering which accounts payable it comes under, it sits as a liability on the balance sheet until this process is finalized.
- Define Journal Batch and click Submit.
- Click OK.
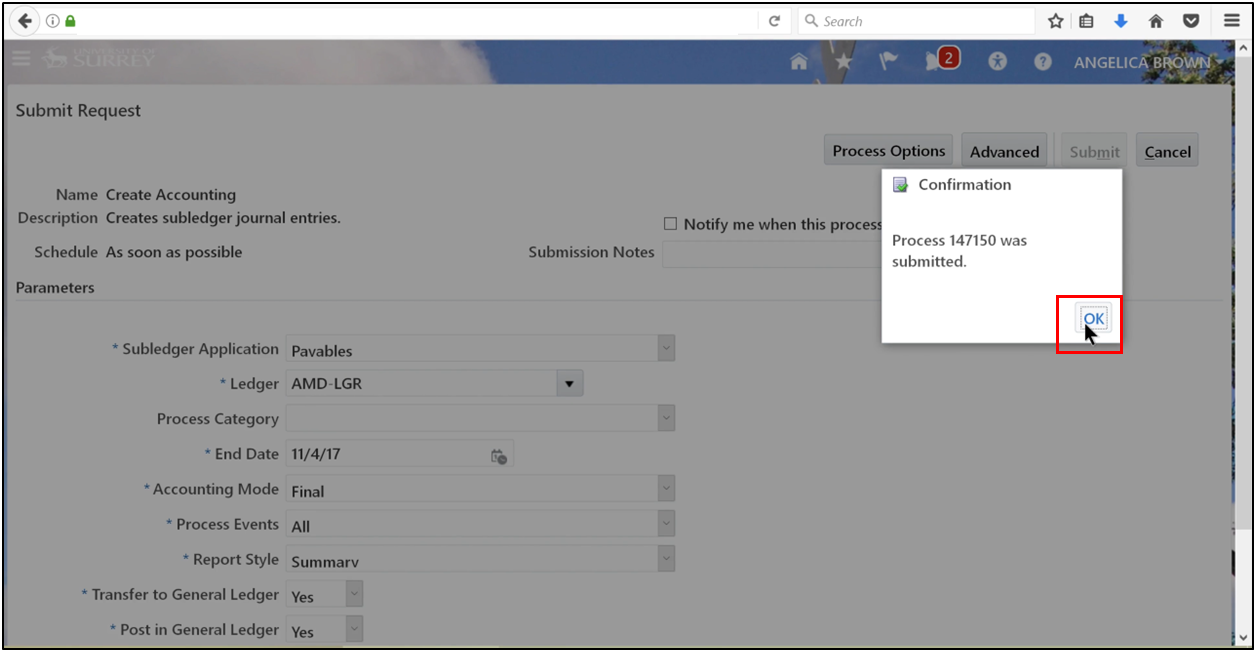
- Refresh until "Succeeded" appears.

- Open the task and click on Manage Payment.
- Define the number and select the date; click Search.
- Click the payment number.
- Go to Actions and click View Accounting.
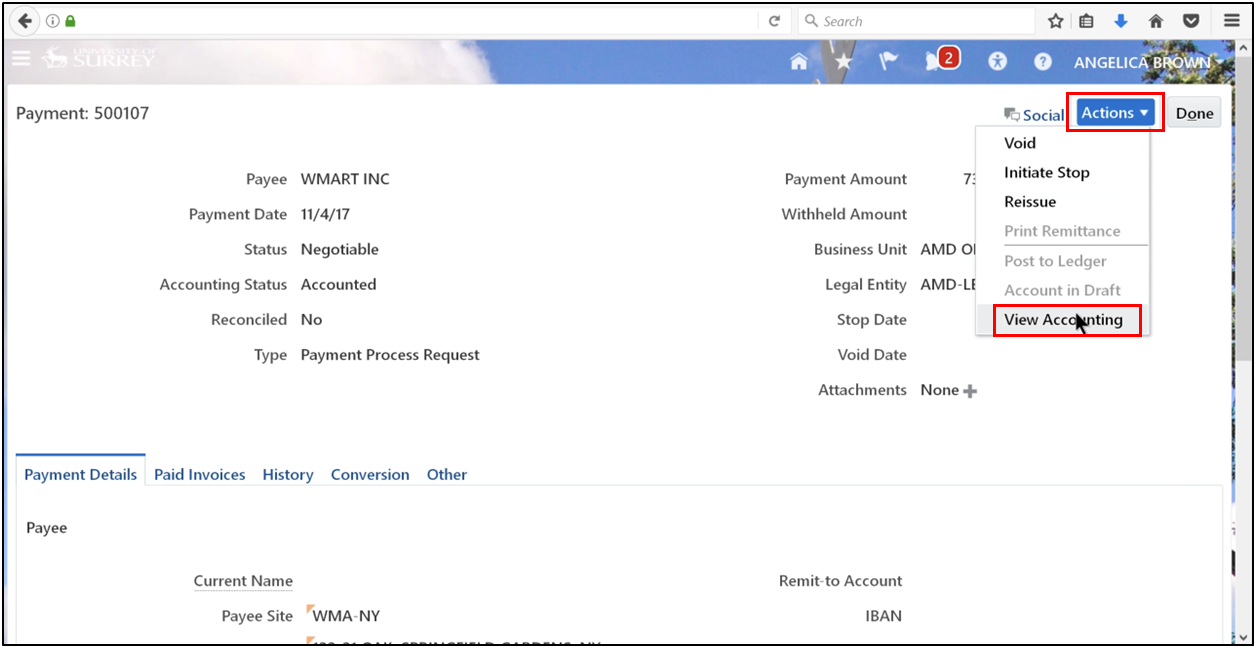
- Check and click Done.
The Automatic Payment Process has been generated.
For advanced cases such as multi-period accounting in Oracle Fusion Payables, this step allows expenses to be spread across the appropriate period while accurately capturing cash payments.
Conclusion
By mastering the Oracle Fusion Payables automated payment process through the Payment Process Request (PPR), organizations can improve accounts payable efficiency, reduce manual errors, and ensure timely supplier payments. By implementing structured automated payment processing, finance teams gain better control over invoice validation, payment execution, and accounting synchronization. An optimized accounts payable process in Oracle Fusion not only improves operational efficiency but also strengthens vendor relationships and financial accuracy. As businesses continue adopting cloud ERP solutions, understanding and effectively managing PPR in Oracle Fusion Payables becomes essential for achieving scalable, compliant, and efficient payment management across global operations.