Overview
This guide covers the process of creating and formatting OTBI (Oracle Transactional Business Intelligence) reports in Oracle Fusion Cloud. You will learn how to add columns from subject areas, calculate balance amounts using formulas and calculated measures, format report titles with logos and colors, apply column-level formatting, use conditional formatting for visual cues, add filters, sort data, and create groups for organized reporting.
Creating OTBI Reports
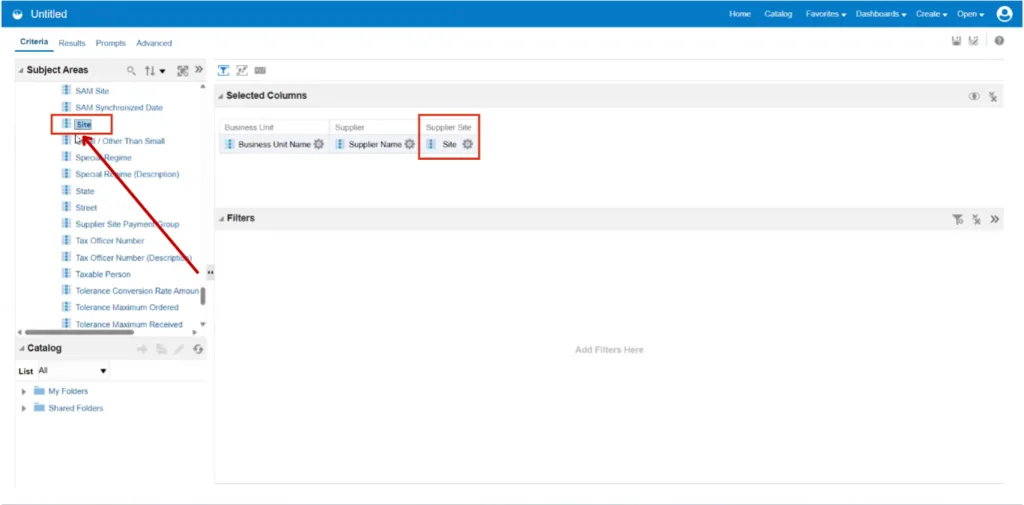
- Double click on the Site to add it as a column.
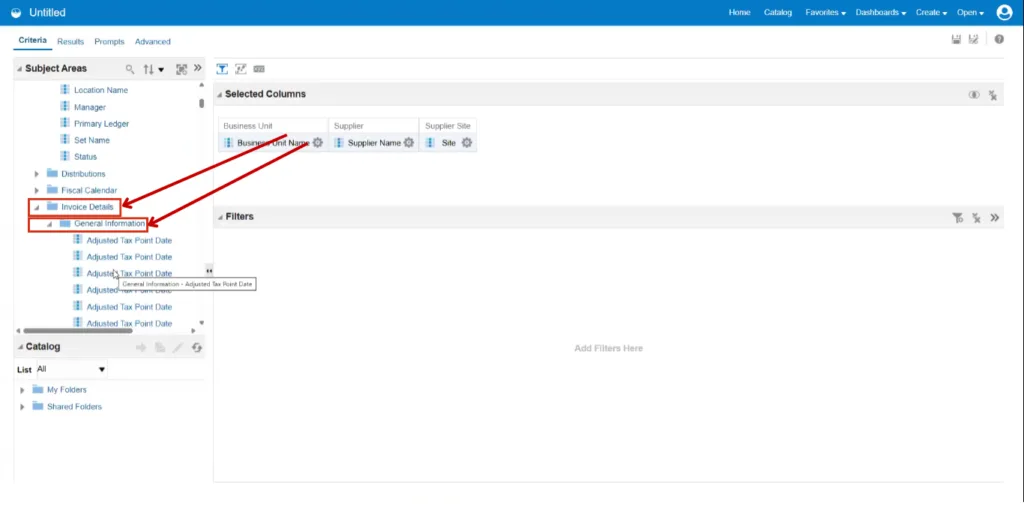
- Expand Invoice Details and General Information to select the Invoice details.
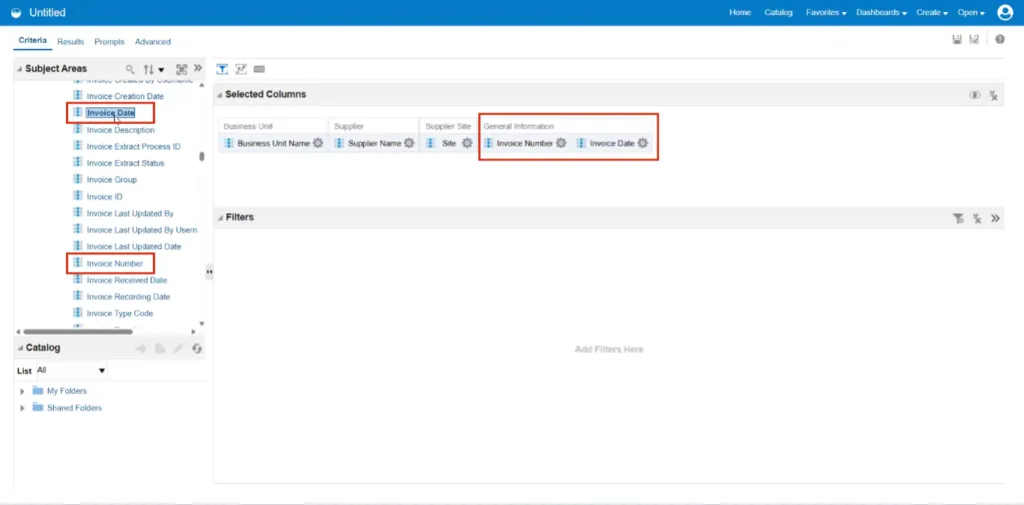
- Double Click on the Invoice Number and Date to add them as a column.
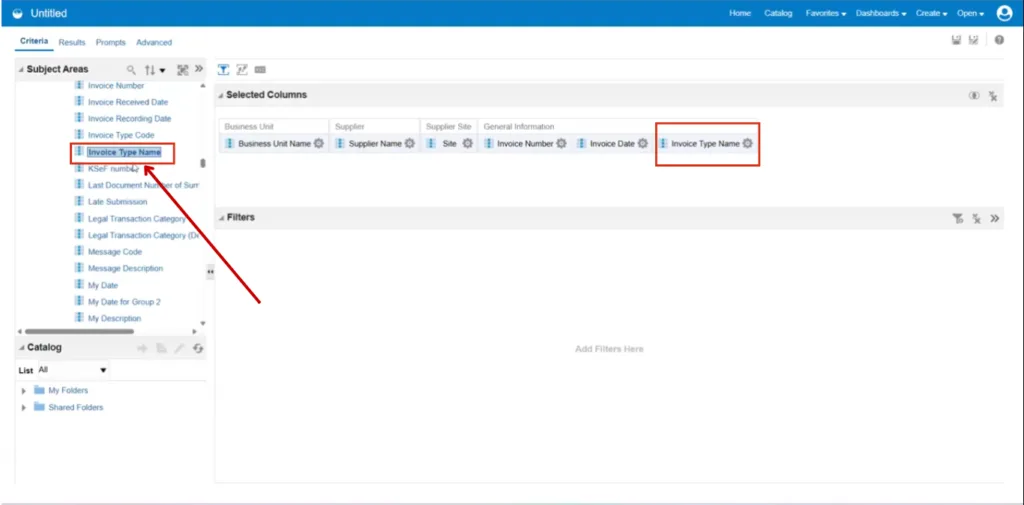
- Double Click on the Invoice Type Name to add it as a column.
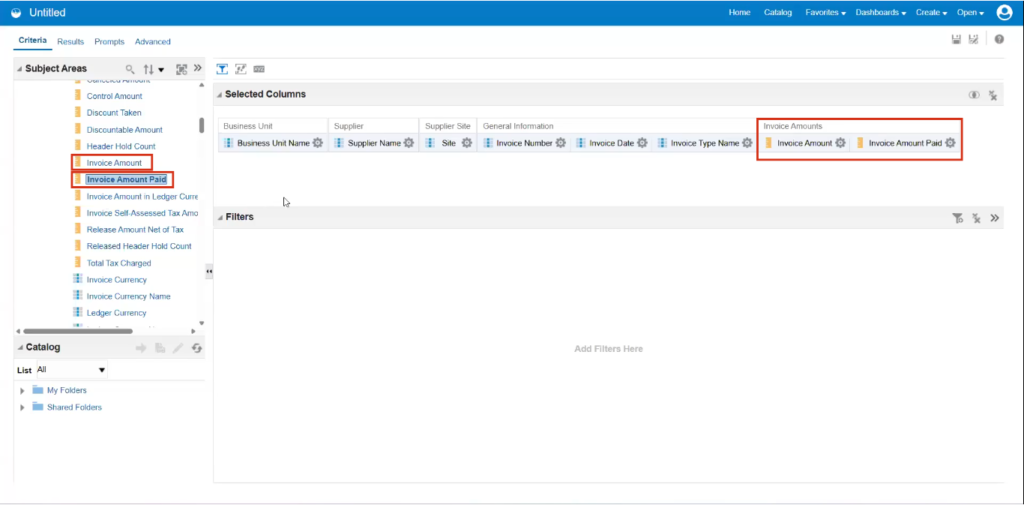
- Double Click on the Invoice Amount and Invoice Amount Paid to add them as a column.
-
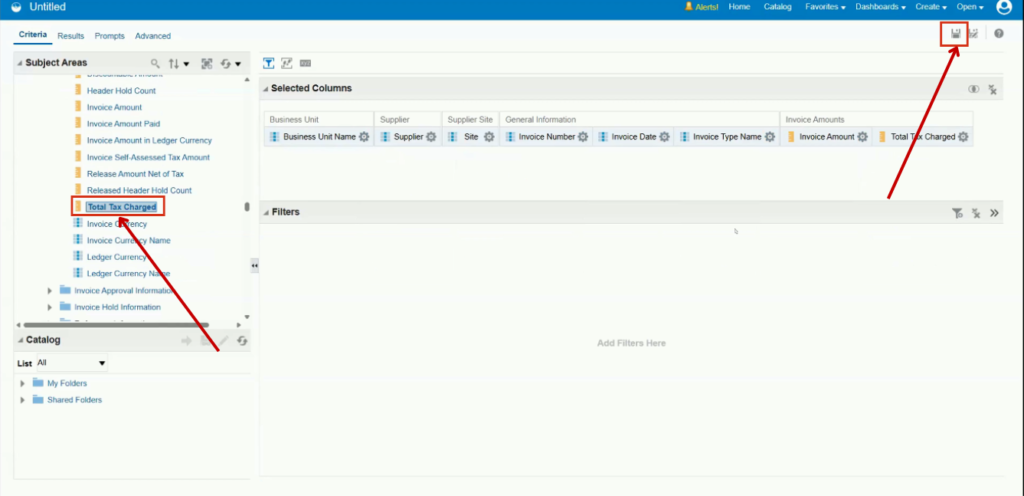
Double Click on the Total Tax Charged add it as a column.
-
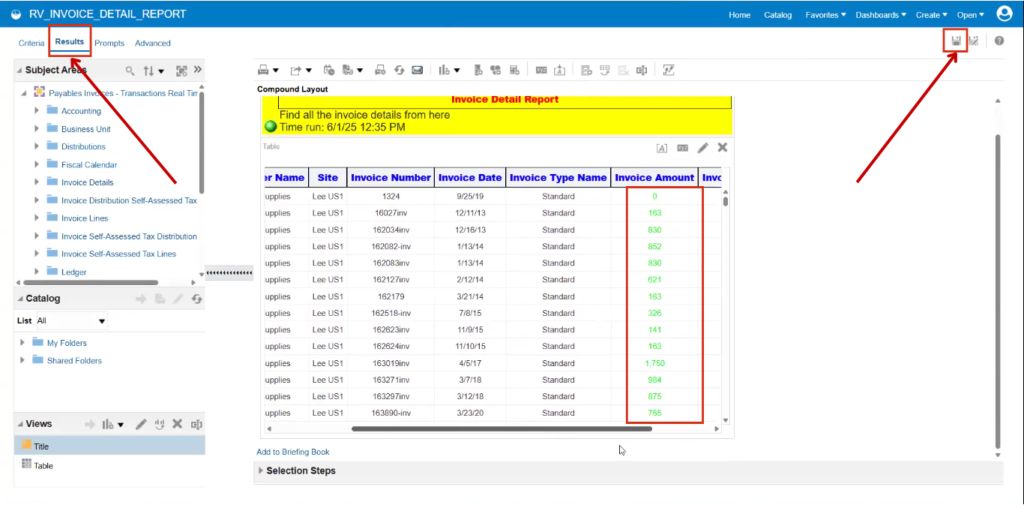
Click on Save to save analysis.
-
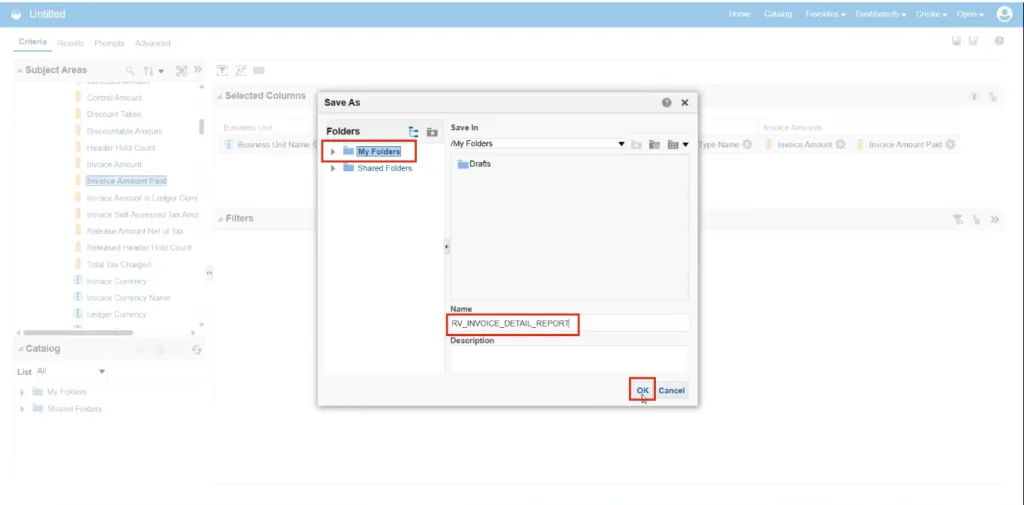
Save the report under My Folder with the name RV INVOICE DETAIL REPORT.
-
Click on OK.
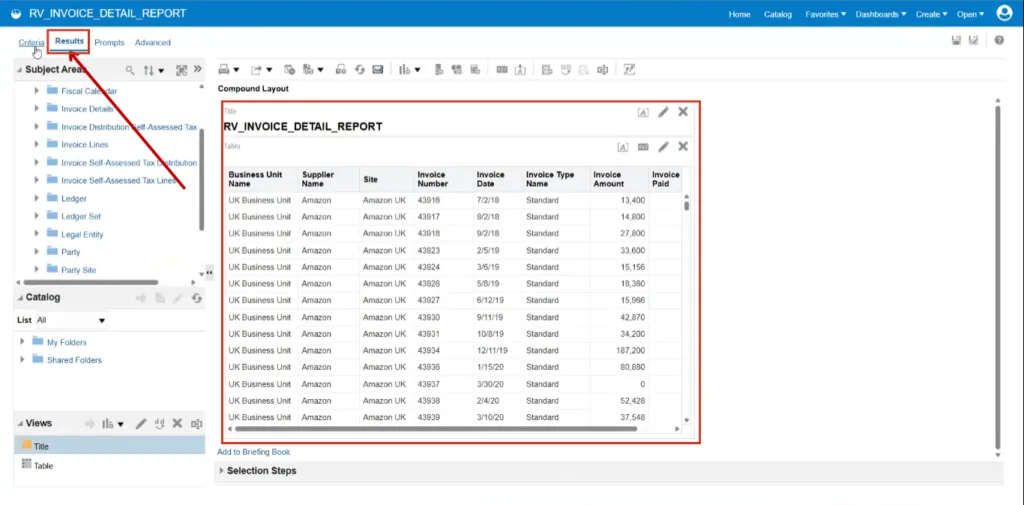
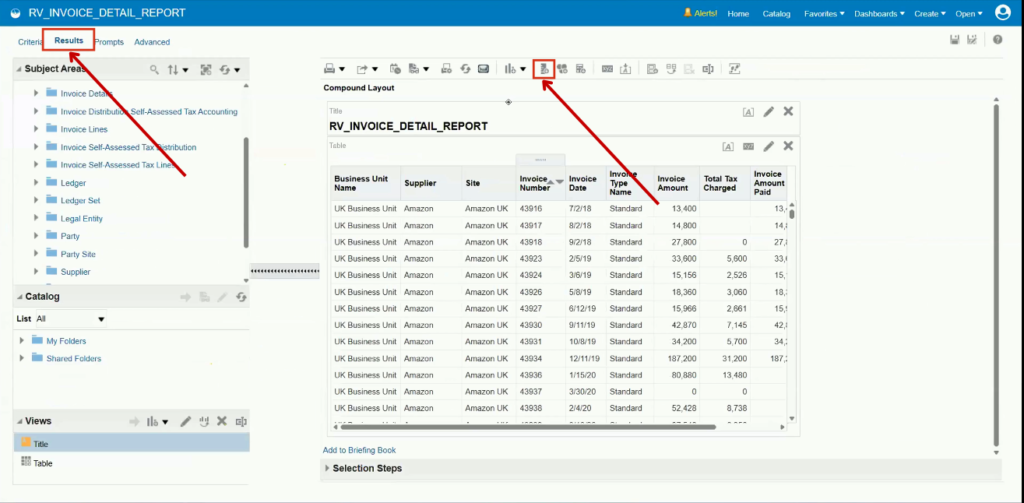
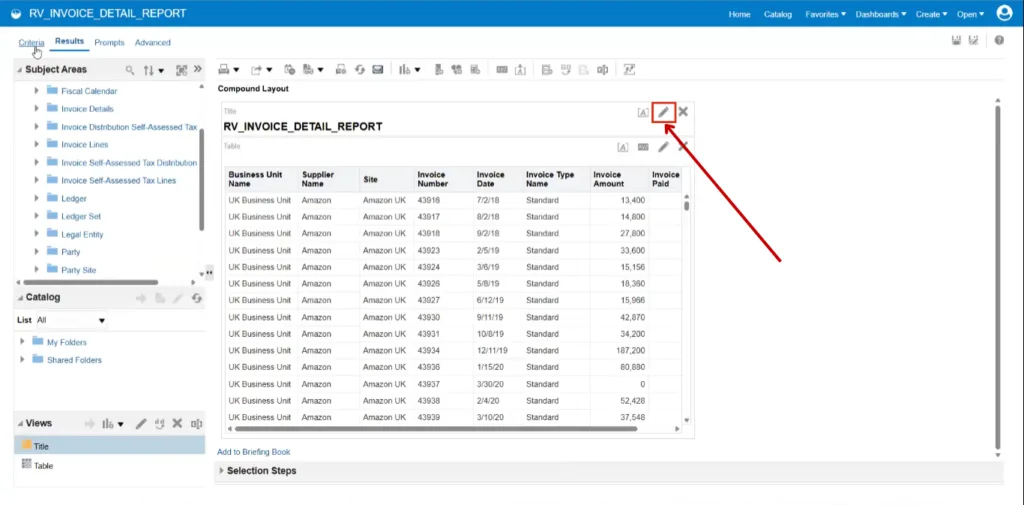
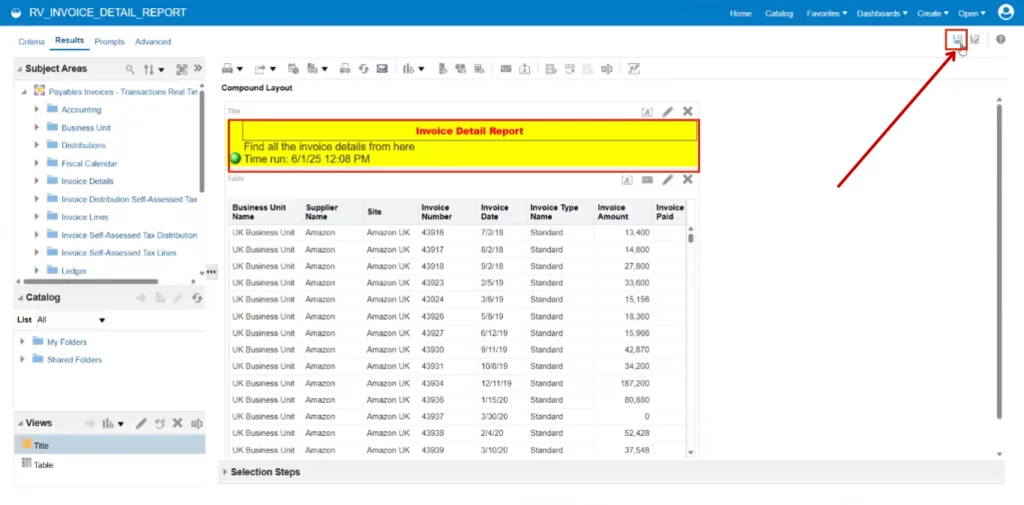
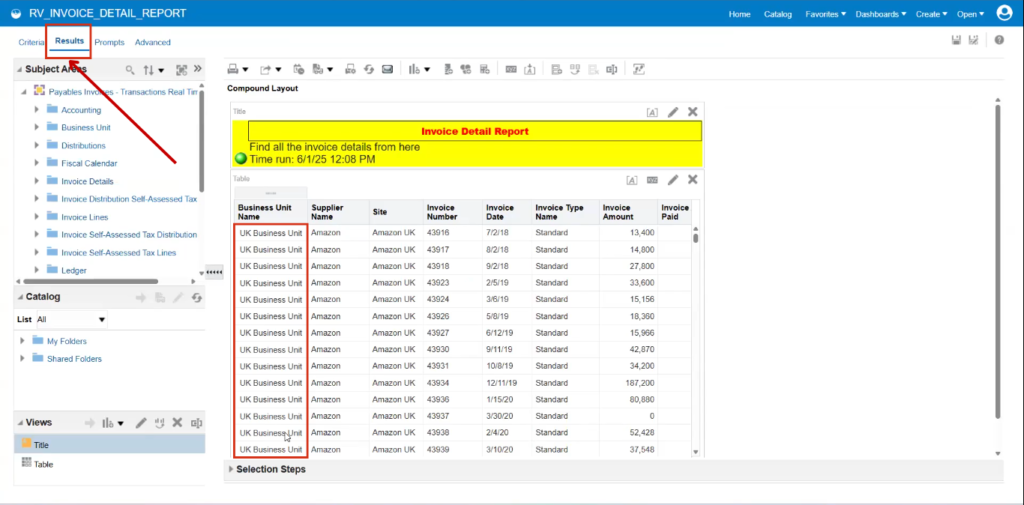
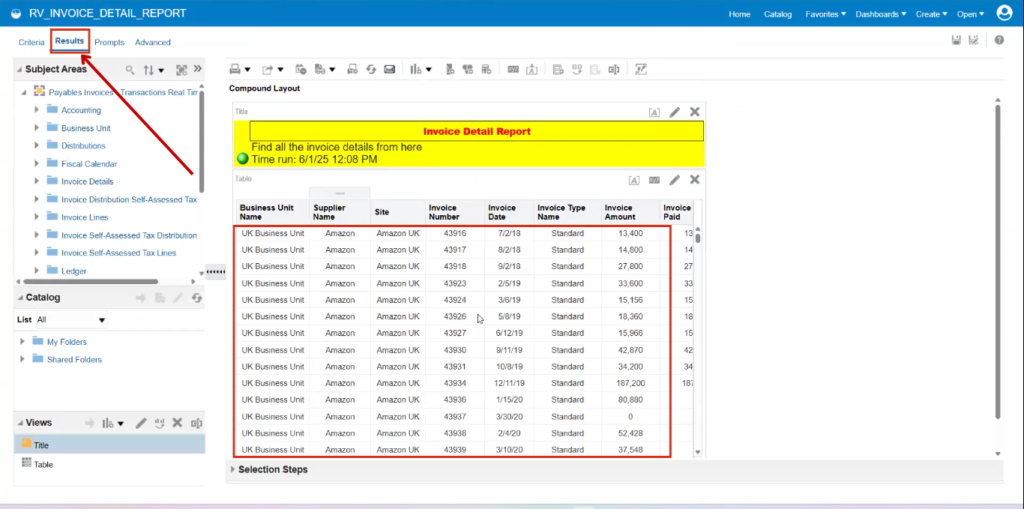
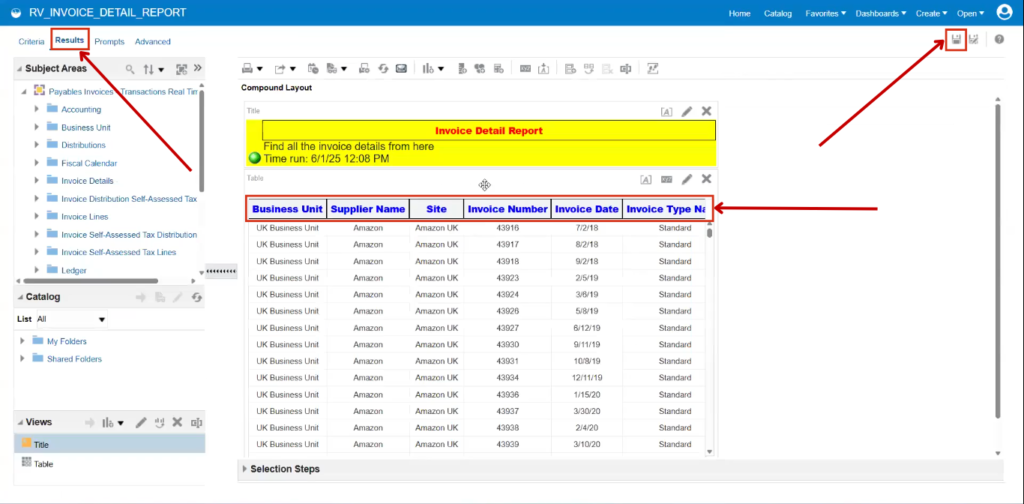
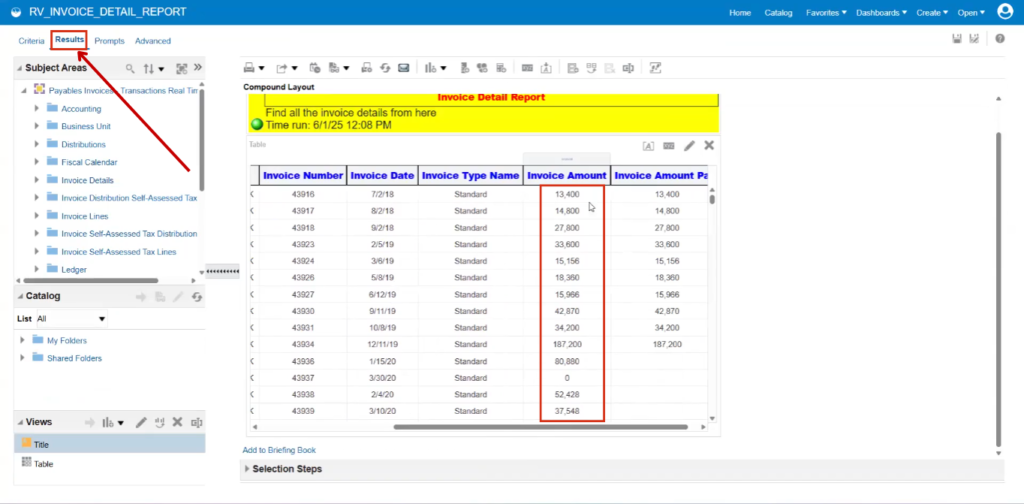
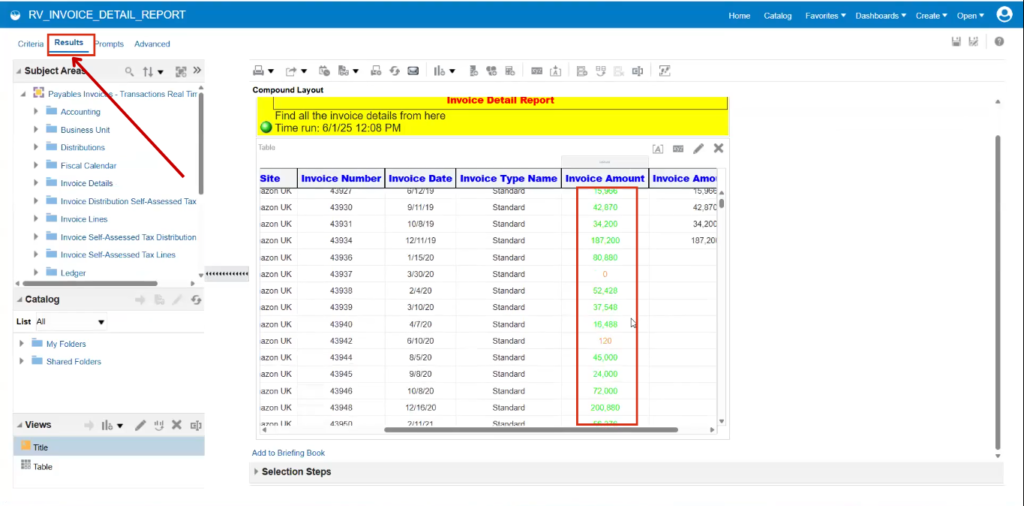
- Go to the Results tab to view the results. All relevant results have been displayed.
Calculating Balance Amount to be Paid
The balance amount, which remains unpaid, can be calculated by subtracting the invoice amount paid from the total invoice amount.
There are two ways to do this:
Method 1: Select any column from the table and modify the formula.
Method 2: Use the Calculated Measure option, which allows for custom calculations.
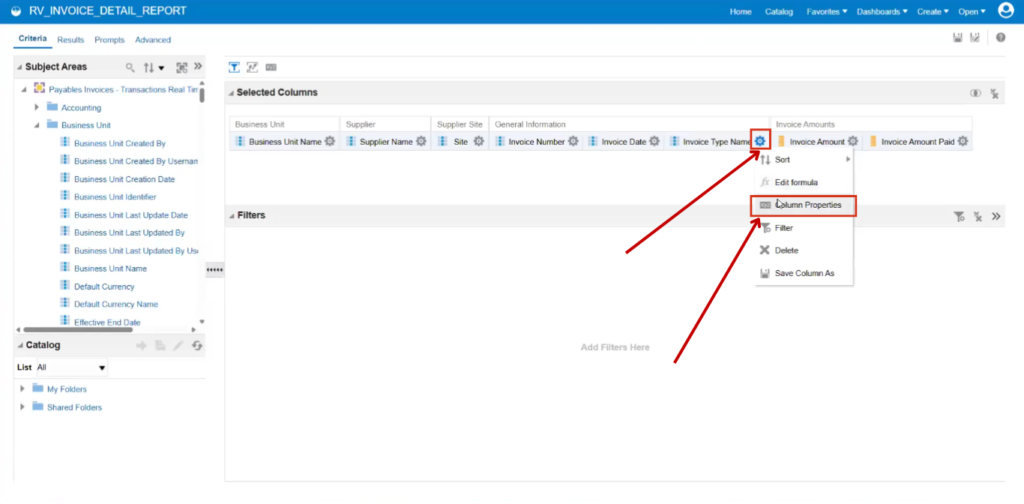
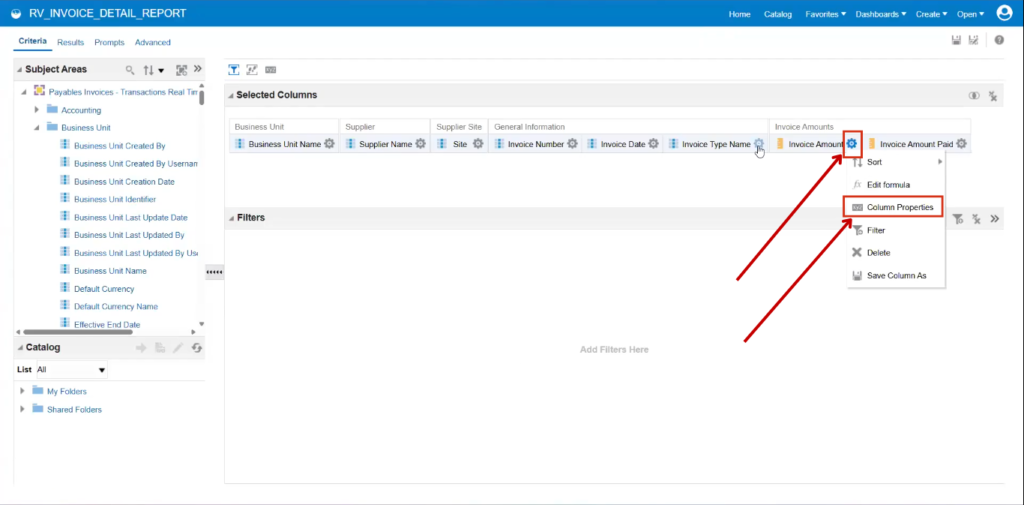
Method 1: Select any column from the table and modify the formula.
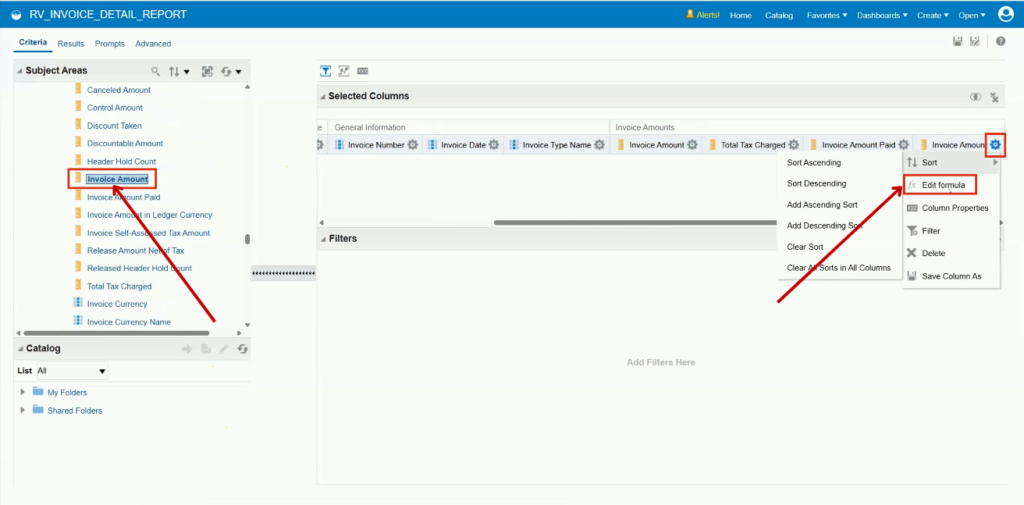
- Add the column for Invoice Amount, then click on Settings and select Edit Formula.
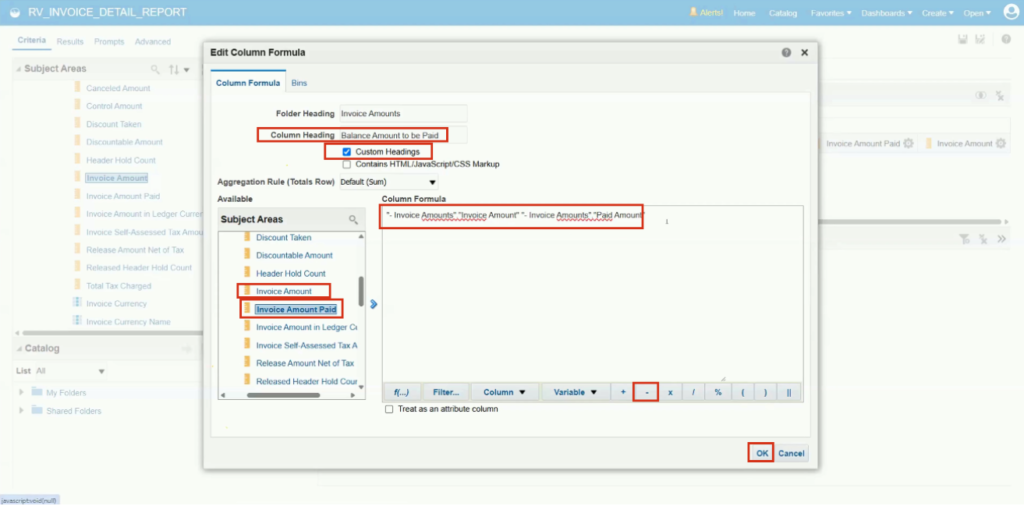
- Click on Custom Heading and change the column name from Balance Amount to Amount to be Paid.
The first formula is derived from the Invoice Amount.
-
Next, click on the Operator (-) and select Invoice Amount Paid from the subject areas to reflect it in the formula.
-
Finally, click on OK to save the changes.
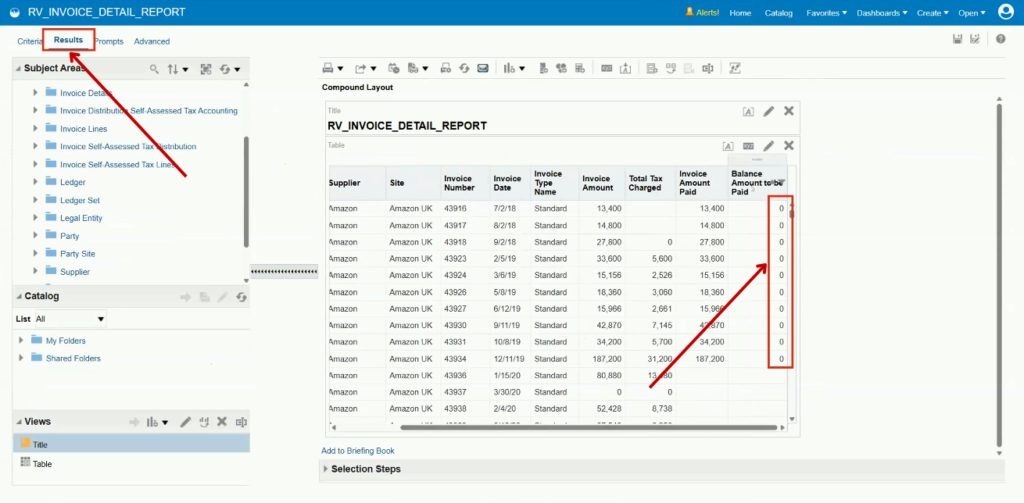
- Go to the Results, and you'll see that the balance is zero.
- Go to the Results and click on the New Calculated Measure.
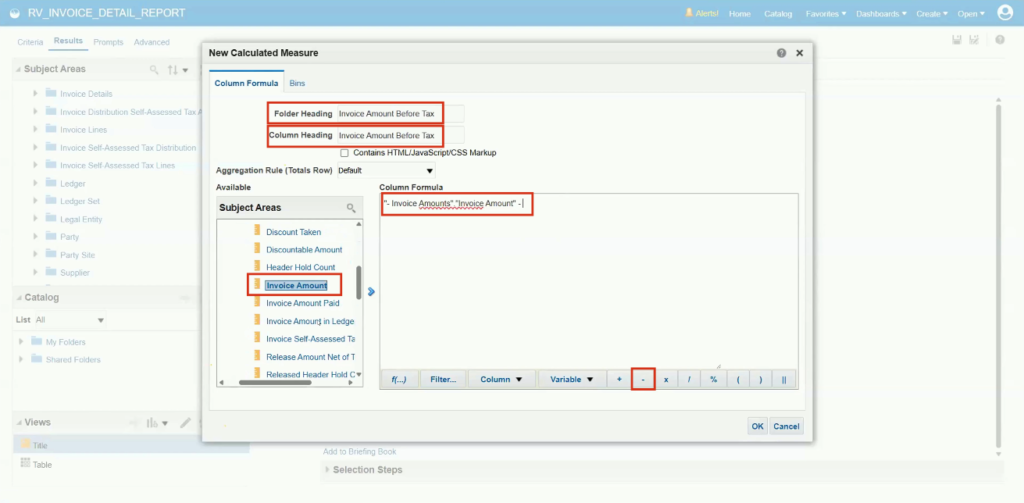
The invoice amount and total tax charged are available. The invoice amount always includes the total tax. The goal is to determine the amount before tax — the invoice amount excluding tax. This can be calculated using a calculated measure.
-
Enter the Column Heading and Folder Heading name as Invoice Amount Before Tax.
-
Select the Invoice Amount, then add a space, enter the operator (-), and provide another space.
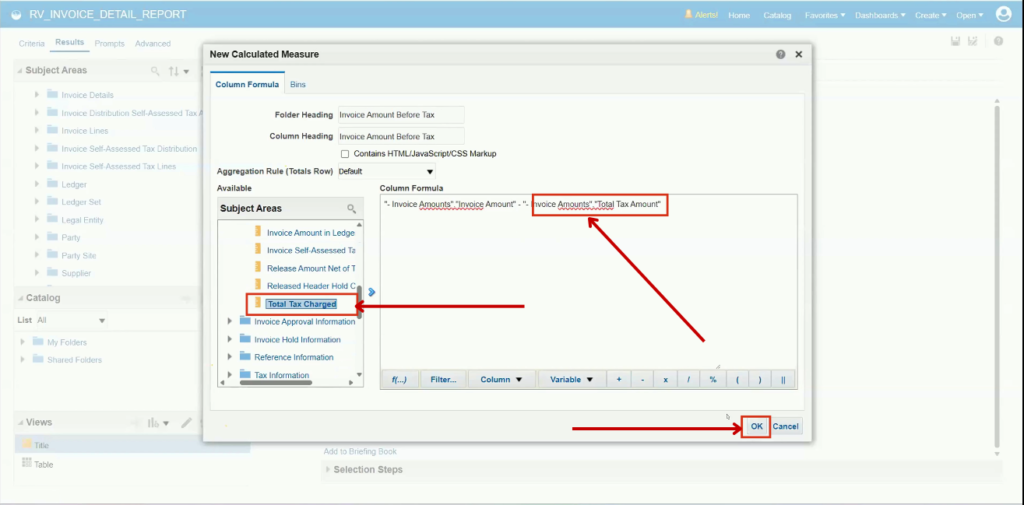
- Select the Total Tax Charges, then click on OK.
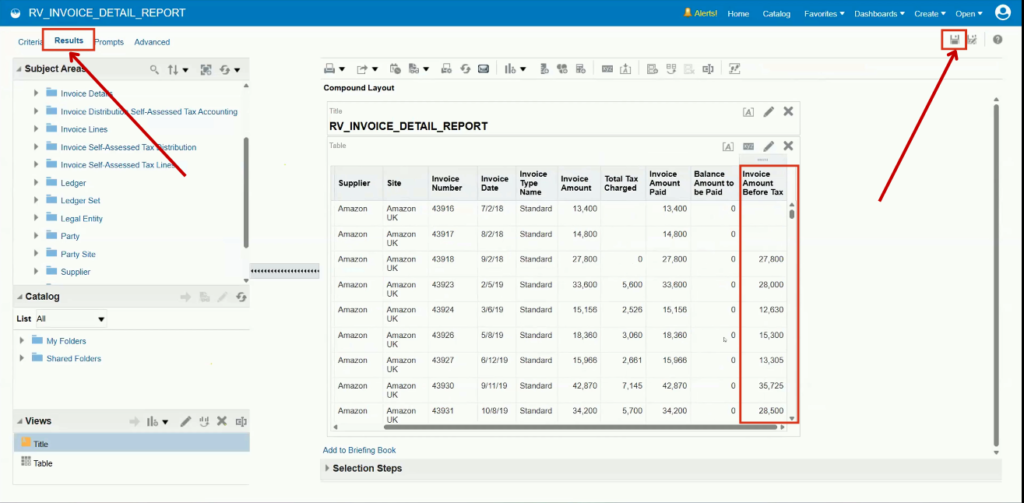
- Navigate to the Results, where the Invoice Amount Before Tax column is displayed. This shows how to create a simple calculation using a calculated measure and formulas in OTBI. Then, click on Save Analysis.
Formatting OTBI Reports
- Go to Title section and Click on Edit icon.
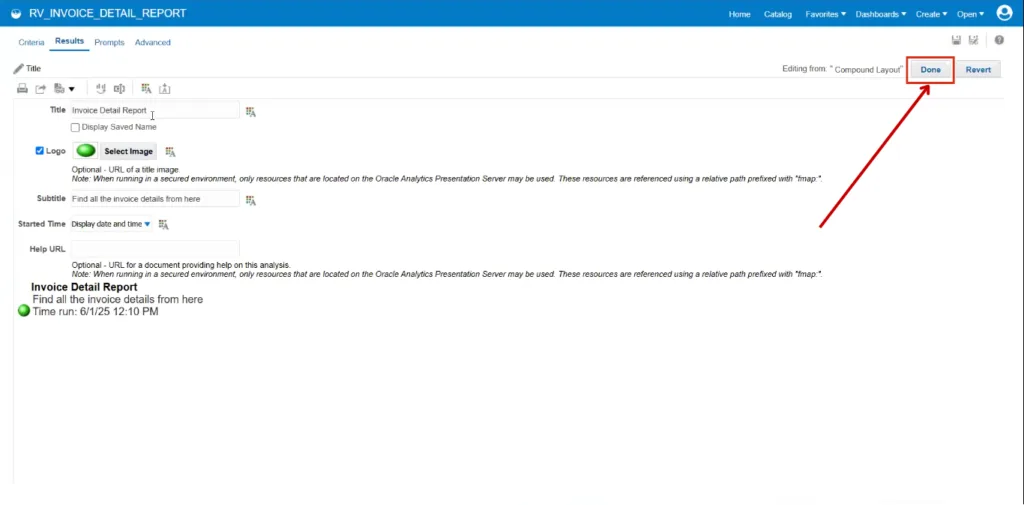
- Enter the title as Invoice Detail Report (this title will be visible to users) then click on the Logo.
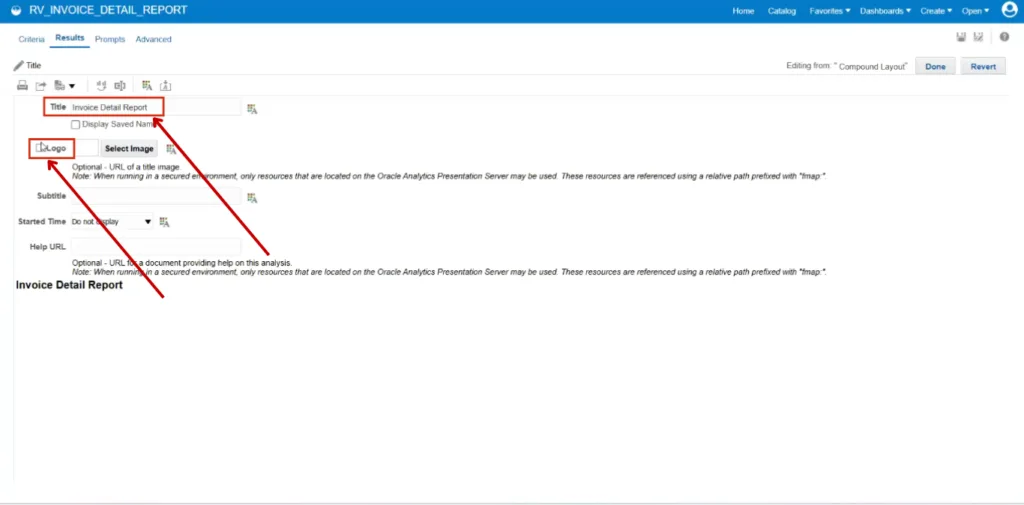
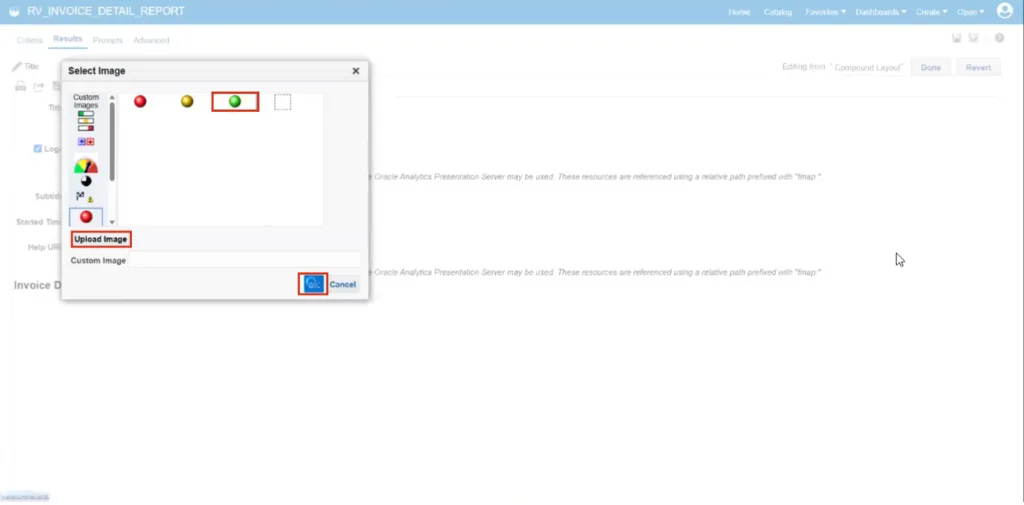
- Select the logo according to your preferences or upload a custom image, then click OK.
-
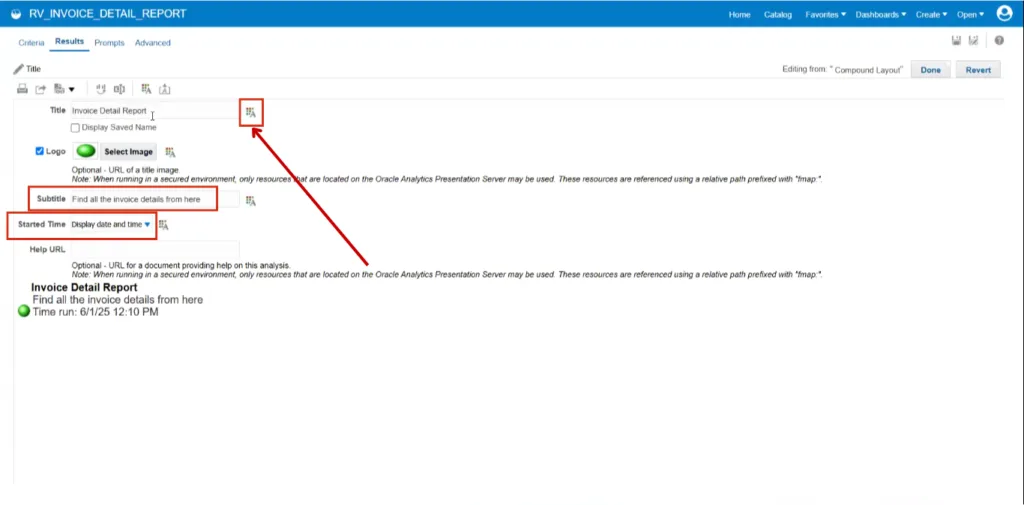
Enter the subtitle: Find all the Invoice Details from here.
-
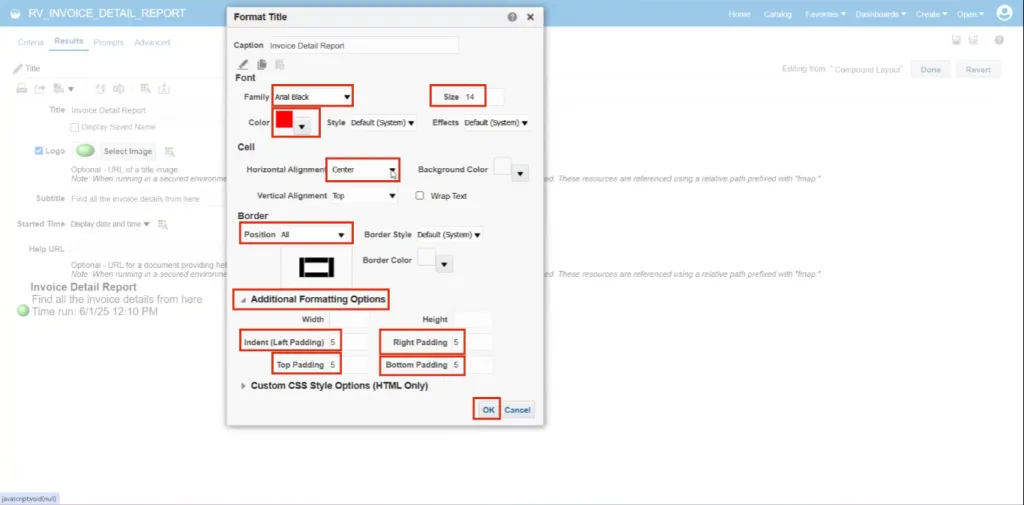
For Started Time, select as Display Date and Time from drop down. To enlarge the title, click on Format Title.
- Enter the following details in Format Title: Font: Arial Black Size: 14 Color: Red Horizontal Alignment: Center Border Position: All
Expand the Additional Formatting Options: Left Padding: 5 Right Padding: 5 Top Padding: 5 Bottom Padding: 5
- Click on OK.
- Click on Done.
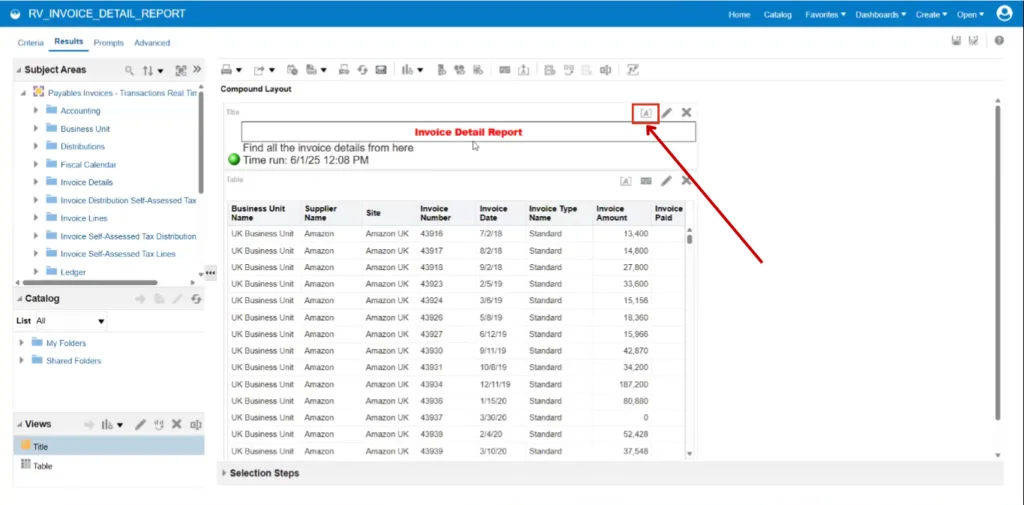
After customization, the report appears as follows. To add color, click on Format Container.
- Select the background color according to your preference (e.g., yellow), then click OK.
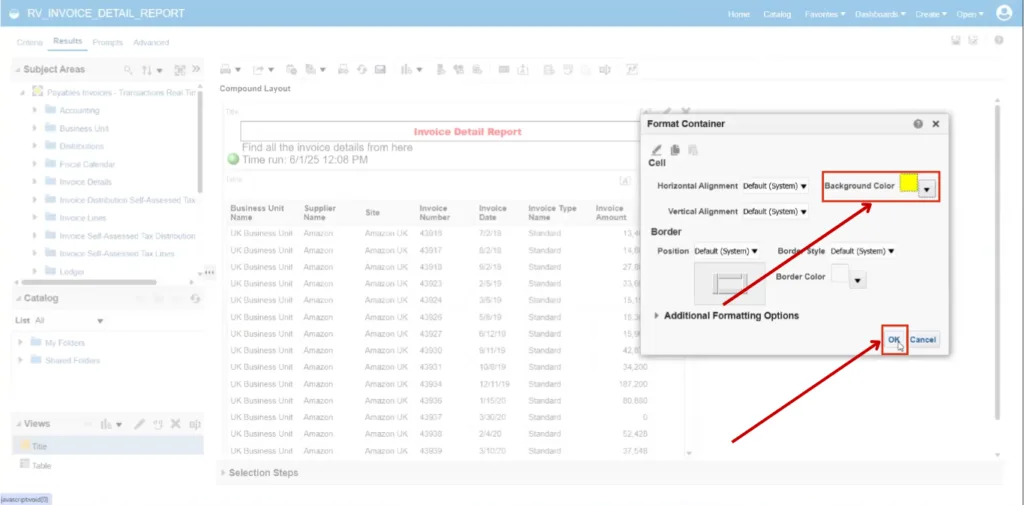
- After applying your preferred color scheme, the title section will display accordingly. Then, click Save to confirm your changes.
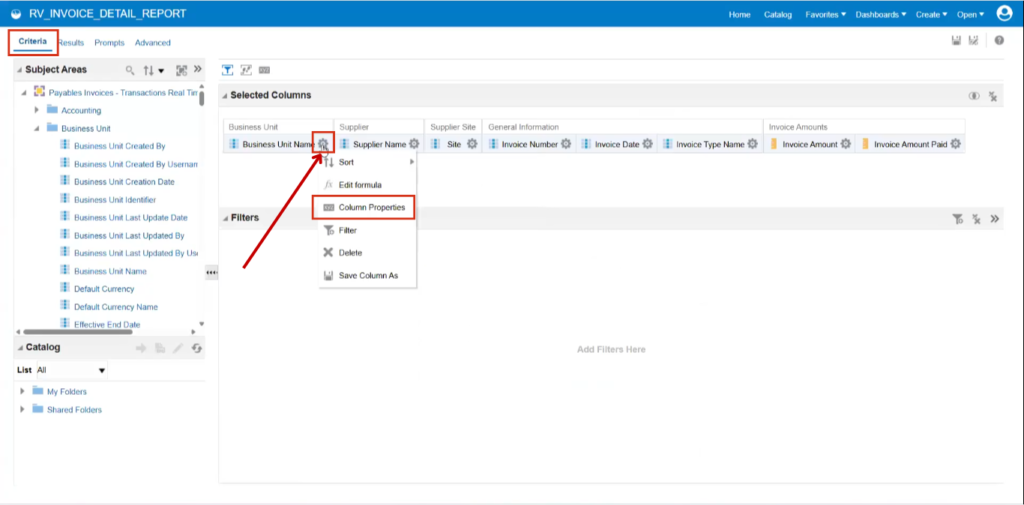
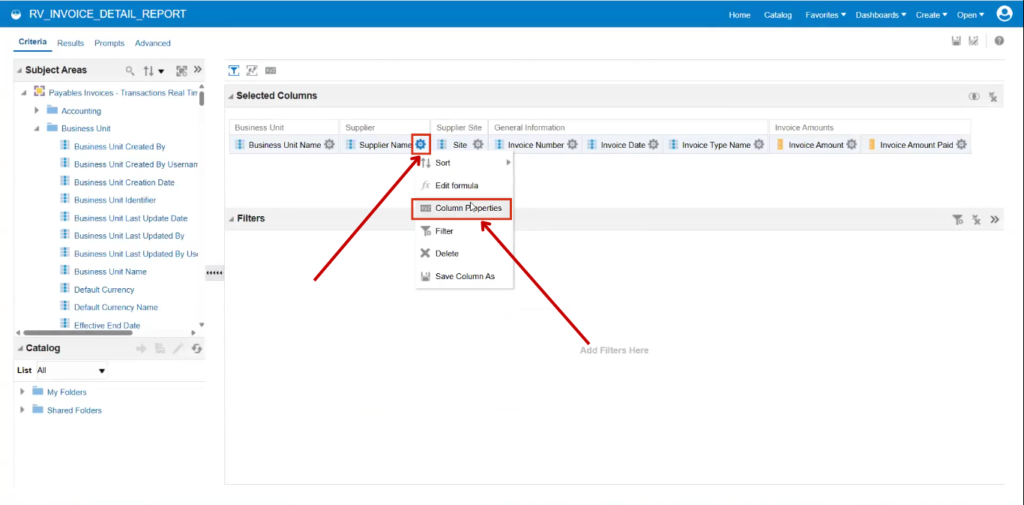
- Go to the Criteria tab. For each column, an option called Column Properties is available under the settings. Click on Column Properties to proceed.
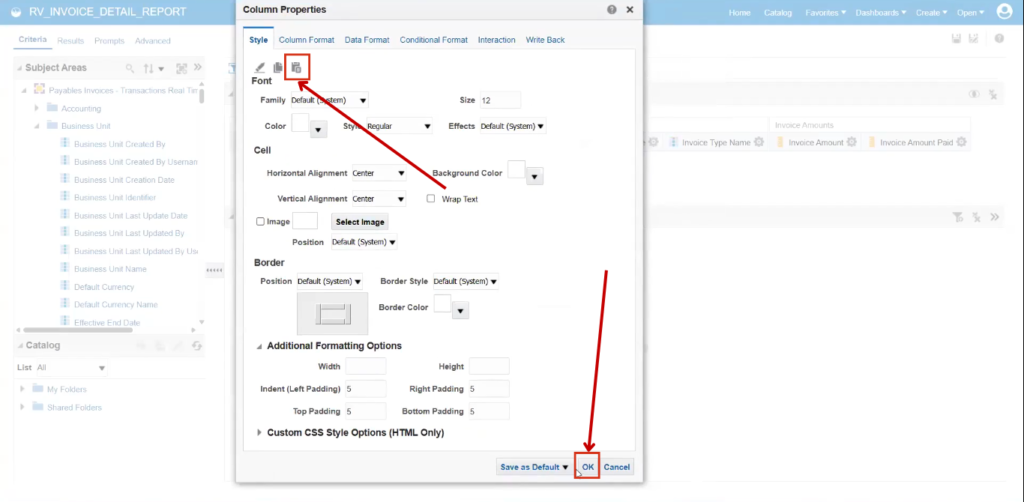
To begin with, the Style option refers to formatting settings. While it opens the same formatting screen, it is important to understand what elements are affected.
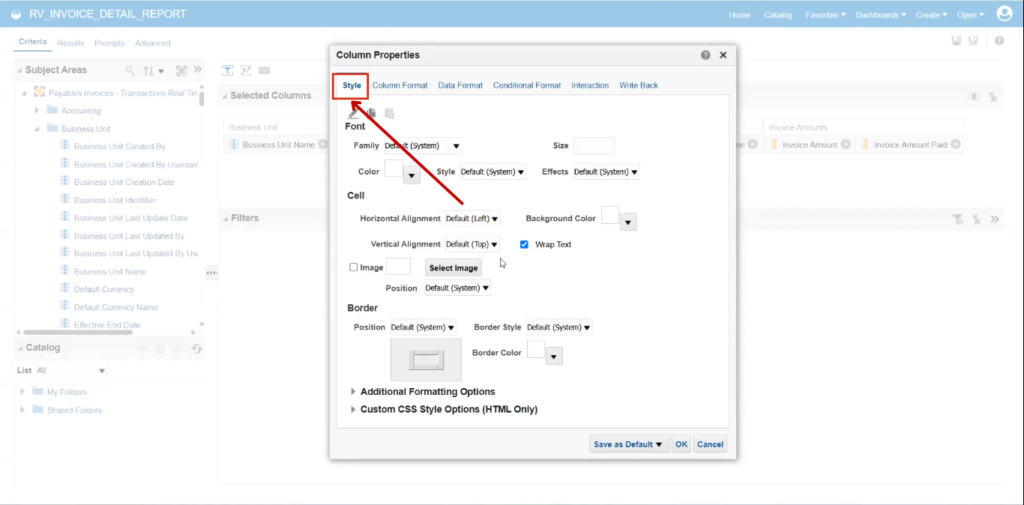
Modifying style properties such as color and formatting impacts only the contents of the table. For example, data values like UK Business Unit or Amazon Invoice Number 43917. The formatting changes do not apply to column headers; only the data cells are affected.
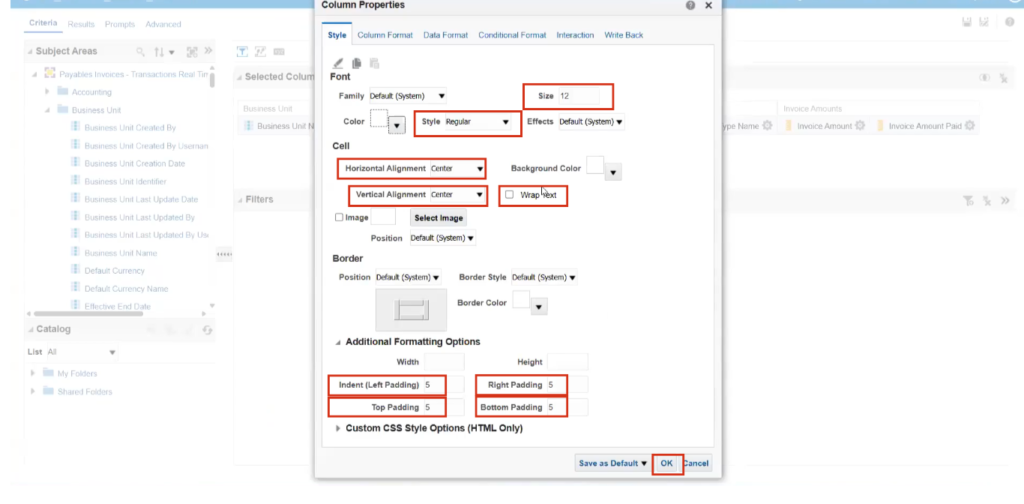
- Enter the following details in Style Tab: Size: 12 Horizontal Alignment: Center Vertical Alignment: Center Deselect the Wrap Text option
Expand the Additional Formatting Options: Left Padding: 5 Right Padding: 5 Top Padding: 5 Bottom Padding: 5
- Click on OK.
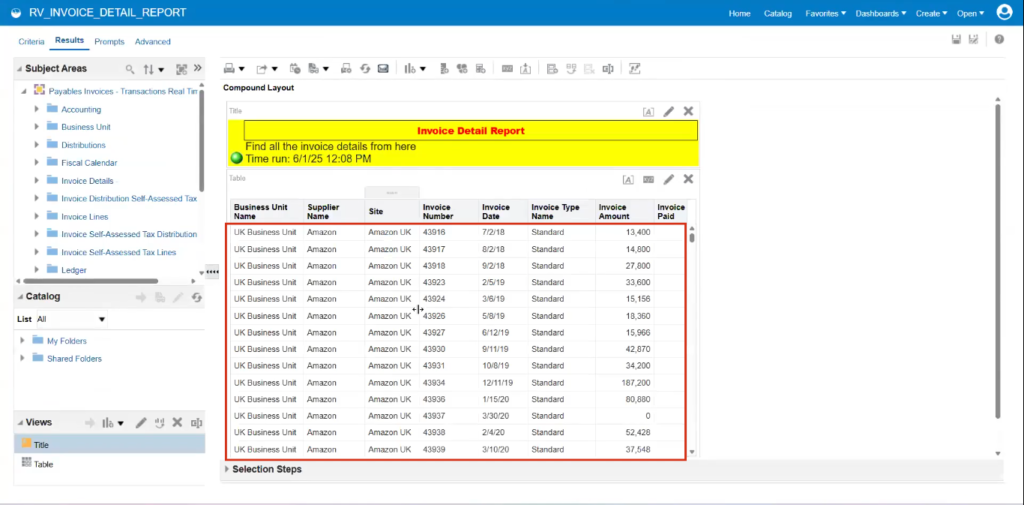
- Go to the Results tab. The first column (UK business unit) is centrally aligned with added spacing, unlike the others. This formatting was applied only to that column.
To apply the same formatting to other columns, it is not necessary to repeat the process manually. Use the Copy Cell Format option and paste it into the required columns.
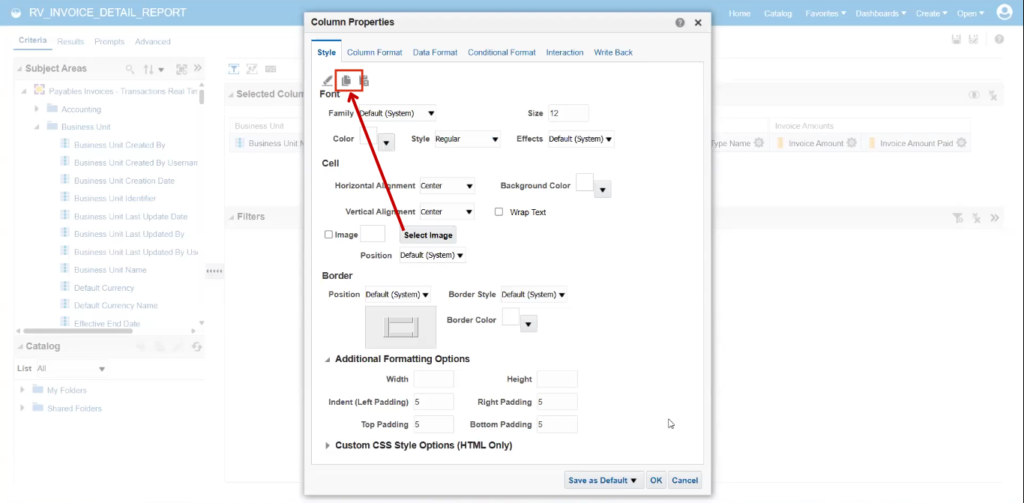
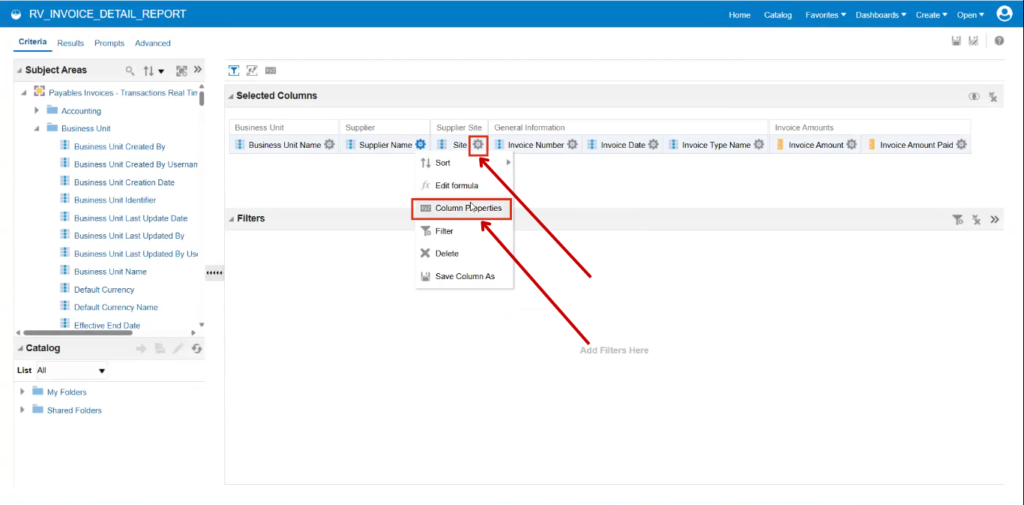
- Go to the Supplier Name settings and click on Column Properties to paste the similar style.
- Click on Paste Cell Format and then click OK.
- Go to the Site settings and click on Column Properties to paste the similar style.
-
Click on Paste Cell Format and then click OK.
-
Go to the Invoice Number settings and click on Column Properties to paste the similar style.
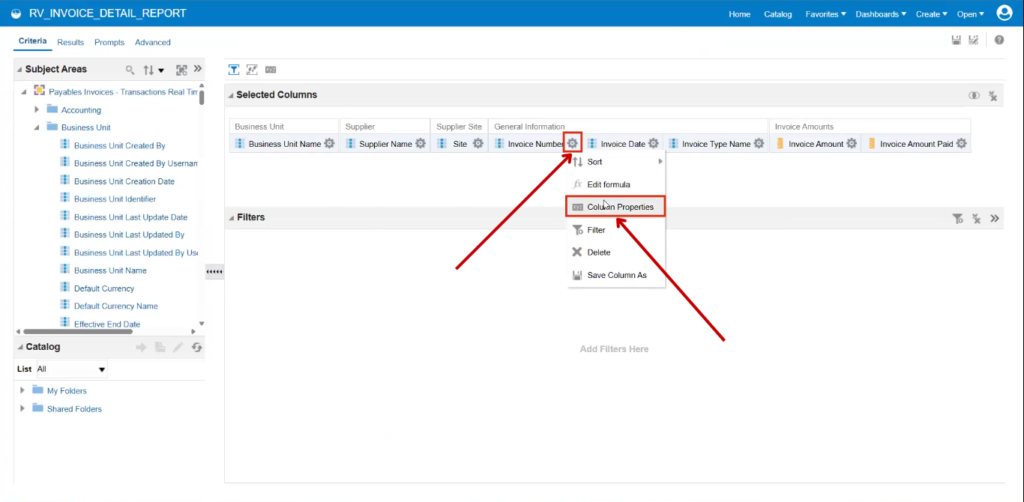
-
Click on Paste Cell Format and then click OK.
-
Go to the Invoice Date settings and click on Column Properties to paste the similar style.
-
Click on Paste Cell Format and then click OK.
-
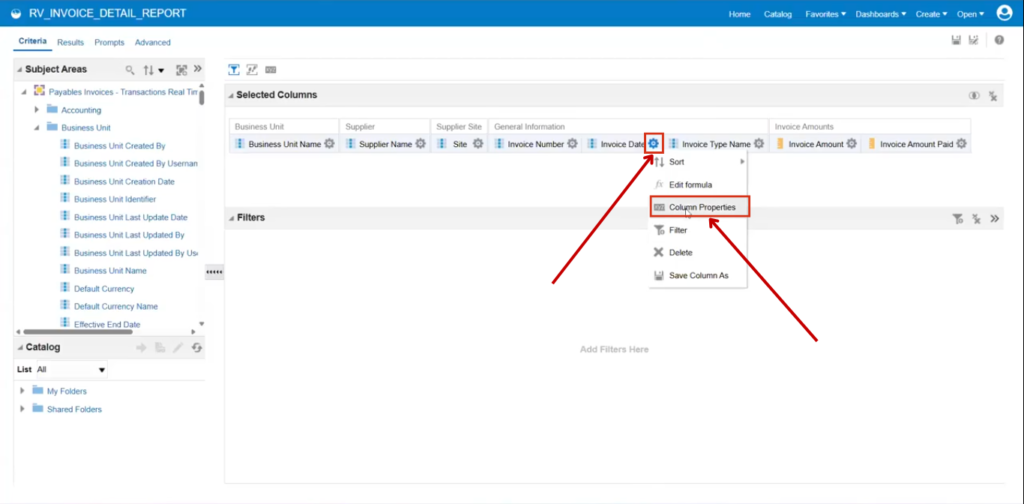
Go to the Invoice Type Name settings and click on Column Properties to paste the similar style.
-
Click on Paste Cell Format and then click OK.
-
Go to the Invoice Amount settings and click on Column Properties to paste the similar style.
-
Click on Paste Cell Format and then click OK.
-
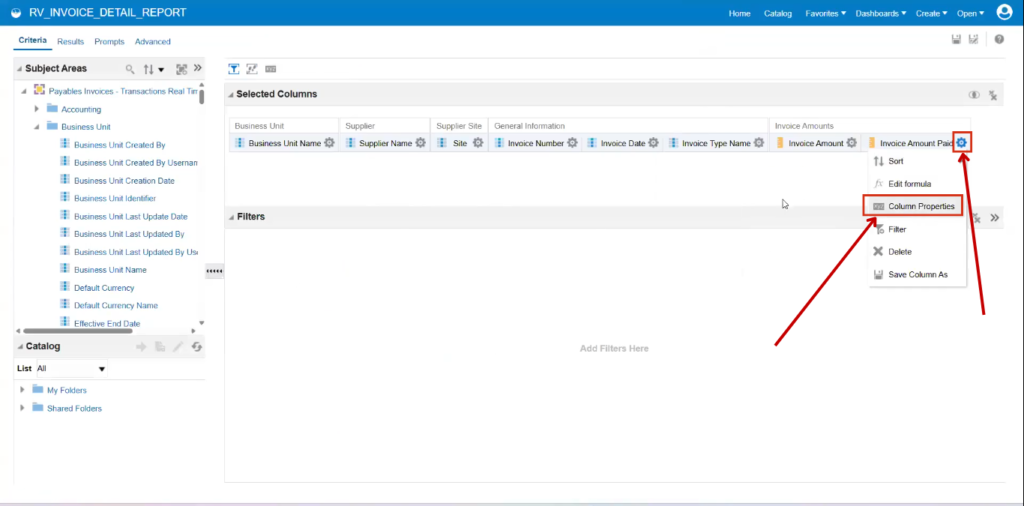
Go to the Invoice Amount Paid settings and click on Column Properties to paste the similar style.
-
Click on Paste Cell Format and then click OK.
-
Go to the Results tab, now data is centrally aligned, and looks more organized. Style formatting is complete.
-
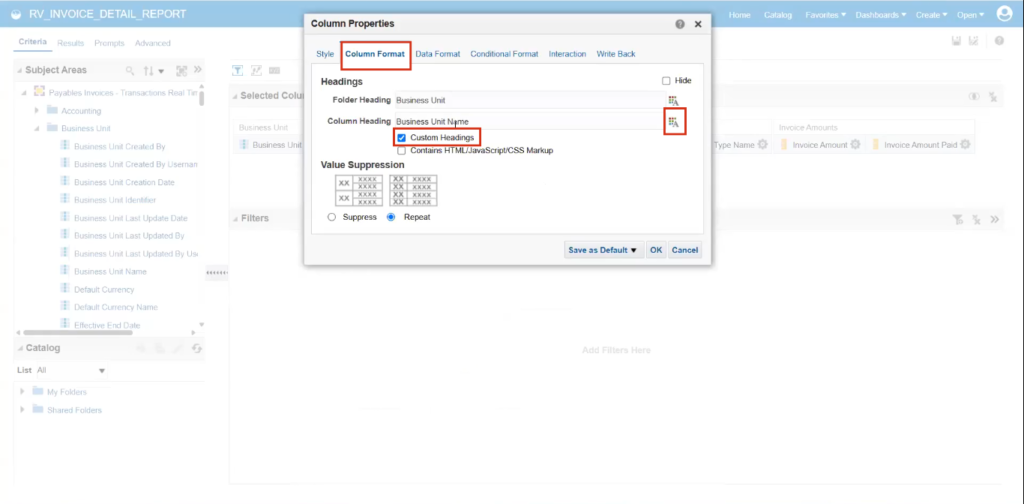
Go to the Criteria tab and select Column Properties under Business Unit Settings to format the column.
-
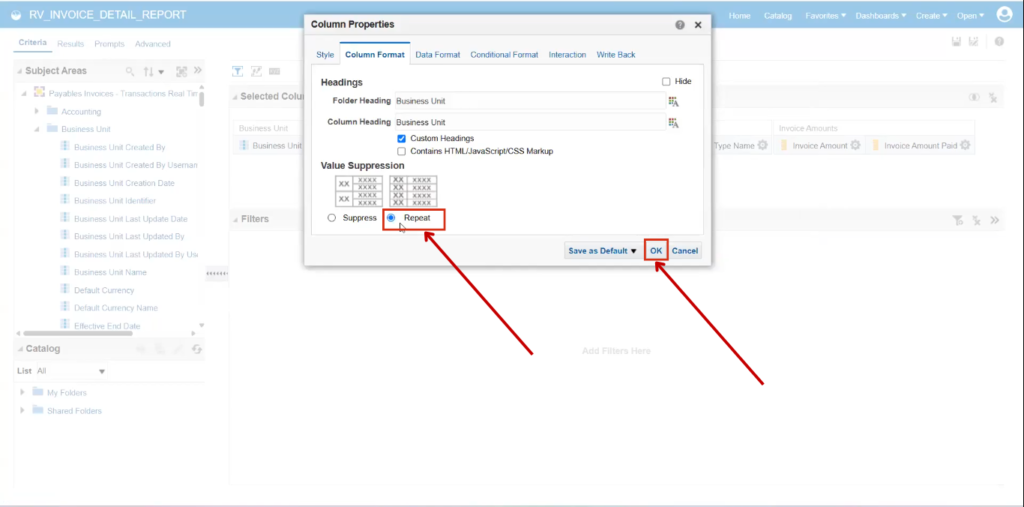
Go to the Column format section and select the Custom Heading checkbox to update the Column Heading name according to your preferences.
-
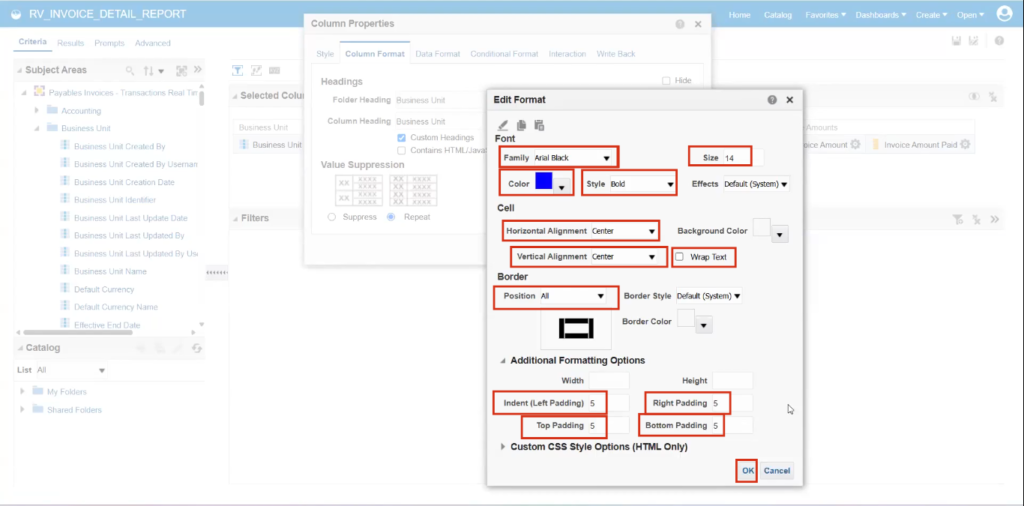
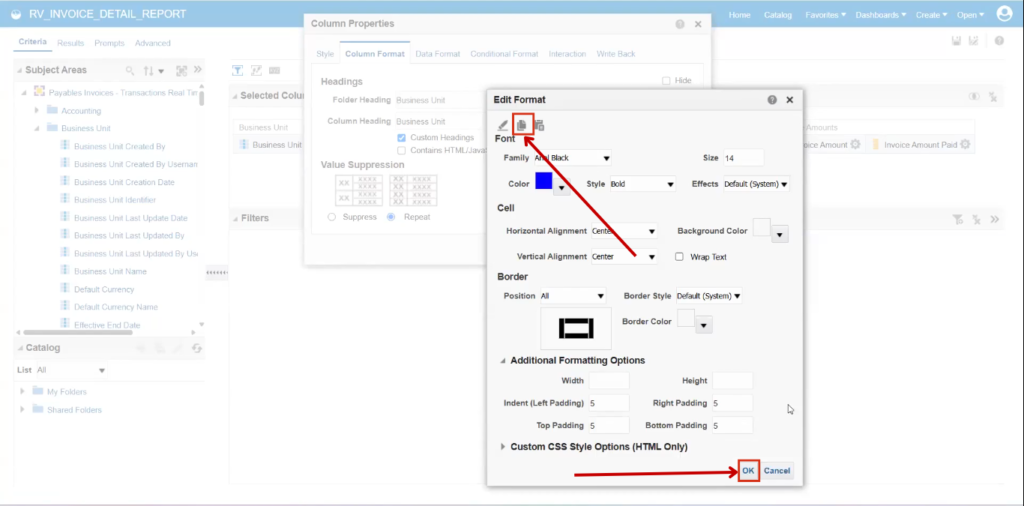
Click on Edit Format.
- Enter the following details in Edit Format: Font: Arial Black Size: 14 Colour: Blue Style: Bold Horizontal Alignment: Center Vertical Alignment: Center Deselect the Wrap Text option
Expand the Additional Formatting Options: Left Padding: 5 Right Padding: 5 Top Padding: 5 Bottom Padding: 5
- Click on OK.
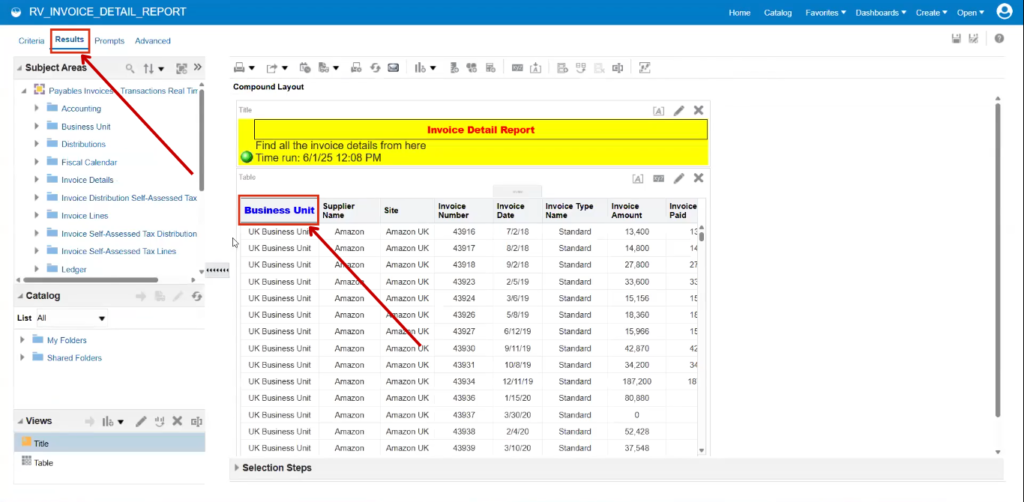
- Go to the Results Tab.
The changes are now visible: the element is displayed in blue.
It is slightly larger and positioned at the center.
Additionally, there is increased spacing around it—on the left, top, bottom, and right.
To apply the same formatting to other columns, use the Copy Cell Format option and paste it into the required columns. Then, Click on OK.
-
Go to the Supplier Name settings and click on Column Properties to paste the similar style.
-
Click on Paste Cell Format and then click OK.

-
Go to the Site settings and click on Column Properties to paste the similar style.
-
Click on Paste Cell Format and then click OK.
-
Go to the Invoice Number settings and click on Column Properties to paste the similar style.
-
Click on Paste Cell Format and then click OK.
-
Go to the Invoice Date settings and click on Column Properties to paste the similar style.
-
Click on Paste Cell Format and then click OK.
-
Go to the Invoice Type Name and click on Column Properties to paste the similar style.
-
Click on Paste Cell Format and then click OK.
-
Go to the Invoice Amount and click on Column Properties to paste the similar style.
-
Click on Paste Cell Format and then click OK.
-
Go to the Invoice Amount Paid and click on Column Properties to paste the similar style.
-
Click on Paste Cell Format and then click OK.
-
Go to the Results tab. Every column heading appears consistent.
-
Click on Save.
-
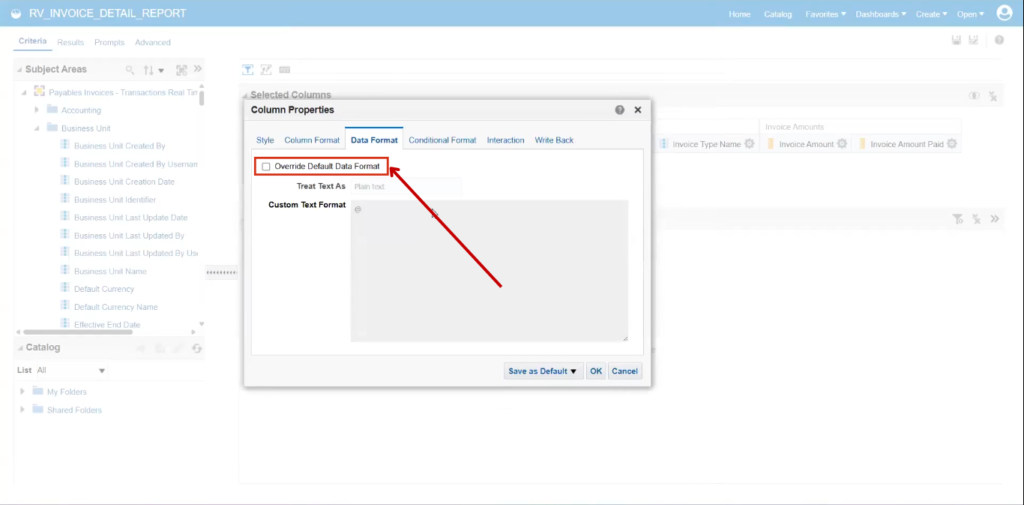
Go to the Criteria tab and select Column Properties under Invoice Amount Settings to format the Data Format.
-
Select the Override Default Format.
-
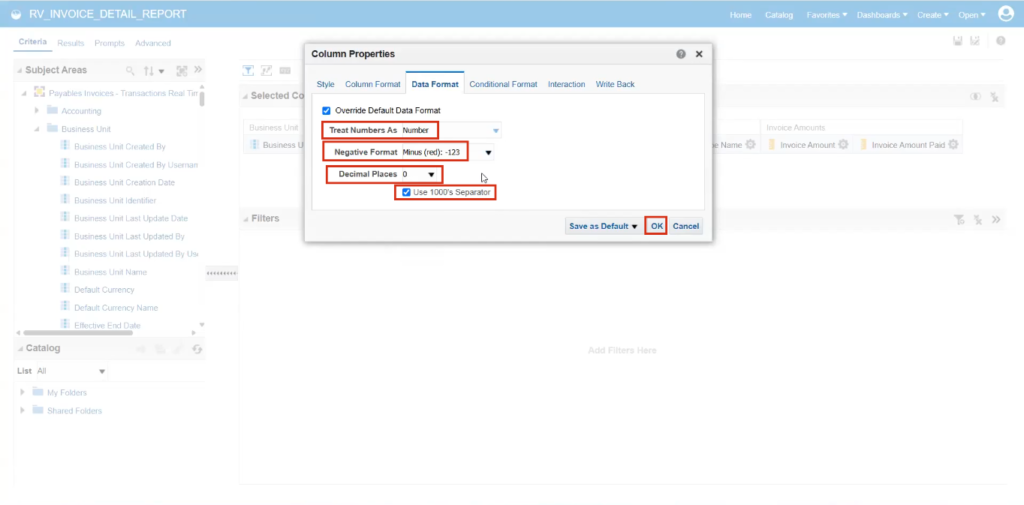
Select the following options according to the requirements: Treat Number As: Number Negative Format: Minus (red): 123 Decimal Places: 0 Select the Use 1000's Separator
-
Click on OK.
- Go to the Results tab; as seen, there's now a separator with no decimals, unlike before, with the setting adjusted to zero decimal places.
The filter option can be used to determine whether a negative number is captured, or not.
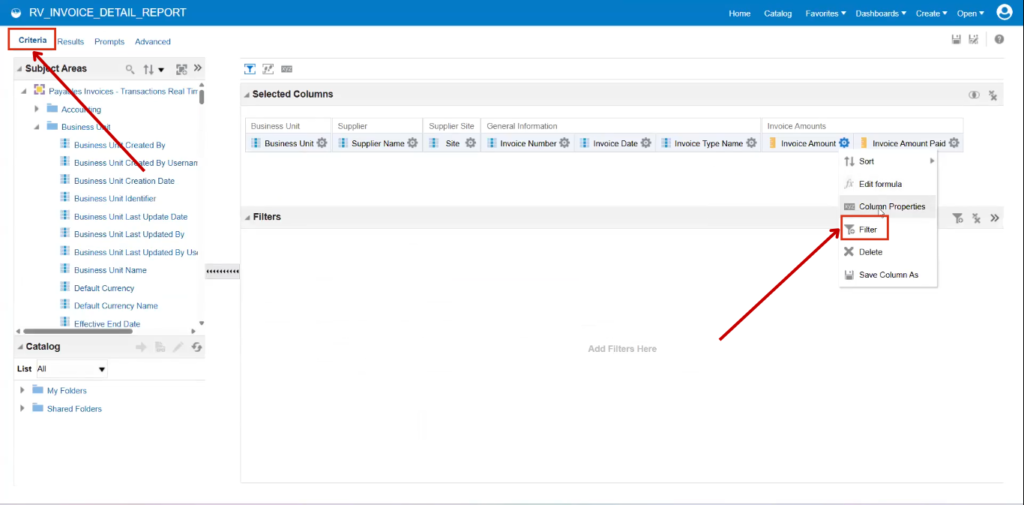
- Go to the Criteria tab and click on Filter option.
-
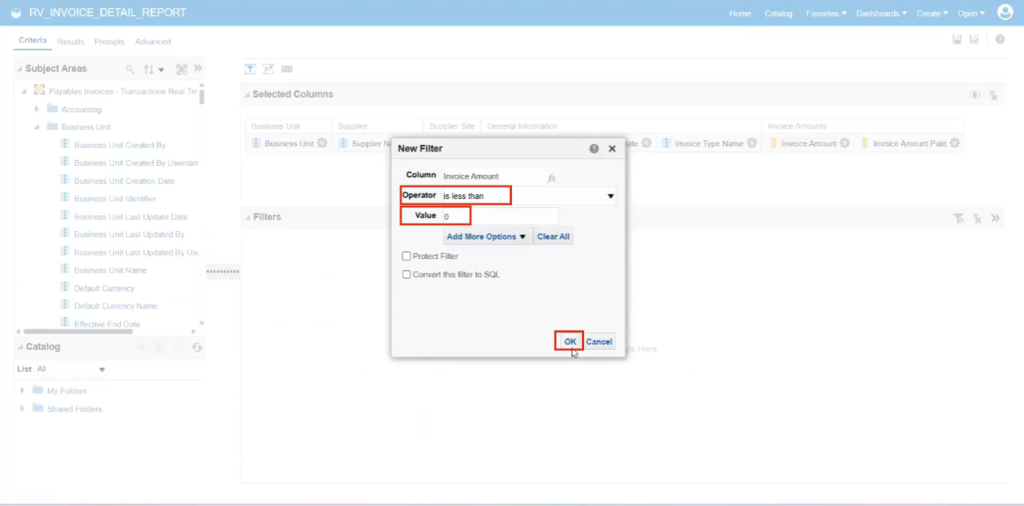
Enter the following details:
-
Click on OK.
- Go to the Results tab, where the invoice amounts are highlighted in red according to the applied data formatting, with all negative invoice numbers clearly displayed in red.

-
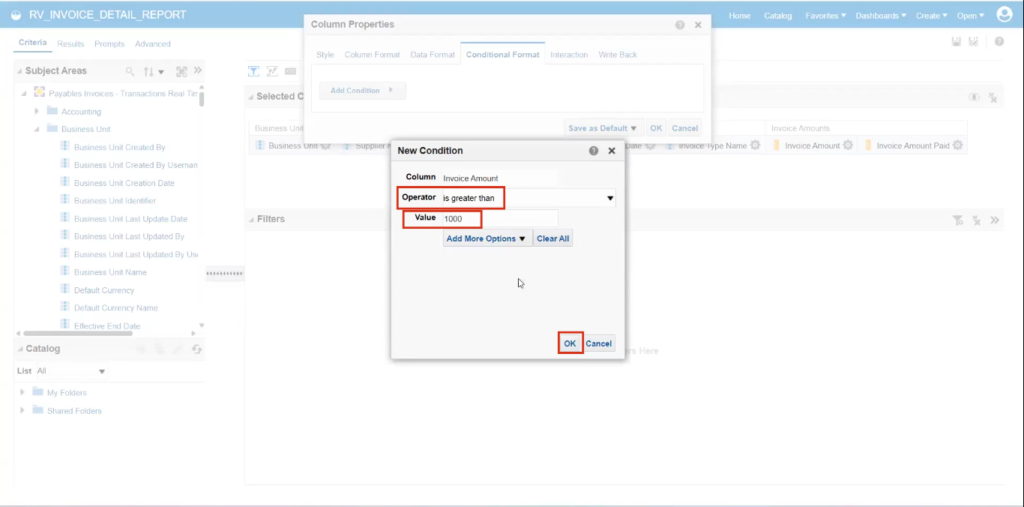
Go to the Criteria tab and select Column Properties under Invoice Amount Settings to format the Conditional Format.
-
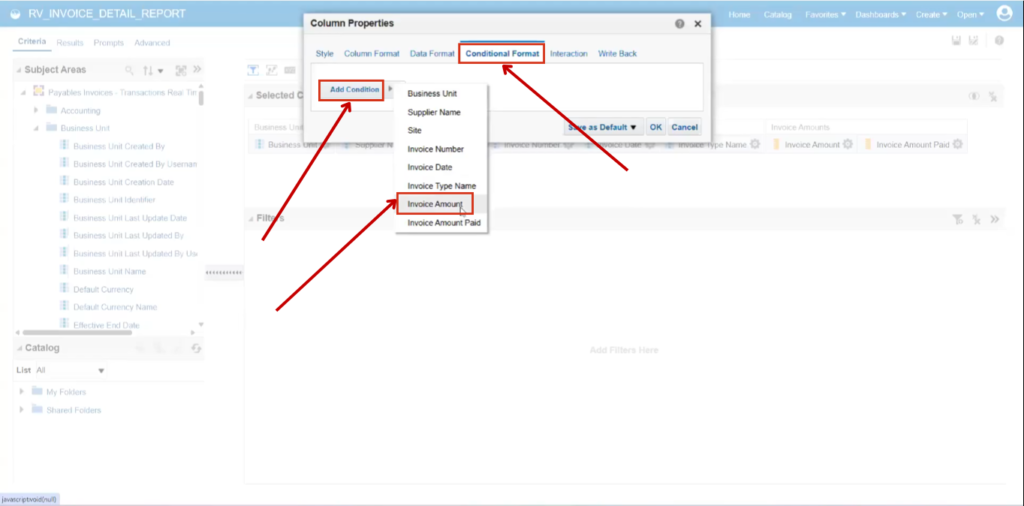
Go to Conditional Formatting, click on Add Condition, and then select Invoice Amount.
A simple condition has been set: If the invoice amount is greater than one thousand, highlight it in green.
-
Enter the following details:
-
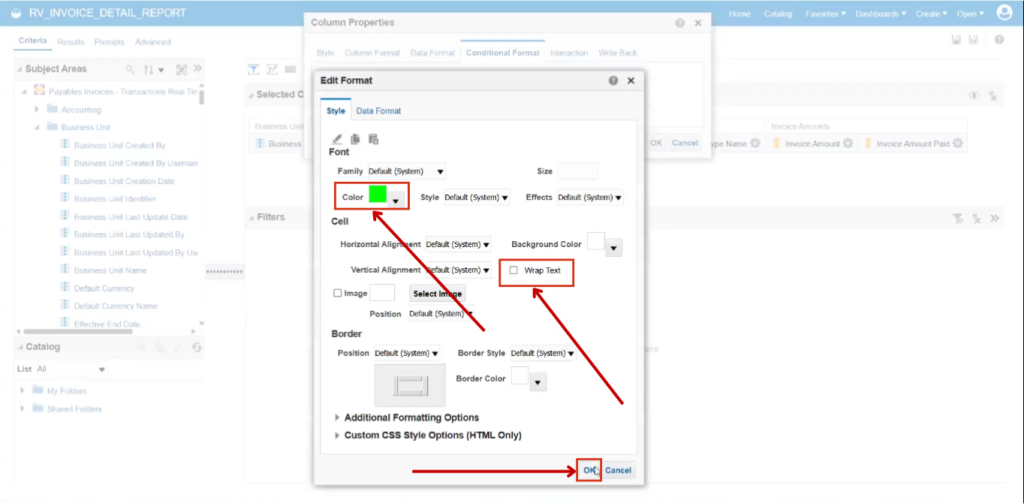
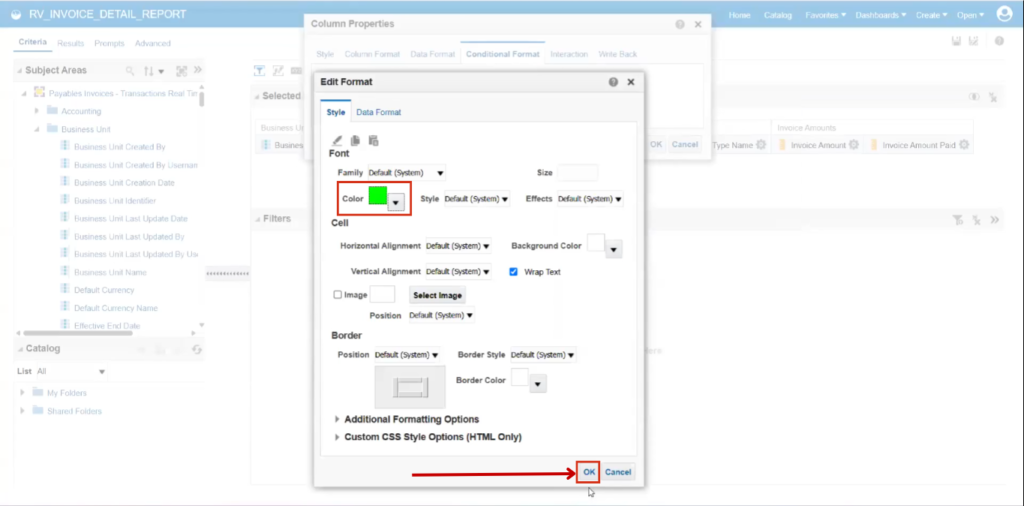
Click on OK.
-
Select the Color as Green.
-
Deselect the Wrap text.
-
Click on OK.
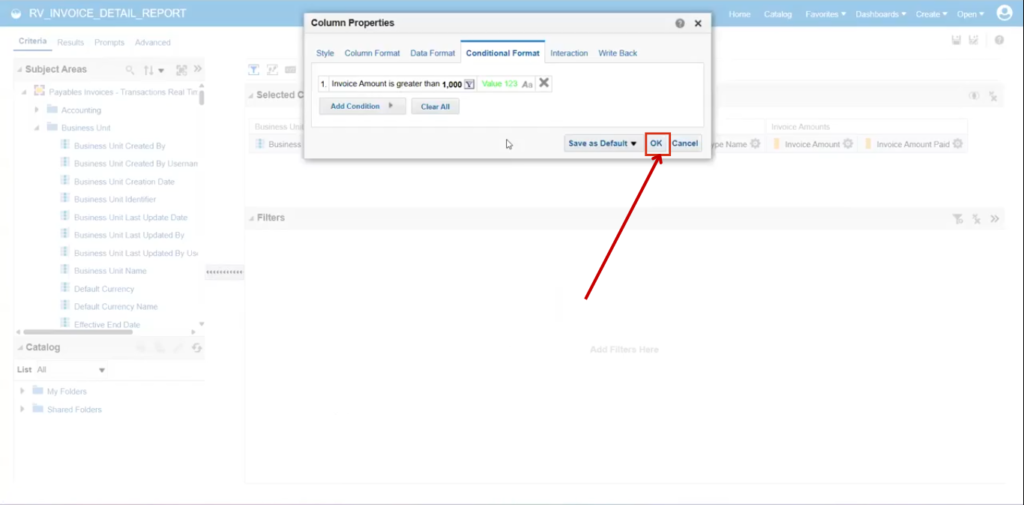
- Click on OK.
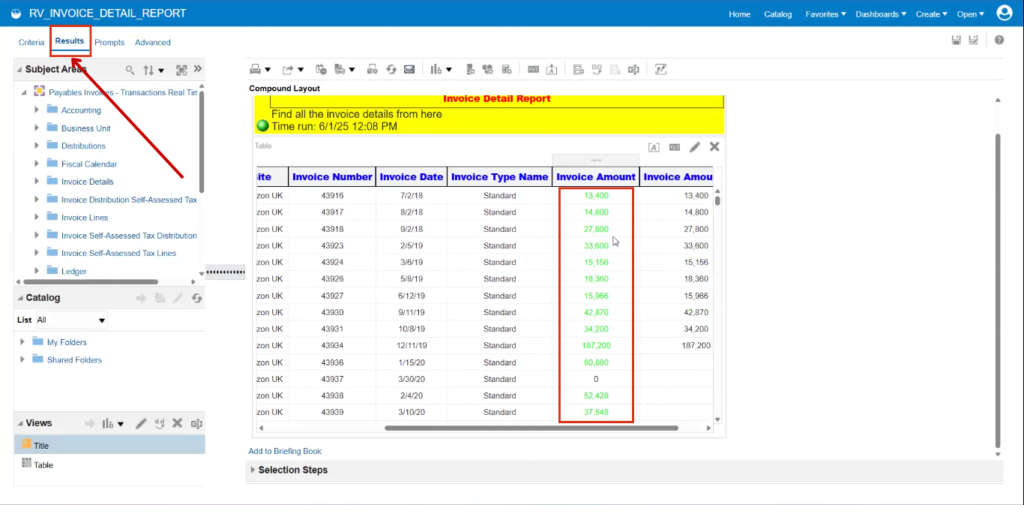
- Go to the Results tab. All invoices greater than one thousand are highlighted in green. The result depends on the data and the type of condition applied.
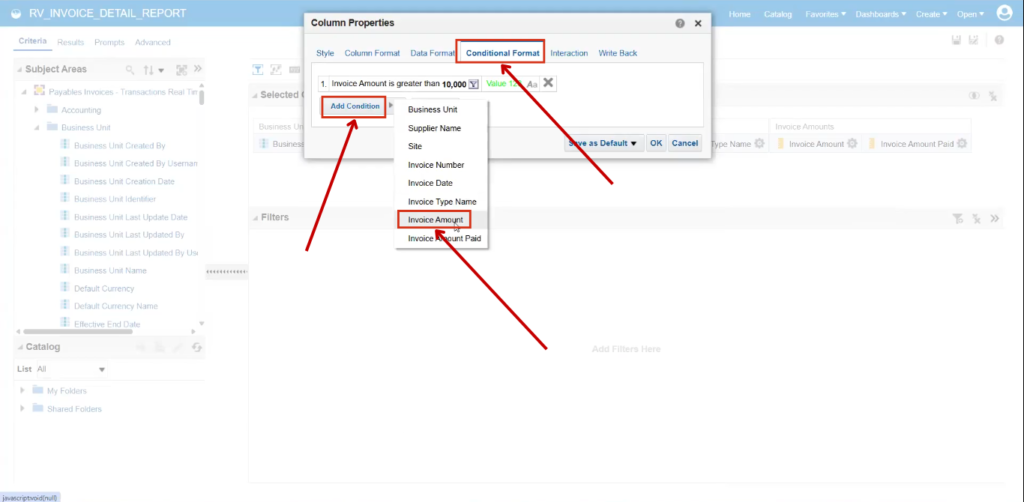
Multiple conditions have been applied: invoices less than ten thousand will be highlighted in orange, while those greater than ten thousand will be in green.
-
Go to the Criteria tab and select Column Properties under Invoice Amount Settings to apply Multiple Condition.
-
Go to Conditional Formatting, click on Add Condition, and then select Invoice Amount.
-
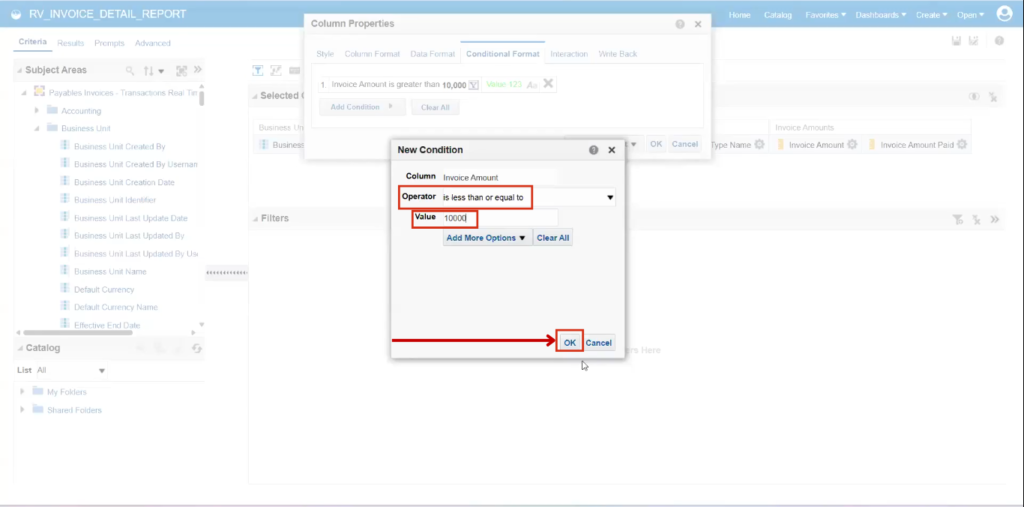
Enter the following details:
-
Click on OK.
-
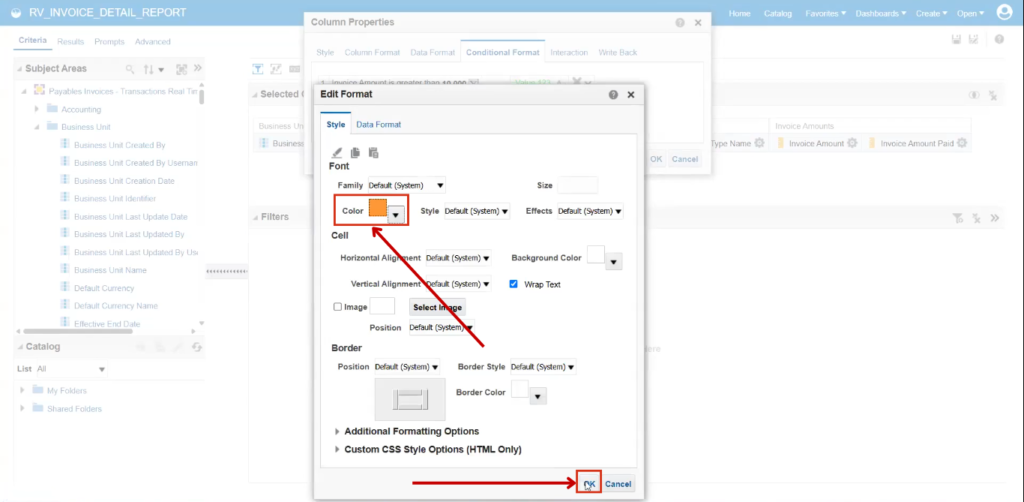
Select the Color as Orange.
-
Click on OK.
- Click on OK.
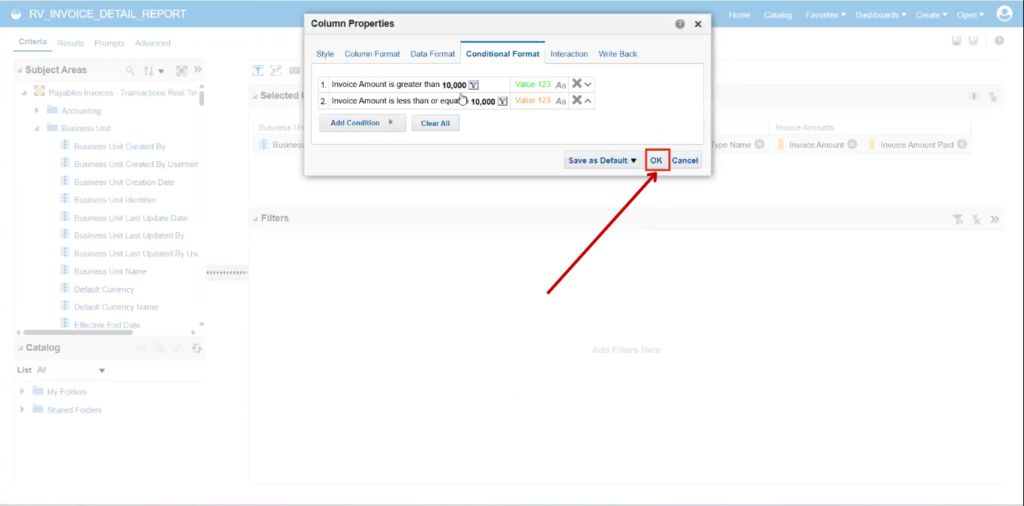
- Go to Results tab. Invoices greater than ten thousand are highlighted in green, while those less than ten thousand are in orange. The condition is being applied correctly.
The condition will be applied based on other attributes as well.
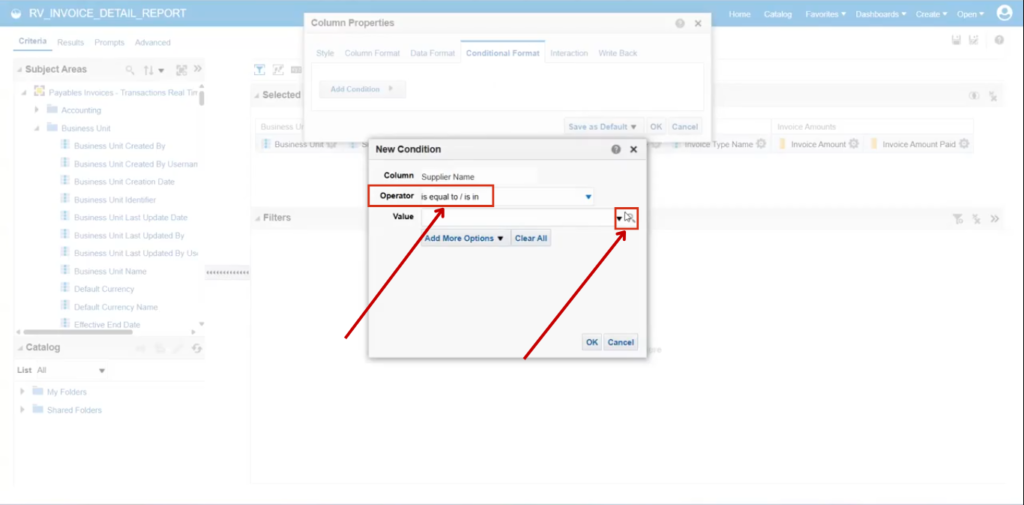
For example, if the supplier name is equal to Lee Supplies (or even if it is not equal), then the condition is set to highlight the cell in green.

-
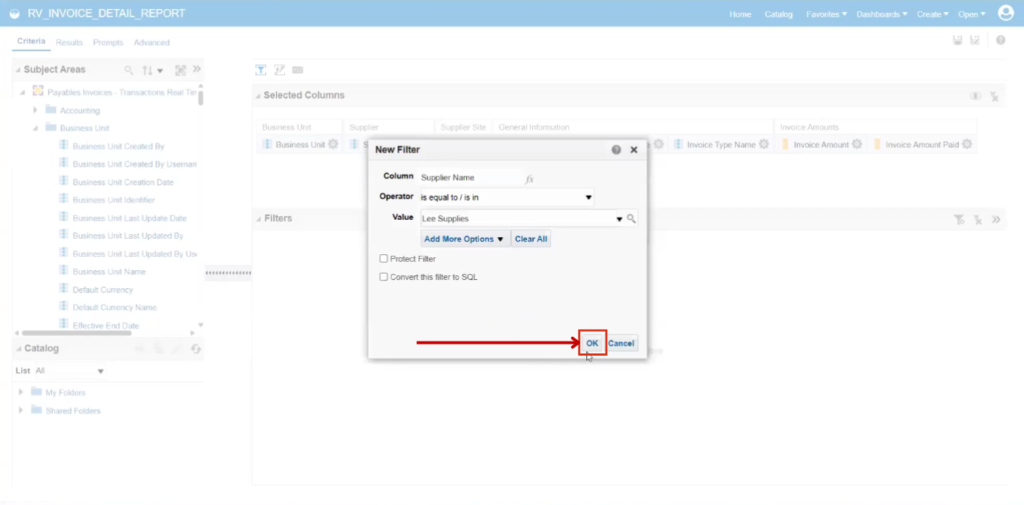
Enter the following details:
-
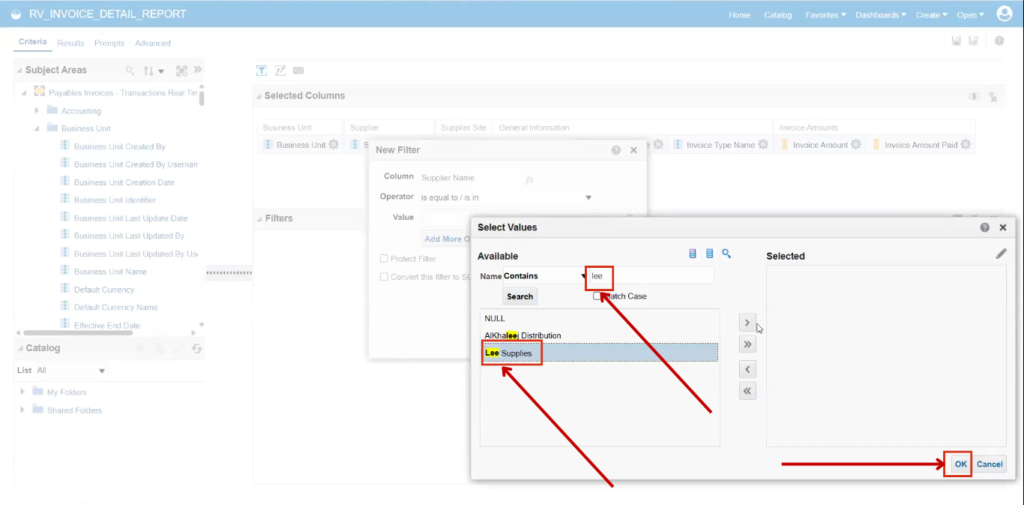
Click on Search button for Value as Lee Supplies.
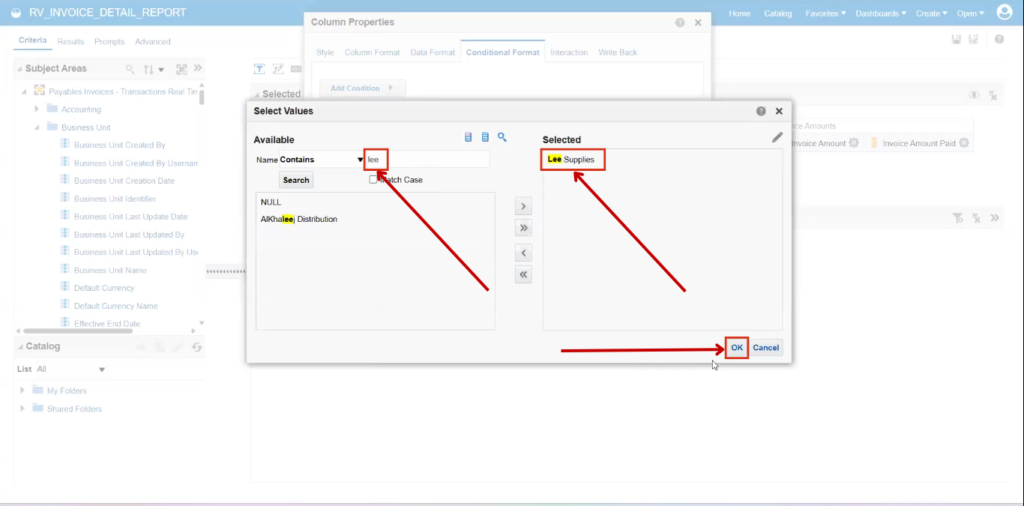
- Search for Lee, select Lee Supplies, and click OK.
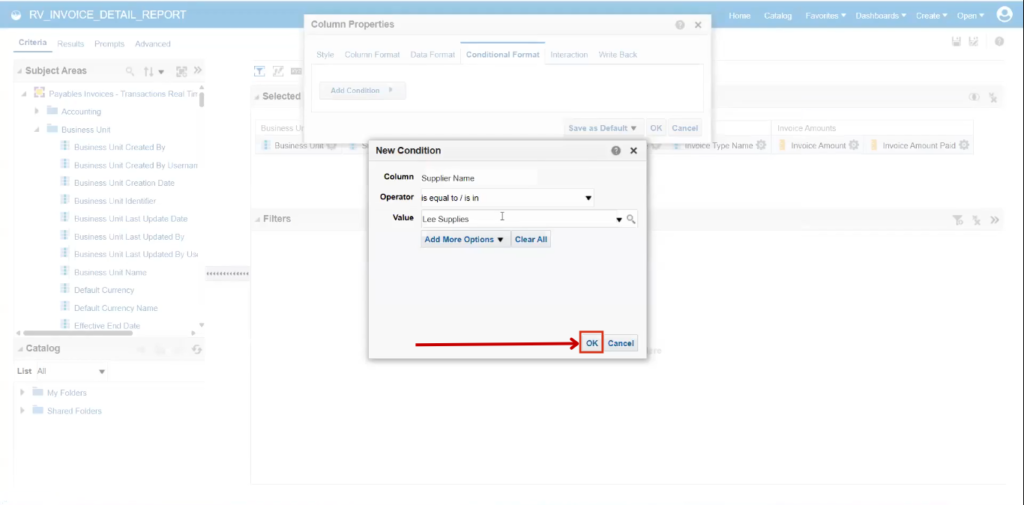
- Click on OK.
-
Select the Color as Green.
-
Click on OK.
- Click on OK.

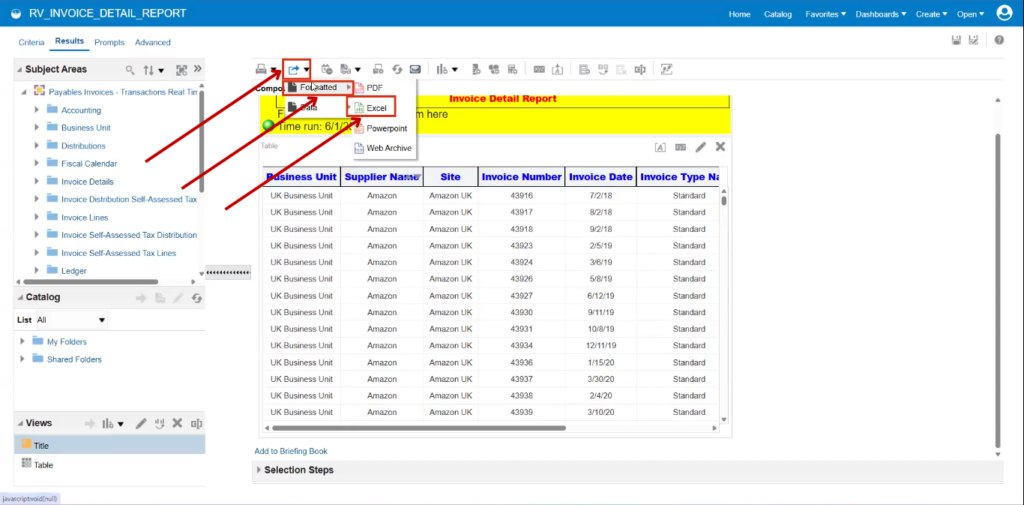
In this large table, Lee Supplies will likely be located at the bottom. To view it more efficiently, there are two options:
- To Export the data to Excel, Click on Formatted and Select Excel.
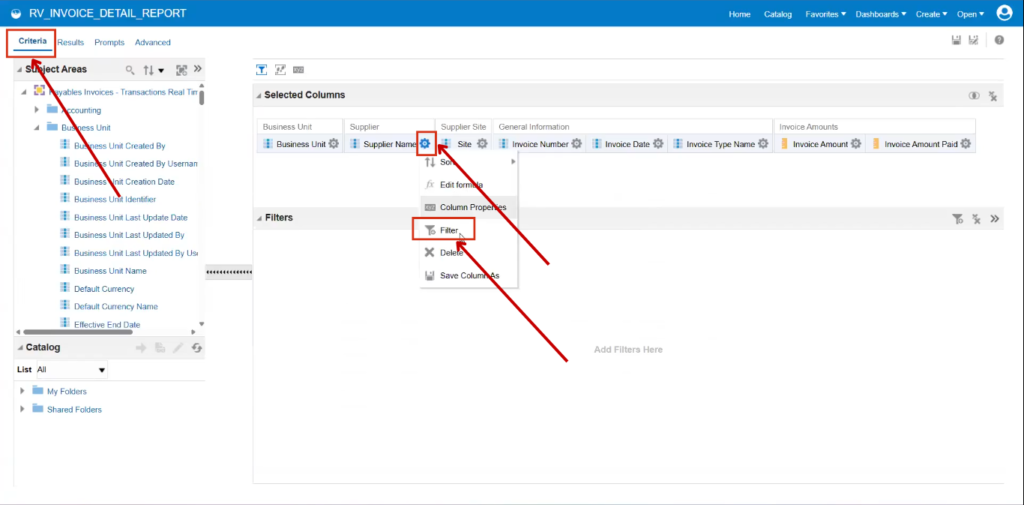
- Go to the Criteria tab then click on Filter option under Supplier Name Setting.
- Click on Search icon.
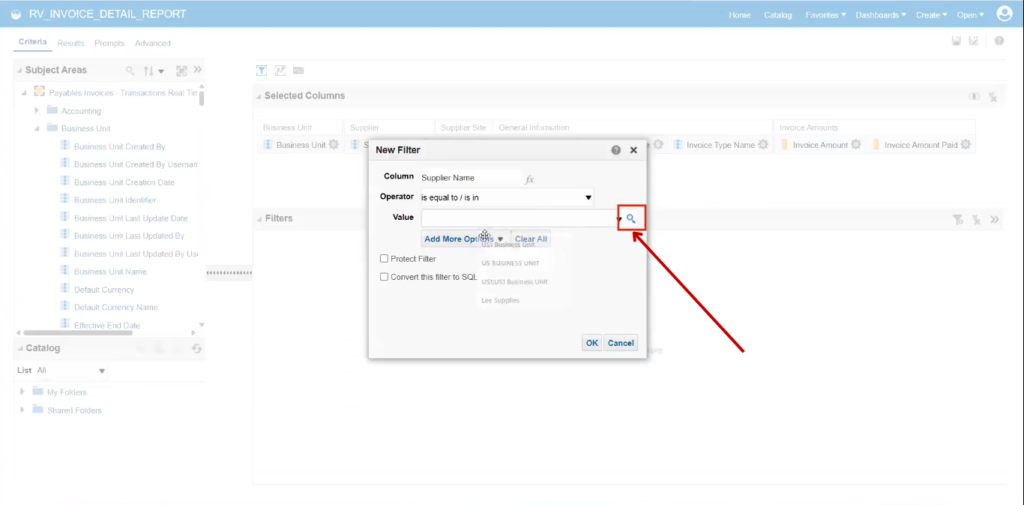
- Search for Lee, select Lee Supplies, and click OK.
- Click on OK.
- Go to the Results Tab. The invoice amount is highlighted in green when the supplier is Lee Supplies, as shown.